In-Process Gaging: A Quiet Revolution


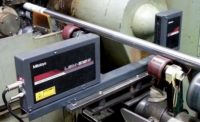
Measurements from this gaging system are crucial for controlling the machining of cast iron rear-axle wheel hubs for heavy-duty pickup trucks. The gaging system sits between the first and second operations in the automated machining cell of four robot-tended turning centers producing the hubs. Photo: Marposs Corp.
At the heart of this change have been radically tighter tolerances. "Years ago, manufacturers used to talk about tolerances in thousandths of an inch," says Chris Koehn, president, Stotz Gaging Co. (Freeport, IL). "Then they went to ten-thousandths of an inch, and now tolerances are in the millionths."
He points out that the greater expectations have been putting pressure on manufacturers of in-process gages to improve the repeatability and reproducibility (R&R) of their products. Users typically want their gages to have an R&R that is an order of magnitude better than their tolerances. Consequently, those confronted with tolerances of 20 millionths of an inch look for gages with R&Rs of 2 millionths.
Although gage manufacturers have responded with technology that can meet these expectations, such gage R&Rs are not always achievable in practice, especially when people are part of the process. If the parts are small enough to hold, for example, just the heat from the operator's hand can cause enough thermal expansion to affect the measurement. Removing people from the process can help, but does not guarantee a 10% gage R&R when tolerances are very small. Careful engineering and innovation are required.

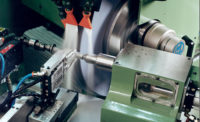
The Unimar measuring head is designed to survive the punishing conditions inside grinders so it can make precise measurements as grinding operations occur for real-time control. Photo: Marposs Corp.
A good match
Such is the case for producing match sets of bearings and other assemblies that require the pieces to fit together perfectly. Stotz, for example, is working with an automotive supplier to tighten the 8 millionths of an inch R&R that Stotz is already guaranteeing for some of the air gages on the grinders that the supplier is using to produce components for such an assembly. Given the progress to date in the engineering project, Koehn expects the R&R to be 4 millionths within a few months.
The automotive supplier is eager to tighten the gage R&R on its grinders because in-process measurements are crucial for not only controlling performance but also sorting the parts into classes. Later, a downstream operation fits the parts in each class with mating pieces in a corresponding class. "Each class is only 20 millionths," says Koehn.
To avoid the variation that people can introduce, each grinder uses a robotic arm to transfer the workpieces between its two workstations. On the grinders producing the female pieces, for example, the arm inserts each raw piece into the spindle for internal grinding. Afterward, it transfers it to a holding ring, where the air gage scans its inside diameter (ID) to check the contour and crucial dimensions.
Adjustments to the process are automatic, but not immediate. A slight lag exists because the measurements occur as the machine is processing the next piece. Consequently, corrections can take effect only on the following piece. Nevertheless, the process is stable enough to remain in control, as the gage confirms, and the components emerge from the machine on trays by class and ready for assembly.
Sorting pieces as they come off the machine and matching them with the mating pieces later is not the only tactic for producing match sets. Other manufacturers are exploiting the accuracy and precision of their machines and the R&R of their onboard gages for producing the mating pieces right away. These manufacturers usually begin with the piece that contains the inner diameter. After measuring the piece, they then use the measurements to produce the outer diameter of the mating piece to size. "It's easier to OD (outside diameter) grind [to size] at these levels," notes Koehn.

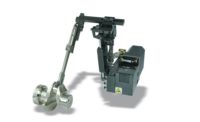
A variety of probes and gages, such as this E55 wireless plug gage from Marposs, can fit in standard tool holders and remain inside the tool magazines until the machine needs them. An advantage of this system is that, unlike conventional gages, it can measure bores precisely both on machining centers and transfer machines independently of the machine’s axes—and their inherent errors. Photo: Marposs Corp.
Automating data flow
Much of the success of in-process gaging is because of information technology. The communications technology and the computing capacity inside modern controllers make it easy to link gages to them and to automate the flow of information. "Once the data is stored, you can create models for viewing it and apply software to it" for analysis, notes Rick Glos, vice president, Heidenhain Corp. (Schaumburg, IL). "Thirty or more years ago, someone would compile the data and evaluate the process by hand."
The computing capacity and communications technology inside today's computers has evolved to the point that they not only can process the available data in real time but also provide closed-loop process control. "Another aspect of ready access is 100% inspection," adds Glos. Automation and the speed of data collection make more complete inspection practical.
Today's computing capacity also allows vendors to create software with elaborate graphical interfaces that simplify programming. Not only is the equipment easier to use, but it also can have more flexibility than earlier versions. "In the machine-tool world, many operators write the part programs themselves when a new part comes along," notes George Schuetz, director, precision gages, Mahr Federal Inc. (Providence, RI). "Users in the gaging world can do the same." They need not run back to the manufacturer every time they need a new program for the gage.
Technology has advanced to the point where even small to medium-size facilities can benefit from automating the data flowing through their shops. In machine shops, for example, operators can enter data simply by using digital calipers and micrometers that are connected to computers. As the operator measures the parts, the measurements flow directly into databases and are readily available for control software to use. Companies often use the same semi-automated arrangement for various benchtop gages that they put next to the machine making the parts or assemblies.
Some small-to-medium companies have even taken the latter step a bit further by deploying robots instead of operators to remove parts from their machines and insert them into gages. Because these shops typically organize their machinery into cells that produce a variety of similar parts, they tend to favor flexible gages over dedicated ones. "They might have a small three-axis CMM (coordinate measuring machine) to make critical checks and get feedback," says Schuetz.
Robots are useful for transferring parts to gaging stations in mass production, too. An American manufacturer of automobile axles, for example, has adopted this method to check the thousands of gears that it makes for differential carriers. After each machining operation, an overhead gantry transfers each part from the machine to a dedicated gaging station built by Mahr Federal. Good parts proceed to the next station, and bad ones are rejected. Meanwhile, the measurements go into the database for later analysis and to the machine's controller so it can correct for tool wear and other fluctuations in the process in real time.

A robot loads an automated gaging station. More manufacturers are finding that installing such stations to production lines or flexible cells can be a kind of in-process gaging that can provide rapid feedback to the process and 100% inspection. Photo: Mahr Federal Inc.
A different look
Greater use of information technology and automation are not the only ramifications of the quiet revolution that has occurred in in-process gaging. The mechanics and structure of the gages are different too. "One of the tricks to in-process gaging is to find a way to fit a high-precision instrument inside the machining envelope and to have it survive the process," explains Frank Powell at Marposs Corp. (Auburn Hills, MI). "You've got coolants, chips and chunks flying around inside the machining envelope." Moreover, the envelopes are becoming more crowded as builders shrink the footprints of their machines and increase the number of operations that each model
can perform.
Cost is another factor influencing the design of in-process gages. Outsourcing and a natural assimilation of the technology over the years have expanded the universe of users well beyond large facilities dedicated to mass production. Users now include small companies, which are concerned about cost, flexibility and reusability. Many are contract manufacturers who cannot count on having today's contracts next year. "So they are going to utilize whatever they have [on hand] and buy the minimum," says Powell. "What they do buy, they're going to expect a payback in a very short period of time."
Recognizing this trend, Marposs and other gage manufacturers have simplified their product lines. The first way was to reduce the part counts in each gage. Among Marposs' successes is its Unimar measuring head for grinders. This gage's predecessor had more than 80 parts. The current model has only 14, yet offers three times the performance, as measured by repeatability and thermal stability. The result is a better product for less cost.
The second way that gage manufacturers have simplified their product lines has been through standardization. They designed basic platforms onto which they can plug various modules made of standard components. The strategy allowed Marposs, for example, to slash the price tag of one of its plug gages for cam bores in half. Besides costing less, the new gage, unlike the old one, also can be retooled easily to measure different size holes.
Another benefit of the modular design is that repairs are also less costly. "Don't forget that in-process gages are inside the machine, where they are going to get wrecked," notes Powell. "It's not a matter of if, but a matter of when." Preparing for that eventuality no longer means having to keep an expensive dedicated plug gage on the shelf somewhere. If you need to keep anything on hand, all you need is a couple of details. Not only are these details much less expensive because they are standard across a variety of product lines, but they also are easier to reorder.
The result of these new designs and their integration with modern information technology and automation is that users have access to in-process gages that are cheaper to buy, use and maintain. A quiet revolution has taken place indeed. Q
sidebar:TECH tIPS
• Greater expectations have been putting pressure on manufacturers of in-process gages to improve the R&R of their products.
• Although gage manufacturers have responded with technology that can meet these expectations, such gage R&Rs are not always achievable in practice, especially when people are part of the process.
• The computing capacity and communications technology inside today's computers has evolved to the point that they can process the available data in real time and provide closed-loop process control.
• Today's computing capacity allows vendors to create software with elaborate graphical interfaces that simplify programming.
Is it In-Process Gaging or Isn't It?
Terms can mean different things to different people. Because this adage is true for the term "in-process gaging," be sure everyone knows what it means. In the strictest sense, in-process gaging refers to the gaging that occurs in real time while a manufacturing process is in progress. The most common example is the contact gage that resembles a pair of scissors. In grinding and sometimes turning, the fingers of such a gage rest on each side of a cylindrical workpiece to measure and report diameter.
In looser, more common usage, in-process gaging takes a broader meaning: measuring while the workpiece is still on a machine, whether the machine is processing the part at the time or not. By this definition, the probing inside machine tools and the gaging between operations on transfer lines are considered in-process gaging. This definition is the one assumed in this article.
Looking for a reprint of this article?
From high-res PDFs to custom plaques, order your copy today!


