A working knowledge of geometric dimensioning and tolerancing (GD&T) is necessary if engineers want to truly understand the designer's intent, and therefore plan accurate and appropriate inspection of the product the drawing represents. As part tolerances get tighter and tighter, it's more important than ever to establish a realistic, agreed-upon part drawing that subsequent inspections can be measured against.
GD&T is a precise mathematical language that describes the size, form, orientation and location of part features. It's also a design-dimensioning philosophy that encourages designers to define a part based on how it functions in the final product.
Through the use of functional dimensioning, tolerances are assigned to a part by the designer based on the part's functional requirements, often resulting in a larger tolerance for manufacturing. This eliminates problems that result when a designer assigns arbitrary, or too tight, tolerances to a part in a drawing because he or she does not know how to determine a reasonable, functional tolerance.
"Two people involved in every design need to understand GD&T -- the designer and the inspector," says consultant Alex Krulikowski of Effective Training Inc., (Westland, MI.) Krulikowski is the author of a self-study workbook based on the revised ASME standard, Y14.5M-1994.
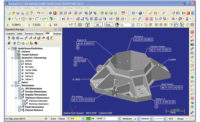
"CAD (computer-aided design) drawing systems do an outstanding job of displaying nominal geometries, but the designer still needs to put in allowable variation, and GD&T symbols are the way those tolerances are expressed on the drawing," says Krulikowski. He adds that, ideally, there is a product team participating in the design process, including those involved in assembly, manufacturing and quality. GD&T can provide uniformity in the specification and interpretation of the drawing, eliminating guesswork and erroneous assumptions, and ensuring that professionals in design, production, and inspection are all working in the same "language."
"There should be a quality/inspection plan for every CAD design, and inspection specifics should be notated in the drawing," he says. Krulikowski adds that the drawing can specify such quality information as the following:
-
How will the part be inspected?
-
How frequently will the part be inspected?
-
What tools will be used? Hard (functional) gages? Coordinate-measuring machines (CMMs)?
-
If CMMs are to be used for inspection, how many data points will be taken?
-
What is the reliability and reproducibility of the gages to be used?
-
How much may the part deflect during inspection?
-
Will the part be clamped or fixtured during inspection? If so, where and with how much force?
Where to find out more
According to the experts, dimensioning rules are violated frequently. In fact, Effective Training has developed a list of the seven deadly sins of GD&T. These are: incorrect use of the word "thru," incorrect use of the word "central," unnecessarily tight titleblock tolerances, use of esoteric notes, imaginary dimensions, dimensions without tolerances and missing dimensions.
"These errors have appeared so often, and for so long, they are accepted without question by many drawing makers and users," according to Effective Training's Web-site. "Violations, however, are dangerous and expensive because they introduce ambiguity, multiple interpretations and guesswork into the manufacturing process." To help quality professionals understand GD&T, a list of some of the GD&T consultants, trainers and software manufacturers are compiled here.
GD&T consultants, trainers and software manufacturers
Affiliated Educational Consultants Ltd.
1510 W. Greenleaf Ave., Suite 2A
Chicago, IL 60626-2879
(773) 262-8140
[email protected]
www.aecltd.com
American Society for Quality
600 N. Plankinton Ave., P.O. Box 3005
Milwaukee, WI 53201-3005
(800) 248-1946
[email protected]
www.asq.org
Applied Geometrics Inc.
497 Lyon Blvd.
South Lyon, MI 48178-1235 (248) 486-9011
[email protected]
www.gdandt.com
CEEM Member of the BSI Group
12110 Sunset Hills Rd., Suite 100
Reston, VA 20190
(800) 745-5565
[email protected]
www.ceem.com
CyberMetrics Corp.
1523 W. Whispering Wind Dr., Ste 100
Phoenix, AZ 85085
(480) 295-3465
[email protected]
www.cybermetrics.com
Dyer Co.
1500 McGovernville Rd., P.O. Box 4966
Lancaster, PA 17604-4966
(800) 631-3333
[email protected]
www.dyergage.com
Effective Training Inc.
2116 S. Wayne Rd.
Westland, MI 48186
(734) 728-0909
[email protected]
www.etinews.com
Excel Partnership Inc.
75 Glen Rd
Sandy Hook, CT 0648
(800) 374-3818
[email protected]
www.xlp.com
Gary Phillips Associates
18208 Laraugh Dr.
Northville, MI 48167-1813
(248) 348-0192
[email protected]
Genium Publishing Co.
1171 Riverfront Center
Amsterdam, N
(800) 243-648
[email protected]
www.genium.com
Geometrics Consulting
1500 Conlin Ave.
Evansville, IN 47714
(812) 476-8078
[email protected]
InnovMetric Software
2014 Jean-Talon Nord, Suite 310
Sainte-Foy, PQ G1N 4N6 Canada
(418) 688-2061
[email protected]
www.innovmetric.com
JBL Systems Inc.
51410 Milano Dr.
Macomb, MI 48042
(810) 677-6700
[email protected]
www.jblsys.com
Mahr Federal Inc.
1144 Eddy St., P.O. Box 9400
Providence, RI 02905
(800) 343-2050
[email protected]
www.mahrfederal.com
Mitutoyo America Corp.
965 Corporate Blvd.
Aurora, IL 60504
(630) 820-9666
[email protected]
www.mitutoyo.com
Prime Solutions
1769 Gabbro Tr.
Eagan, MN 55122
(800) 281-9946
[email protected]
www.primesolutions.com
Resource Engineering Inc.
P.O. Box 219
Tolland, CT 06084
(800) 810-TEAM
[email protected]
www.reseng.com
Society of Manufacturing Engineers
International Headquarters
One SME Dr.
Dearborn, MI 48121
(800) 733-4763
[email protected]
www.sme.org
BENEFITS OF GD&T
Depicting functional design relationships.
Reducing scrap and rework.
Providing a common language for the production team.
Reducing expensive drawing changes.
Increasing production rates.
Insuring parts interchangeability.
Providing inspection verification consistency.
Allowing multiple source procurement.
Facilitating functional gaging.
Making maximum use of available tolerances.
Source: Applied Geometrics/Affiliated Educational Consultants
