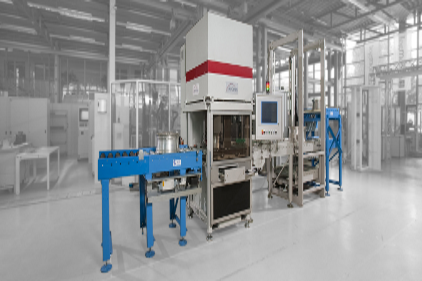
MAGDEBURG, GERMANY--Even the minutest deviations are detected: Researchers at the Fraunhofer Institute for Factory Operation and Automation IFF have created the “Wheelinspector”, an in-line compatible system for 100 percent inspection of vehicle wheels without contact. The experts will be presenting this and other systems at Control 2013 (Hall 1, Booth 1502) in Stuttgart on May 14 to 17.
Up to eighty geometric features, such as radial and axial runout, width and diameter, relevant to vehicles wheels’ function are inspected before they are launched on the market. These have usually been inspected randomly with tactile measurement and under laboratory conditions away from the production line – for instance, in a room adjacent to the production floor. The procedure takes up to approximately forty-five to sixty minutes per wheel, thus making it impossible to inspect 100 percent of the wheels produced. Defects and their causes are detected and rectified only with some delay.
Together with its industry partner Ascona GmbH, a specialist for optical profile measurement systems headquartered in Meckenbeuren in the Lake Constance district, Fraunhofer experts developed the “Wheelinspector”. “The system makes fully optical, non-contact measurement of light-alloy wheels directly in the production process possible for the first time,” explains Ralf Warnemünde, Deputy Manager of the Measurement and Testing Technology Business Unit at the Fraunhofer IFF. “Immediately after they have been machined, that is, turned, milled and drilled, the new 3D laser technology compares real finished products with their digital model. It scans a multitude of geometric parameters and, with a cycle time of twenty seconds to inspect one wheel, can be integrated fully in the production flow.” The measurement system does more than just assure quality: A manufacturing unit can respond to deviations from process parameters without delay and thus organize production processes far more cost effectively.
The basis of the system is the OptoInspect 3D technology developed at the Fraunhofer IFF, which operates with triangulation that measures points and lines. The system uses a laser light projection. A camera registers the light of the projection reflected diffusely by the part. On the basis of the perspective, the laser projection in the camera image changes according to the wheel’s shape.
The “Wheelinspector” measurement system consists of four sensors and a complex system of axes for moving and positioning the sensors during measurement. This guarantees high flexibility; the system can inspect a wide variety of products in the same machine – even when regularly switching between different types of wheels.
Inspection proceeds thusly: Wheels are rolled into the measuring unit on a conveyer, are centered and locked in place mechanically. An image-based identification system upstream recognizes the particular type of wheel and transmits specific features, such as diameter, width or offset, to the measuring unit. These coordinates are used to align each of the positioning axes of the sensors to their correct position. The sensor cluster revolves around the wheel 360 degrees and scans the measured values. The entire scanning cycle for one wheel is completed after approximately twenty seconds.
The system compares the results of 3D measurements with the tolerances from the 3D CAD model of the vehicle wheel. Deviations of parts resulting from tool wear or breakage are reported to the machines immediately. This prevents serial defects and resulting costs.
The “Wheelinspector” is already being used successfully in the automotive supplier industry. Attendees of Control 2013 will be able to see how the technology works live: The Fraunhofer Vision Alliance will be presenting a wheel inspection system together with the “Wheelinspector” at the trade fair in Stuttgart.


