Most manufacturing and repair focused companies already have several NDT methods operating within their standard processes. So, naturally they will try to use a currently active method to perform any new inspections. This is a commonsense approach, but as all NDT professionals will admit, each standard NDT method has very focused areas of interest.
To protect the product, often several methods are implemented to ensure that a possible defect does not go undetected. Unfortunately, this logical strategy often leads to extended testing time and expensive personnel requirements. They need a full body inspection method that could provide real information about the structural integrity of a test specimen.
This type of method is already available and being used by several industries. The method is called resonance testing.

This high-pressure compressor blade is in position and ready for process compensated resonance testing. Source: Vibrant
Resonance Testing
Resonance testing is an often overlooked but proven NDT method. Audible resonance inspection dates back centuries, to the beginning of metalworking and glass blowing. Whether it was a bell, sword or some other object, the ring sound produced when it was tapped with a solid “hammer” determined if the object was good or bad. When the object is impacted, a defect-free part produces a clean, distinct sound. Defects in the object will produce a variety of sounds, all of which will deaden or dull the response. The distinct difference in response is a proven way to determine if an object is structurally acceptable.Several types of resonance testing are used today; the technique derived from the initial methodology is called the acoustic impact technique or ping testing. The specimen is excited with an impact hammer and the response is collected using a highly sensitive microphone. Various software packages can be used to analyze the responses and to calculate inspection parameters. Locomotive maintenance personnel, casting manufacturers and various inspection professionals use this technique in specific applications. It is generally not considered extremely -precise, and sensitivity to the deadening of sound can be subjective.
The obstacle with this testing has always been defining the acceptable difference in sounds and standardizing the process for various applications. But, even with some subjectivity and precision issues, this technique is routinely used to determine natural resonance frequencies and to identify defective parts. It is a quick inspection, and with the proper process and controls has proven to be effective.

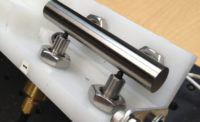
This Inconel wheel tie bolt is located on piezoelectric transducers for resonance testing. Source: Vibrant
Resonance Ultrasound Spectroscopy
Another more sensitive form of resonance testing is called resonance ultrasound spectroscopy (RUS). Using resonance to determine differences in materials is not limited to the audible range; ultrasonic resonances also can be used. The relationship between acoustic or ultrasonic resonance frequencies and material properties has been studied for years in the scientific community. As technological innovations have become available, this study of resonance frequencies has continued.Throughout the years several significant studies and experiments have determined that ultrasonic resonant measurements can be directly correlated to material elastic properties for a variety of material geometries. This correlation has always led to a belief that under the right conditions and controls, ultrasonic resonance could be used to determine structural integrity of materials and alloys used in manufacturing applications. A hurdle for science has always been to determine the correct conditions and controls.
The most common method of applying the RUS technique uses a contact piezoelectric transducer to excite a specimen through a range of resonance frequencies and one or more contact piezoelectric transducers to collect the response data. This data is then plotted and analyzed against either the predicted frequencies based on the specimen’s material properties and geometry or against a known population of defect-free and defective specimens. The technique is accurate when system and specimen properties are stringently controlled.
However, whereas the measurements of the RUS samples are accurate and repeatable, standard NDT applications do not come with resonance “targets,” but they do come with significant part-to-part variation from even today’s modern manufacturing methods. As the resonances are sensitive to all sources of variation, discriminating the allowable variation from the defects remains the challenge. RUS is proven and used in many applications where resonance differences due to gross defects are detected despite process variation. Detecting smaller critical defects requires a smarter kind of resonance inspection.

Resonance testing results are displayed in a software package, which provides rapid, accurate and operator-independent pass/fail testing. Source: Vibrant
The Next Generation
The need to compensate for manufacturing variation has led to the next generation of resonance testing called process compensated resonance testing (PCRT). PCRT incorporates the RUS method of resonance testing while applying pattern recognition statistics and genetic algorithms to define acceptable and unacceptable process variation.A significant advance incorporated with PCRT is the capability to identify resonances that correlate to specific structural integrity problems. Multiple frequencies are sampled for each test and the relationship of these resonances is analyzed. The PCRT method has greatly improved the sensitivity of resonance testing and has led to an expansion of the method's acceptance. This method can be used for defect detection, process variation monitoring and single-part production validation. The digital nature of the results allows for real-time data feedback and historical correlations.
PCRT is a fundamental shift in NDT philosophy and applications. Current NDT technologies strive to highlight indications that could represent structural deficiency in a component. The PCRT method accurately measures the structural similarity of a component to a known population of good parts and also is able to measure the structural changes in a single part throughout its useful life. With the testing modules developed, the software provides for rapid, accurate and operator-independent pass/fail testing. These improvements have allowed resonance testing to be implemented by many automotive component manufacturers-150,000,000 parts tested in 2008-major airlines, material producers and original engine manufacturers.
Resonance testing has gained acceptance in various industries. The methodology’s sensitivity has matured and reached a level where even critical aerospace applications are in full production use. There are several different techniques for applying the testing and each of these techniques can be explored for specific applications. The testing is full body, correlated directly to structural integrity and provides digital results with no subjectivity introduced by the operator.
The addition of resonance testing to the quality and NDT professionals’ toolbox allows for a new NDT method for testing consideration. This additional tool can be used when evaluating the proper NDT method for certain applications, and more importantly, can provide substantial inspection time savings, real structural correlation and process capability monitoring that other NDT methods just cannot deliver. Detailed information specific to several methods described here can be found in the ASTM E2001-08 and ASTM E2534-10 specifications.NDT


