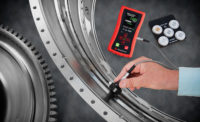
Since the development of eddy current testing in the early to mid-1900s this method has been used to detect defects and properties of many types of metals. The most common applications are testing tubular products for transverse defects, testing bar or wire products for longitudinal surface defects, and testing parts for defects and properties such as hardness. Eddy current testing is also widely used in the aerospace industry to detect defects and anomalies in both new manufacturing and in-service inspection roles. This article will focus on eddy current technology and its use in the tubing, wire and parts industries.

MultiMac® eddy current screen display of signals illustrating signal “noise”, usually from vibration or similar extraneous sources, and a defect. Image source: Magnetic Analysis (Click on image to enlarge.)
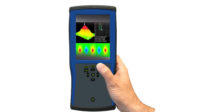
Modern eddy current test systems use computer driven interfaces to display the test parameters and resultant signals as well as to allow storing and changing test parameters. Coupled with those testers are a wide variety of test coils and probes as well as the fixtures that hold and position them. Additionally, mechanical systems for driving, handling, guiding and sorting all manner of materials from small ball bearings to large diameter tubing and barstock have been designed.
PRINCIPLES OF EDDY CURRENT TESTING
Eddy current testing uses an electromagnetic field that is set up by passing an alternating current through a coil of wire. When that coil is placed near an electrically conductive object, such as metal, the electromagnetic field in the coil is disturbed or changed. Changes in the object or the distance of the coil from the object can be measured. It is these changes that are detected. Eddy current testing in most cases allows for 100% testing of the material at relatively high throughput speeds without the need to touch or damage the material under test.

An eddy current encircling coil, mounted in a coil platform for testing stainless steel tube. The white bushing helps position the incoming tube to ensure the accurate test. Image source: Magnetic Analysis (Click on image to enlarge.)
Eddy currents will penetrate into the material, and surface and sub-surface defects can be detected. This penetration is based primarily on the permeability and conductivity of the material to be tested along with the selected test frequency applied to the test coil. In most cases, the permeability and conductivity of the material under test is defined by the metallurgy of the material, leaving the eddy current test frequency as the primary variable that can be adjusted. Increasing the test frequency will decrease the penetration and conversely, lowering the test frequency increases the depth of penetration. Testing of tubular goods normally requires penetration to the ID surface, while testing of cold drawn steel bars is often performed as a surface test. The ability to control the frequency setting allows modern eddy current test equipment to be versatile, working in many applications.
For defect testing of long cylindrical metallic products, such as tube, pipe, wire or rod, a differential encircling coil arrangement may be used, whereby two coils, wound in opposite directions, are placed adjacent to each other. The two coils are balanced together providing a null output when homogeneous material is in the field of both coils. As the product passes through the differential coils, a defect will cause a signal in the first coil and then an opposite signal in the second coil. These signals are detected, processed and reported to the operator via displays, bar graphs, lights, horns, buzzers, etc. Typical defects that may be detected with a differential encircling coil eddy current test include scabs, slivers, inclusions and short cracks. Other coil configurations for different applications are often used, including absolute coil arrangements where only one secondary coil, balanced against an internal, electronic reference is used, allowing for detection of some longer continuous defects such as open welds.

An encircling coil eddy current test on high frequency welded, drawn tubes in a mill in Thailand. Image source: Magnetic Analysis (Click on image to enlarge.)
FERROUS METALS
The basic test coil arrangements discussed above work well for non-ferrous materials such as copper and aluminum but need some help when testing ferrous materials such as carbon steel. Un-magnetized ferrous materials have randomly oriented magnetic domains within their structure. The eddy currents will flow around those domains but the resulting signal will be noisy. To counter this, magnetic saturation systems are required to magnetize the part under test which allows for smoother flow of the eddy current resulting in quieter test signals. Magnetic saturation can be accomplished with either permanent magnets or electromagnets. The proper choice of saturation system will depend on the material under test as well as the diameter and wall thickness for tubular goods.

MultiMac® eddy current screen display of signals from the unfinned “land” and a hole in the finned portion of a copper tube destined for heat exchangers. Image source: Magnetic Analysis (Click on image to enlarge.)
HEAT EXCHANGER TUBE
Products such as heat exchangers are manufactured using many tubes mounted in a series of tube sheets. Because these tubes are built into the vessel, there is no access to test them from the outside diameter. In these cases, inside diameter (ID) probes are used to test the tubes from the inside out. This type of test is common for new vessels (baseline testing), during periodic preventive maintenance (PM) of the vessel and/or to find broken or damaged tubes after a failure. Eddy current tests are also very effective for detecting defects in fin tube during production where, using filters and phasing, the eddy current instrument test parameters can be set up to clearly differentiate between the unfinned “land” and the finned portion of the tube.
TESTING BAR & WIRE
Detection of long continuous surface defects (such as seams) that are typical of bar or wire products is accomplished by using probes that are spun around the material as the product is passed through. This type of test, known as a rotary eddy current test, creates a spiral inspection pattern, similar to a barber pole, known as the helical pitch of inspection (HPI). The helical pitch is determined by the number of probes used, the rotary speed (RPM) and the speed at which the material is passing through the rotary. Increasing the RPM and/or number of probes, or reducing the material feed speed will lessen the HPI, allowing shorter defects to be detected.
Cold drawn and hot rolled bars are often tested using both rotary and encircling coil test systems. This tandem approach takes advantage of the encircling coil’s ability to detect short, transverse types of defects such as scabs and inclusions along with the rotary’s ability to detect long continuous types of defects such as seams.

An eddy current system that uses both an encircling test coil and a rotating probe rotary to test SBQ (Special Bar Quality) steel bar for the construction, automotive, and fastener industries. They are shown in the off-line position. Image source: Magnetic Analysis (Click on image to enlarge.)
TESTING PARTS
Small parts are often tested by spinning the part past a probe or series of probes, similar to rotary eddy current testing. One example is an inspection system that uses a series of probes to test for defects in large bearing races for critical application bearings. Another adaptation is the rotary inside diameter (RID) test method that uses spinning probes that test the inside diameter of a part. An example of this is the small spinning rotary probes that are used to inspect fastener holes for cracks in the aerospace industry.

An eddy current comparator screen shows test signals for above, below and acceptable different length small parts. Image source: Magnetic Analysis (Click on image to enlarge.)
COMPARATORS
Beyond the defect detection capabilities of eddy current testing, there are eddy current comparator systems that are used to test for material properties. These systems can use both encircling coils and/or probes to detect differences in a part’s material properties. Applications include something as simple as mounting an eddy current comparator into a test line to check that the material is the expected grade (grade verification). This is done for both tubular and bar types of materials. With smaller parts, such as fasteners or bearings, it is common to test the individual pieces, providing assurance that all the parts are within the specified hardness range. In another example, automotive intake and exhaust valve stems are often tested for hardness using a probe or a series of probes. In this case the valve stem is passed by the comparator probe and the comparator provides an almost instant go/no-go result.
An eddy current comparator screen shows test signals for above, below and acceptable different length small parts.
Eddy current comparators typically run with test frequencies in the 1kHz to 100kHz or higher range at a fairly low power level. Electromagnetic comparators run at much lower frequencies (60Hz to 1kHz) and much higher power. These units are used with magnetic materials and are much more sensitive to material properties such as hardness and case depth. Electromagnetic comparators are frequently mounted in-line on a mill for grade verification. In other applications they are used to test large threaded studs for proper hardness.
Both the eddy current and electromagnetic comparators are versatile tools that can be used to solve or prevent material with property issues from leaving a manufacturing facility. Tandem systems that include encircling coil eddy current, rotary eddy current or other test methods such as ultrasonic rotaries often will require a comparator for grade verification.
HIGH SPEED EDDY CURRENT TESTING
Eddy current testing is often used in high speed applications such as both hot and ambient temperature wire testing. While it is often difficult or impossible to mark or locate an individual defect with material travelling at thousands of feet per minute, grading systems are used to count the levels of the individual defects and group them by severity, providing outputs and reports based on the count of each level of defect.
EDDY CURRENT TESTING FOR CRITICAL APPLICATIONS
Eddy current continues to be an important technology for inspecting metal products for today’s critical applications including for medical implant wires, umbilical tube for off shore installations, and high quality fasteners for aerospace.
Perhaps instead of asking “What can eddy current testing do for me?”, the better question is “How can I use eddy current testing to improve my product?”


