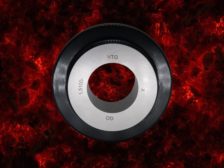
Cylindrical ring gages have a number of inspection purposes. They are used as Go/No-Go gages to inspect the outside diameter of a shaft or rod. They are masters for dial bore gages, internal micrometers and coordinate measuring machines (CMMs).
This situation pops up quite regularly when a relatively simple feature such as the diameter of a hole in a machined part doesn’t appear to be right when the part is at the assembly stage of manufacture. Like similar disputes, the finger pointing begins and compromises are made but the problem doesn’t go away.
At first glance, you might think I’m losing it with the title of this month’s rant. After all, who would pay anything for ‘zero’ or nothing? It turns out a lot of people try to get ‘nothing’ or ‘zero’ and end up with more than they bargained for at a very high cost to get there.
All the buzz these days is about laser micrometers and vision systems. If you visit a tradeshow or get any online advertisement, many companies are promoting these measuring methods.
Attempting to create a precision machine or product without taking accurate measurements is like trying to cook a great meal without measuring as you go along.
I am in my tenth year as a part-time instructor at Western Michigan University, currently working with junior- and senior-level engineering students. I instruct the hands-on metrology lab of Dr. Pavel Ikonomov’s metrology class. We have about 15 weeks for this three-credit hour class to introduce metrology, focusing on precision measurement. We have about 45 students taking three hours of lecture and three hours of lab each week.
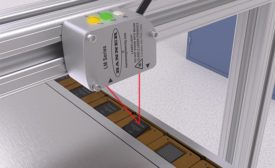
Quality control applications that require precise measurement can be some of the most challenging applications to solve. Very tight tolerance requirements demand a reliable solution that can measure parts in micrometers to detect the smallest variations in part size, thickness, orientation, placement, and more.
From calipers to micrometers, to indicators and all manner of gages and metrology equipment, there are literally hundreds of standard off the shelf solutions for measuring the vast array of parts that manufacturers make.
I’ve commented on this subject from time to time but thought I’d have another go at it since the questions never seem to go away. I’m referring to the language used in our day-to-day work in measurement and calibration.