Measurement
Quality 101
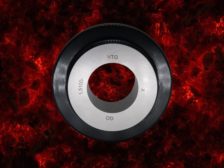
Cylindrical ring gages may be used as master gages to set variable measuring tools.
Read More
Quality Headline
Mitchell Joins Verisurf Software as Business Development Manager – Americas
April 26, 2021
Quality Headline
ECM’s Metrology Engineer Honored as ASQ’s Inspection Division 2021 Inspector of the Year
April 14, 2021
Quality Headline
Starrett Appoints VandeHei Director of Sales, Metrology Systems
April 14, 2021
Sponsored Content
White Paper: Learn about the Transformative Advantages of Wireless Measurement Data Collection for Industry 4.0
April 12, 2021
Other Dimensions | Hill Cox
Thread Ring Gage Calibration
The basic advantage of the solid thread ring is that it does not have a size adjustment that can be changed.
April 8, 2021
New Data Collection Fundamentals Keep Pace With Industry 4.0
New to wireless data collection? Here’s some helpful terminology to get you in the know.
April 8, 2021
Special Gage Solutions Optimize Measurement for Many Unique Applications
Discover gaging solutions for manufacturers in the automotive, aerospace, power generation, food and medical industries.
April 7, 2021
Stay in the know with Quality’s comprehensive coverage of
the manufacturing and metrology industries.
eNewsletter | Website | eMagazine
JOIN TODAY!Copyright ©2024. All Rights Reserved BNP Media.
Design, CMS, Hosting & Web Development :: ePublishing


