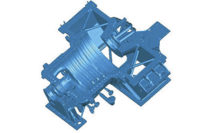
3-D Measurement Hits the Road
Roush engineers used to rely on manual techniques to make all of the exacting measurements re-quired to perform these jobs. But with the advent of increasingly sophisticated touch probe, laser scanning and digitizing technologies, the task today has become much faster and easier. Moreover, taking this advanced technique directly into an auto factory and to component suppliers' sites, or literally "on the road," is easily possible with portable coordinate measuring machines (CMMs).
Roush acquired its first portable CMM about 10 years ago from Romer Inc. (Farmington Hills, MI), and has since expanded its use of the technology, says John Immonen, portable CMM program manager.
Roush has more than 50 facilities in North America, including Canada and Mexico. These locations are supported with four Romer Model 1000i CMMs, maintained out of Immonen's department in Livonia. Another Romer unit in England supports several Roush facilities in the United Kingdom and Germany.
This is possible because the Romer CMM is compact and lightweight--12 to 17 pounds, depending on options--and comes equipped with a carrying case. Its articulated rotating arm can be checked as standard luggage on commercial airlines, and the laser scanning probe available as an option for the system can be changed without tools. Data is collected through touch probes with the CMM's rotating arm or using the laser scanning attachment, "which takes a large number of points, and we construct surfaces off a point cloud," Immonen explains. The CMM operates with a laptop or desktop computer for data collec-tion and analysis.
"We take them [portable CMMs] outside to auto companies and even to their Tier 2 suppliers' sites to help them with any tooling problems and with any kind of 3-D measurement they request to get profiles," says Immonen.
Most of Roush's CMM applications are for automotive OEMs, but the company also has a facility in Concord, NC, that serves the NASCAR auto racing teams based in the area. At this site, Roush conducts reverse-engineering, particularly "to gauge repeatability on vehicles," Immonen says, "plus a lot of computer-aided engineering on vehicles to digitize parts." Roush also performs inspections there on vehicles newly received from vendors. "And," adds Immonen, "if a vehicle is performing very well, we want to know a little more about it as well."
Roush also performs extensive "competitive benchmarking" for its Big Three automotive customers. "Each likes to know what the other companies are doing," Immonen says. "So we use portable CMMs to digitize profiles of the vehicles--for example, giving the centerline, seating positions, and 'centerline' the wheels and the wheelbase--to give a full profile. They get a scope of what's going on with each vehicle. We'll go out to their facilities to do it; it's what the portable CMMs lend themselves to."
Romer Inc.
(800) 218-7125
www.romer.com
Looking for a reprint of this article?
From high-res PDFs to custom plaques, order your copy today!


