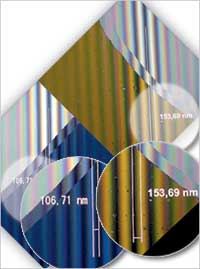
TIC technique
The total interference contrast (TIC) measuring technique for step height and layer thickness measurement is used for materials microscopy such as think films, electronics, microsystems technologies, as well as in the glass, ceramics and automotive industries. Work is carried out in circularly polarized light. The interference fringe can be aligned using the TIC slider without sample orientation. The differences in height of specimen structures are then determined by measuring the phase shift in the interference pattern. The technique allows the measurements of step heights on the order of 20 nanometers to 5 microns. The TIC prism will function regardless of its main orientation and can be rotated without changing the contrast of the interference fringe, producing repeatable measurements every time.Carl Zeiss MicroImaging
(800) 233-2343
www.zeiss.com/materials
Inspection gage
Computer-controlled dual laser micrometers measure diameter, average diameter, diameter total indicated runout (TIR), TIR, composite TIR, length, roundness and straightness of transport rolls and shafts up to 10.5 inches in diameter and up to 4 feet long. Single laser roll capacity up to 4.5 inches and up to 4 feet long is also available.QAE Inc.
(585) 359-8910
www.qaeincorporated.com
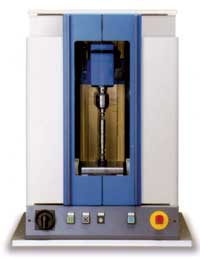
Shaft gaging system
The Opticline noncontact computer numerical controlled shaft gaging system measures form, dimensional and positional tolerances of symmetrical parts in submicron detail and records results almost instantaneously. Measurements are completed within the production cycle for quality control. Applications include manufacturing checks, automatic tool correction, initial sample measurement and machine setup. The system accommodates shaft sizes from 0.2 to 270 millimeters in diameter, 1 to 1,500 millimeters in length and measuring accuracy to ±1 micron.Detroit Precision Hommel
(248) 853-5888
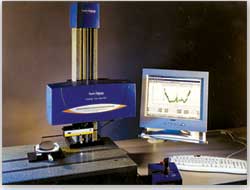
Contour and form analysis
The Form Talysurf PGI 1240 delivers 0.8 nanometer resolution over a 12.5 millimeter range and has the ability to measure form, roughness, radius, inclination and contour in a single traverse. A 200-millimeter horizontal measuring traverse and 450-millimeter vertical positioning traverse allows the unit to accommodate large components, and 0.125-micrometer horizontal data spacing and traverse speed selectable down to 0.1 millimeter per second accommodate miniaturized components. Programmed, automatic measuring and analysis routines allow for maximum productivity for all applications.Taylor Hobson Precision
www.taylor-hobson.com
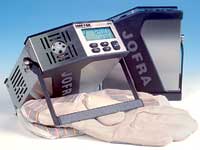
Dry-block calibrators
The Jofra ETC (easy temperature calibrator) series of dry-block calibrators has an easy-to-read display, one-key-one function technology, multiple bore blocks for a range of applications, programmable test setup and RS232 communications and software. Available in two versions, the ETC 125A has a range from -10 to 125 C and is stable to ±0.05 C. The ETC 400A has a range from 28 to 400 C and is stable to ±0.15 C. Both versions have accuracy of ±0.5 C.Ametek Test & Calibration Instruments
(800) 527-9999
www.ametek.com
Process control software
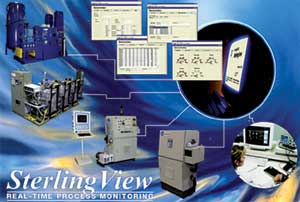
SterlingView provides real-time process control and integral data acquisition and recording. It can log machine and process faults and provide operators with diagnostic information. Developed to work with industry-standard protocols, the software integrates record functions for assembly, fill and test. Functions include real-time data viewing, cycle data logging and printing, machine and process logging and diagnostics, preventive maintenance alerts, and parameter read and write. The software works with single or multiple systems using any programmable-logic controlled fill process.Sterling-PCU
(937) 853-1710
www.sterlingpcu.com
Macroscope
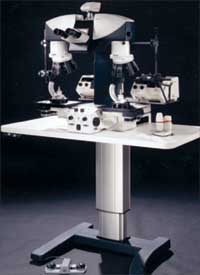
The FS C comparison macroscope for real-time comparison, quality control and medical device inspection has a comparison bridge design that integrates a tilting binocular tube to accommodate users of all statures and to facilitate easy reach and natural body position. Automation and motorization allow synchronous control of both stages, as well as remote positioning of stage and focus control. Side-by-side or superimposed image comparison can be done with the touch of a button. The system's built-in 1.5X magnification changer expands the magnification range from 4X to 60X and provides up to eight discrete magnification settings to ensure measurement reproducibility.Leica Microsystems Inc.
(800) 248-0123
www.leica-microsystems.com
Process map software
ISOlutioner is a software tool that allows users to develop process maps by modifying a series of generic flow charts derived from the ISO 9001: 2000 quality management systems standard. The tool is part of the allCLEAR flow-charting platform. The system allows the user to attach or provide links or pointers to files that represent documented procedures, records or forms within the quality management system. Once accomplished, the file functions as a paperless quality manual.Proquis Inc.
(827) 768-6630
www.isolutioner.com
Laser measurement sensor
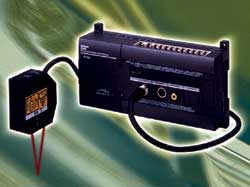
The Z500 laser measurement sensor combines a wide-beam laser and a two-dimensional charge-coupled device (CCD) for two-dimensional measurements in a single procedure. The sensor measures at distances from 5.2 to 100 millimeters with resolution from 2.5 to 1 micron. The system includes a sensor, controller, programming console and a liquid crystal monitor that can display measurement data in four different formats.Omron Electronics LLC
(800) 55-OMRON
www.info.omron.com
Vision systems integration
The EZVIP software and vision systems integration has a point-and-click user interface that contains everything needed to set up vision applications. Along with the specified vision board and software libraries, the system can perform precision measurements, robot guidance, assembly verification and other applications. The system supports live video, up to four cameras and inspection rates up to 500 parts per minutes.Cincinnati Automation Ltd.
(859) 371-5070
www.cincinnatiautomation.com
Combination lathes
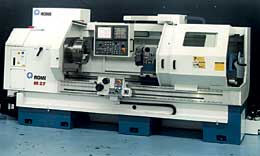
The M Series of combination lathes can be used for mixed volume, short-run operations and dedicated high-volume applications. The M27 has a swing of 26.97 inches, and a 116.6 by 74.8 inch footprint. An optional electric automatic drum turret has a 0.48 second station-to-station indexing time. The turret holds eight tools with pockets for square tool holders and bolt-on inside diameter blocks.Romi Machine Tools Ltd.
(859) 647-7566
www.romiusa.com
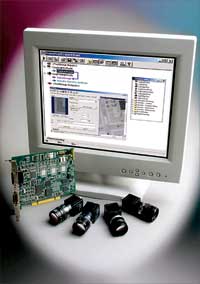
Frame grabber
The MVS-8501 has been designed for the next generation of high-speed analog cameras that use progressive scan charge-coupled device (CCD) sensor technology. It provides high-speed acquisition capability in a single-channel architecture that supports up to four multiplexed cameras. It is backward compatible with standard speed analog interlaced and progressive scan cameras, providing a platform for those users migrating PC-based machine vision systems to the new generation of 60 frames per second standard resolution analog cameras. The unit provides real-time image transfer over the PCI bus to system memory for analysis. Independent direct memory access (DMA) eliminates delays by allowing captured images to be processed at the same time other images are being captured.Cognex Corp.
(508) 650-3000
www.cognex.com


