Lasers Speed First-Article Inspection
Delays along the supply chain have the same effect on manufacturing as lane closings on highways. Nowhere is this more apparent than in quality inspection.
"Better processes in design, analysis, machine tools and cutter technology have improved manufacturing reliability and speed tremendously, but quality inspection still lags behind," says Matt Reinhard, chief executive officer of Aerospace Manufacturing Technologies (AMT, Arlington, WA). "Manufacturing has a fire-hose capacity, but quality inspection clamps it down to a drizzle."
AMT manufactures 3-, 4- and 5-axis milled parts, stretched-formed parts and sheet-metal parts of all sizes for the aerospace industry. The company recently turned to noncontact laser scanning and computer-aided inspection software to speed its part verification. Traditional coordinate measuring machines (CMMs) are used by AMT for final quality inspections.
"Obviously, quality is a big focus for aerospace manufacturing," says Reinhard. "And now the pressures for speed have led us to a new inspection process - one we hope can become standardized industry-wide."
AMT's new process starts with a laser scanner that captures a manufactured part as a 3-D point cloud. The scanner, shaped like an 18- by 26-inch cube, allows AMT to place the part that is ready for inspection on a rotating table and scan it at a rate of up to 5,000 points per second. The large numbers of points captured during scanning enables AMT to inspect complex contours, forms, shapes and holes.
If the part is too large for the cube, the scanner can be moved and configured in a larger area to capture the necessary points.
Another major advantage is automation. The scanner's automatic control and calibration means highly skilled engineers are not needed to perform the inspection, and AMT is not tying up valuable time on two CMMs.
Before implementing the scanner, AMT's first-article quality inspection could take half a day to set up and hours to run. By changing to noncontact part verification and automating much of the work, AMT sets up inspections in as little as half an hour. The actual inspection might take only a few minutes. The reduced time saves manpower, cuts costs and adds flexibility for design changes, according to Reinhard.
"Faster response times are critical," he says. "While CMMs are accurate, the high cost, slower speeds and difficulty correlating to 3-D computer-aided design (CAD) models make them less conducive for adjustments during the manufacturing process. Customers like Boeing are pressured by OEMs as they try to cut inventory, and we need to decrease the time involved in the inspection phase of manufacturing."
Part-to-CAD Comparison
The second part of AMT's new inspection process involves processing the 3-D point cloud data for the manufactured part and comparing it with the corresponding 3-D CAD model.
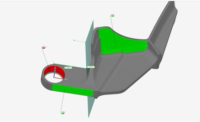
AMT loads the CAD model that is supplied by the customer and the point cloud captured by the scanner into and downloaded into a software package. The CAD model and the point cloud are automatically aligned, and color maps depict deviations. As AMT runs graphical comparisons for dimensions, datums, features and other quality factors, the software automatically records the session for reporting purposes.
AMT uses the software-
generated reports to help designers decide what alterations are necessary, to make changes to its milling machines or to certify that the part is suitable for further production. Reports can be formatted in HTML, PDF, Microsoft Word and Excel, allowing them to be used in print or online for collaborative assessments.
Behind the scenes, a template of information gathered by the scanner and software during the first inspection of a particular part allows subsequent inspections of the same part without a new setup. AMT is using this capability to develop a library of 200 part inspection profiles that will further automate its processes.
"After the library is implemented, we will be able to put a part on the scanner, hit a barcode and automatically scan the part," says Reinhard. "The software will bring in data from the inspection library and then develop a finished inspection report without any user intervention."
Gaining Acceptance
Eventually the scanner and software could extend beyond first-article inspection and dimensional verification to encompass the entire quality inspection process. But for now, Reinhard says industry standards dictate using CMMs for quality inspection before shipping parts to customers.
"Our obstacle is getting customers familiar with the process we use for first-article inspection," says Reinhard. "By creating an industry standard for noncontact parts verification, valuable time savings will improve the flow of the supply chain and relieve pressure on our customers as they move to just-in-time inventory and other cost-saving measures."
Sidebar: Tech Tips
1. Laser scanning and computer-aided inspection software has sped up part verification.
2. The scanner captures a manufactured part as a 3D point cloud.
3. The company uses the point-cloud data for the manufactured part and compares it against a CAD model.
4. After scanning a part during first inspection, it keeps the data on file so that part does not need a new setup.
5. Reports can be formatted in HTML, PDF, Word and Excel.
Looking for a reprint of this article?
From high-res PDFs to custom plaques, order your copy today!


