Automated Inspection Saves Time, Money
Precision Concepts Inc. (Winston-Salem, NC) previously used optical comparators for manual in-spection of its precision stamped metal and over-molded electronic contact products, which it supplies to the automotive, medical, com-puter and telecommunications industries.
The company found that as volumes and customer requirements increased, manual inspection was becoming a challenge. "We were struggling with on-time delivery and the depth of inspection we were asked to perform by our customers," says Chris Sealey, senior quality assurance engineer at the company.
One solution might have involved more people assigned to inspection responsibilities, but that would have required a "multitude" of new hires, Sealey says. So the company set out instead to automate the inspection process.
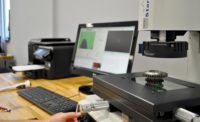
According to Sealey, durability, ease of programming and cost were factors for purchasing the Smart-Scope ZIP 250 supplied by Optical Gaging Products Inc. (Rochester, NY). The SmartScope ZIP 250 is a programmable video measuring system that enables part inspection routines to be performed automatically.
The system, which Precision Concepts uses only in an automated mode, has eliminated the need for most manual inspection at the company. "Our inspections are 10 times more in depth than they were four years ago and we're doing them in 10% of the time," Sealey says. The automated system allows the company to focus more time on new product development.
The SmartScope ZIP uses written programs for inspection of different part features utilizing optical grade acrylic fixtures. "Basically, we do about 90% of all inspections on the SmartScope ZIP, and we have well over 650 programs written at this point," says Sealey. Learning to program the system was not particularly burdensome, Sealey indicates. Employees assigned to the task became relatively proficient after writing only two or three programs and have now become adept at program development. Most of the programs written within the last year have become increasingly more complex due to the company's move into multi-cavity overmolding.
Sealey comments that most of the inspection is done on the factory floor, and it is all automated. All an operator has to do is open a file, select a fixture and follow the instructions. This allows for the same results and same inspection of products each time across three shifts. "Uniformity across the shifts has been a great plus for us," says Sealey.
Gage repeatability is important to Precision Concepts. Gage repeatability of the SmartScope ZIP runs within the 5% range says Sealey. In other words, gage error is less than 5% of the print tolerance. Using an optical comparator at 50 power, the best gage repeatability and reproducibility Precision Concepts had been able to achieve was 15%.
In the last few years, Precision Concepts has incorporated reel-to-reel molding into its metal stamping organization. Reel-to-reel molding is a process in which a stamped reel of metal contacts is de-reeled, fed through an inline molding press, overmolded with plastic, and then re-reeled at the end of the process. It is an auto-mated process, so that when complete, customers are supplied with a finished reel of components for use in their assembly operations. Reel-to-reel molding eliminates the need for a plastic assembly operation to insulate the metal stamping prior to component assembly.
In the reel-to-reel environment, the SmartScope ZIP's speed compared to the earlier manual approach is paying big dividends, Sealey says. To manually run and measure a reel that has 16 cavities, each with 25 features--a total of 400 separate measurements--would take at least two to three hours. With the SmartScope ZIP, thanks to some programs that include up to 3,000 steps, the same job can be done in about 30 minutes.
According to Sealey, the system has solved a logistics bottleneck, by allowing inspection at a level that ensures quality to the customer, while doing it in a cost efficient manner.
Precision Concepts purchased the SmartScope ZIP originally to do end-of-reel inspections of critical product features. Because of the success of the first SmartScope ZIPs, the company has started developing first article inspection programs for new products. First article inspections require the measurement of all print features. Sealey says some of the programs that are being developed to perform first article inspections have more than 200 print features to be measured. The automation capability of the SmartScope ZIP has significantly reduced the amount of inspection time required to perform a first article inspection. For example, to manually inspect one part from one cavity with 150 items takes approximately eight hours. Inspection time of a 16-cavity mold would multiply that time by 16, which would total about 128 hours. By contrast, a typical first article inspection of a 16-cavity mold using the SmartScope ZIP takes only eight hours.
Sealey notes that Precision Concepts has made a substantial commitment to the automated inspection technology; in each of several facilities, the company has installed three SmartScope ZIP systems to handle production and a fourth that is used solely for programming and new product development.
"These systems have allowed us to delegate and manage our people more efficiently," says Sealey. "It has benefited our new product development by allowing Precision Concepts to develop and measure components as they are being built. The company has developed a fast track tooling program where we can deliver a tool from design to production part approval within eight weeks."
In all, the bottom line for Precision Concepts, he says, is a significant reduction in cost since the introduction of the SmartScope ZIP.
--Kimberly Schmidt
Optical Gaging Products Inc.
(716) 544-0400
www.ogpnet.com
Looking for a reprint of this article?
From high-res PDFs to custom plaques, order your copy today!


