Quality 101: Surface Finish Measurement Basics

|
|
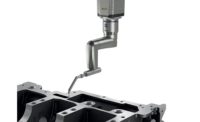
In skidded gages, the sensitive, diamond-tipped stylus is contained within a probe, which has a skid that rests on the workpiece. Skidded gages (upper) measure roughness only. Skidless gages (lower) use an internal precision surface as a reference. This enables skidless gages to be used for measurements of waviness and form, in addition to roughness. Source: Mahr Federal Inc. |
Ever since E.J. Abbot developed the first surface finish tester at the University of Michigan in the 1940s, industry has been aware that roughness is an important characteristic of machined surfaces.
The growing influence of surface finish can be traced to dramatic changes in manufacturing specifications and drastic tightening of dimensional tolerances over the past few decades. As a result of these changes, the proportion of the tolerance range, which is taken up by surface irregularities, has increased from roughly 15% in the 1940s to nearly 50% in some cases today.
Surface geometry is measured for two principle reasons: to try to predict the performance of the machined parts, such as engine pistons and fuel injection parts, and to try to control the manufacturing process.
A surface consists of three basic components: form, waviness and roughness. On a turned part, form is the result of errors in the way the lathe produces a part, commonly known as straightness errors, and waviness is a result of various vibrations, both in the machine tool and from outside sources. Roughness, on the other hand, is the result of feed-rate tool geometry, tool condition, and variations in material and hardness.
There are two general types of surface-finish measuring systems: "skidded," measuring roughness only, and "skidless," evaluating form, waviness and roughness. In skidded gages, the sensitive, diamond-tipped stylus is contained within a probe, which has a skid that rests on the workpiece. Thus, skidded gages use the workpiece itself as the reference surface.
Skidless gages use an internal precision surface as a reference. This enables skidless gages to be used for measurements of waviness and form, in addition to roughness.
Because the three basic forms of surface geometry are caused by different factors and tend to have different relationships to the performance of the part, it is common to separate them during analysis. This separation is achieved by the selection of filter or cutoff settings that allow the operator to select the degree of filtering that will be applied to the measured profile.

|
|
Here, two very different surfaces have the same Ra. Source: Mahr Federal Inc. |
The irregularities of the machined surface consist of high and low spots created by the tool bit or by a grinding wheel. These peaks and valleys can be measured and used to define the conditions and sometimes the performance of the surface. There are more then 100 ways to measure a surface and analyze the results, expressed as parameters, but for most cases, only a few are specified. Each of the parameters has its own advantages and limitations. Often one parameter is incapable of defining a surface adequately. Therefore, a complete definition of a surface often involves two or more parameters, and in some cases, the relationship or ratio of one parameter to another.
The most common parameter is Ra, or Arithmetic Average Roughness. It basically reflects the average height of roughness component irregularities from a mean line. Ra provides a simple value for accept/reject decisions. It is a default parameter on a drawing if not otherwise specified, and is available even in the least sophisticated instruments. Ra is not a good discriminator for different types of surfaces as it is incapable of differentiating between "spiky" and "scratched" surfaces having the same Ra. Additional parameters should be specified for this purpose, such as Rp (Maximum Peak Height), Rv (Maximum Valley Depth) and Ry (Maximum Peak-to-Valley Roughness Height).
In Europe, the more common parameter for roughness is Rz, or Mean Roughness Depth. It is the average distance between the highest peak and the deepest valley in five sampling lengths, or cutoffs. Rz is more sensitive then Ra to the changes in surface finish because maximum profile heights, and not the averages, are being examined. There is no firm conversion between Ra and Rz parameters, as the actual ratio depends upon the shape of profile, but the approximate ratio of Rz = x4 - x7Ra could be used.
Surface finish measurement procedures, general terminology, definitions of most parameters and filtering information can be found in American Standard ASME B46.1 - 2002, Surface Texture, and in International Standards, ISO 4287 and ISO 4288.
Looking for a reprint of this article?
From high-res PDFs to custom plaques, order your copy today!


