Sponsored Content
Finer Tolerances Demand Better Measurement Methods


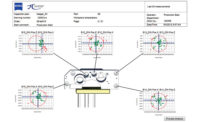
A recently developed system is designed to quantify even the smallest chatter marks produced on all shaft types. It requires no special axis alignment as the crankshaft is fixtured on centers and also provides accurate inspection results in regards to pin diameter, stroke, index, radial position and even straightness of the pin. Source: Source: Jenoptik Automotive
Vibrations induced during the machining process produce a special form of roundness error called chatter marks. Identifying and further quantifying chatter marks today requires a special type of measurement system.
Chatter marks produced during milling or turning operations are not uncommon. These chatter marks are usually visible to the naked eye and can be determined by a simple visual quality control check. Chatter marks are usually identified by inspecting ground surfaces under intense light. Manual light inspection is typically not a satisfactory method of quality control because length and depth of visible defects cannot be quantified. Chatter marks produced during the grinding operation do call for a better inspection method in order to be detectable.<
Improvements to surface finish qualities are currently being achieved by using modern machine tools and new production processes. However, with the improvements in surface finish quality, even smaller sources of error occur called chatter. This type of error is typically not detectable by just a standard roundness evaluation, either.
Chatter marks on camshafts and crankshafts, even at low amplitudes, can cause disruptive noises or vibration in an engine. Defining chatter marks can only be performed by using a Fast Fourier Transform (FFT) routine on a roundness profile. The FFT routine displays the individual harmonics and the amplitude of the chatter mark and determines circumferentially which errors are in excess. Chatter marks are then quantified based on quality control standards from the engine manufacturers to insure low engine noise levels.
Not every frequency in the profile will be harmful to the performance of the workpiece-in a sense there is good chatter and bad chatter. In fact, depending on the application, there is usually only a small bandwidth of frequencies that can be considered bad chatter. With data obtained during the shaft inspection, manufacturers will be able to link inspection data to specific manufacturing methods, processing speeds, forces, feed rates and tool wear issues.

The new generation of shaft measuring systems must be fully functional on the production floor as well as the measuring lab environment; the stability of the system ensures changes in temperature, humidity and air pressure have no effect on measurement accuracy. Source: Jenoptik Automotive
Suitable Systems
The challenges in measuring cam and crankshafts start with using the appropriate measuring system. When measuring pin diameters on a crankshaft, some traditional roundness measuring systems fixture the crankshaft so that the pin axis is centered to the measuring system axis (main axis off-center). This method requires long set-up times as each individual pin measurement requires a new axis set up.
There is a new type of measuring system available that addresses these challenges.
This recently developed system is designed to quantify even the smallest chatter marks produced on all shaft types. It requires no special axis alignment as the crankshaft is fixtured on centers and also provides accurate inspection results in regards to pin diameter, stroke, index, radial position and even straightness of the pin.
The challenge with camshafts is due to the specific shape of the lobe. Traditional roundness systems do not have the probe range or scanning capability with suitable resolution of the R-axis to trace the eccentric features of a lobe.
The measurement of camshafts and crankshafts require a specialized roundness inspection system.
Common camshaft and crankshaft measuring systems use essentially the same measuring principle: The shaft is clamped between centers, which allows for fast and fairly accurate pre-location of the part. This location method is common, since all earlier machining operations establish datums in relationship back to the center axis of the part.
When using a highly accurate shaft measuring system, there are essentially three axes: Z, R and C. The Z-axis provides travel and length measuring capability along the center axis of the workpiece. The R-axis (or X-axis) is for measuring in the radial direction and follows the part contour recording data points. The C-axis uses a high-resolution drive system for part rotation.

A reliable way to measure fine chatter marks is with a mechanically accurate, air-bearing-based measuring system. Source: Jenoptik Automotive
Mechanics Count
During inspection of a pin on a crankshaft or the lobe on a camshaft, the measuring follower (R-axis) contacts the outer diameter of the surface. The shaft is then driven by the C-axis. During rotation the pins or lobes introduce forces to the measuring follower with each directional change.
Compensation of the translational forces must occur in the R-axis. Traditional systems rely on mechanical bearings to balance the friction and pre-loads associated with the axial forces onto the R-axis. Laser compensation is one available solution to monitor the R-axis for compensation. This method of compensation is completed by adding an additional glass scale and reader head. Both the measuring head and the laser must simultaneously be tracked for this compensation to function correctly. Although this method provides accurate results, it does result in longer inspection times as the alignment of both measuring signals limits the measuring heads overall speed.
Tech Tips
- Chatter marks on camshafts and crankshafts, even at low amplitudes, can cause disruptive noises or vibration in an engine.
- As chatter or higher frequency needs to be detected in the future, the natural frequency of mechanical bearings may distort, interfere with or simply filter the actual measurement data.
- The new generation of shaft measuring systems must be fully functional on the production floor as well as the measuring lab environment.
When using mechanical bearings, their lack of response to high frequencies can become critical. The mechanical bearing system requires preloads to balance the radial and axial play of the mechanical system. The limitations of the mechanical system to detect high-frequency chatter are a result of slow response to high frequencies. As chatter or higher frequency needs to be detected in the future, the natural frequency of mechanical bearings may distort, interfere with or simply filter the actual measurement data.
During recent years, another approach has helped to pave the way in mechanical accuracy of the measuring system. Unlike standard industry shaft systems, this technology does not require laser compensation due to its unique mechanical design. Laser compensation is eliminated by using a high-precision linear air bearing in combination with a vibration-free cable drive system. Its rigid design does not introduce inaccuracies associated with axial play, thereby eliminating the need for error compensation. An extremely small air gap and air pressure ensures frictionless function for high response time and ensures there are no adverse effects from transverse forces.
The most recent approach includes a refined version of the earlier proven R-axis technology. The new system also includes a Z-axis in combination with an improved R-axis, which together aids in decreasing measuring time and increasing capability.
This new approach also offers ease of serviceability of the entire system with little maintenance, an advantage over laser-based systems. Traditional laser-based systems frequently require cleaning and precise adjustment of their lenses, a process that can be time-consuming, complex and costly.
Software
With this new type of system, the measurement cycle is automatically optimized by the software to ensure short measuring times. Measurement cycles can be further optimized by selecting shorter trace widths and also repeating only individual measurements within a measurement cycle. Simple operation and programming in Windows XP/Vista can provide quick and easy-to-understand software control.
Program adjustments can be made both on-line or optionally off-line for computer numerically controlled (CNC) programming, position adjustment, tolerances and nominal values. Software for the new type of system can be used for standard measuring tasks such as roundness, cylindricity, concentricity, coaxiality, radial run-out, positional tolerance and stroke of crank pins, as well as the FFT calculation for measuring chatter marks. Output of measuring reports also is created within the software.
The new generation of shaft measuring systems must be fully functional on the production floor as well as the measuring lab environment. The stability of the system ensures changes in temperature, humidity and air pressure have no effect on measurement accuracy.
Chatter marks left behind on precision part surfaces by even the most precise machining operation, particularly on the eccentric surfaces of rotating components such as camshafts and crankshafts, have a big impact on part performance. Going forward, a reliable way to measure these fine chatter marks is with a mechanically accurate, air-bearing based measuring system. Q
Quality Online
For more information on surface measurement, visit www.qualitymag.com to read these articles:
“A Map to Better Surface and Form Measurement”
“Compare Tactile and Optical Technologies for Surface Texture”
“Surface Measurement Basics”
About Jenoptik
https://www.jenoptik.us/products/metrology
Jenoptik Automotive North America LLP
248-853-5888
1505 W. Hamlin Road, Rochester Hills, MI 48309
Looking for a reprint of this article?
From high-res PDFs to custom plaques, order your copy today!


