Quality 101: Digital Calipers Go Beyond Basics

Measuring OD
Measuring calipers have been around for nearly 150 years. In that time they have evolved into full-featured digital measuring systems. But it is a testament to the simplicity and versatility of the original design that the evolution has been so slow and that so few changes have been required to produce the instruments we are familiar with today.
Here are some of the highpoints of the caliper’s evolution since it was introduced in the 1860s:
Today you are apt to see digital calipers as the tool of choice for the most common shop, automotive and hobby measuring tasks. But when most people pick up today’s digital caliper, they still see a tool for just measuring outside diameters (OD) and inside diameters (ID). Yet there is a lot of versatility built into this tool. Let’s take a closer look and see what a caliper can do.

Measuring ID Source: Mahr Federal Inc.
Caliper Basics
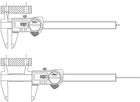
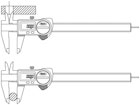
All calipers, whether vernier, dial or digital, include the same basic components. They have two jaws. The fixed one is the reference jaw and the sliding one makes the measurements. All calipers incorporate a little “hump” where your thumb goes to help move the measuring scale back and forth. Some incorporate a thumbwheel to help improve repeatability by trying to maintain constant gaging pressure (the wheel disengages when the sliding jaw comes into contact with the part).Usually, the sliding scale will have a round or flat rod associated with it. This extends out the back of the caliper and is used for making depth measurements. Electronic calipers usually also have controls to set the zero point, change units and turn the units on/off. There may even be a connector for sending measured values to a data collection device.
As with any measuring tool, it is important to make sure a caliper is in proper operating condition and ready to do its work. Always check to make sure its calibration is current, the scale moves freely and there are no nicks or burrs on the jaws. Clean the jaws with a soft piece of cloth to remove any dirt. Close the jaws and make sure the instrument reads “0” or set it to zero, using the zero button on a digital caliper or set the dial to zero on a dial caliper.
Fundamental Measurements
When using a vernier, dial or digital caliper, the process of making fundamental OD, ID, depth and step measurements seems pretty obvious. But what may not be so obvious is how easy it can be to make them incorrectly. The caliper is a very operator-dependent tool. If the part is not placed in the middle of the jaws, if the caliper is not 90 degrees to the measurement, or if the operator applies too much force to the sliding scale, there is a good chance the measurement will not be very accurate. Here are some tips:
Measuring Depth Source: Mahr Federal Inc.

Step Measurements Source: Mahr Federal Inc.

Measuring Center Distance Source: Mahr Federal Inc.
Compound Measurements
Digital electronics are great. The advent of the electronic calculator has saved countless hours. The electronics in the digital caliper can do the same by doing some of the math during the measurement process.The first step involves using the inside jaws to measure the diameter of one of the holes. After having the caliper in position and reading the diameter, use the zero button to set the caliper to zero.
Then, while still using the inside jaws, measure the distance between the two furthest surfaces of the two holes. The caliper reading is the distance between the outside edges of the two holes, minus the diameter of one hole. Since the diameter is twice the radius, the reading is actually the distance between the centers of the two holes.

Comparing ID and OD Source: Mahr Federal Inc.
First, use the inside jaw set to find the diameter of the hole. While the caliper is in place, reset the zero.
Now measure the shaft OD using the outside jaws. The caliper will show the difference between the shaft and the hole. A plus dimension will mean the shaft is oversize while a minus dimension will mean the shaft is smaller than the hole. The positive reading can be used to make the shaft to the proper size fit to the hole.

Measuring Thickness Left Source: Mahr Federal Inc.
First use the outside jaw set to measure the total width of the part. Again, while the caliper is in place, use the zero button on the digital caliper to set the tool to zero.
Then use the depth rod/blade to measure the depth of the hole. The caliper reading is the remaining thickness left in the part. Using this process, the reading will be a negative number-but it represents how much material is left.
Looking for a reprint of this article?
From high-res PDFs to custom plaques, order your copy today!


