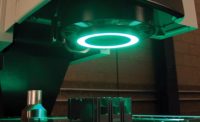
Video Extensometers Boost Performance

From fragile wires to structural steel components, metals producers are faced with many testing challenges. Metals manufacturers producing products such as plate, rebar, sheet metal and wire/cable must not only meet advertised strength and performance ratings, but also comply with a wide range of standards including ASTM, EN, JIS and SAE.
Tensile testing of metals determines characteristics such as yield strength, yield point elongation (YPE), ultimate tensile strength, plastic strain ratio (r) value and the strain-hardening exponent (n) value. One common requirement needed for all these calculations is accurately measuring the strain of the material in question.
In practical terms, strain is a measurement of the deformation in a defined, uniform section of a test specimen-known as the gage section-as it is subjected to a load. Engineering strain is the extension divided by the original gage length; it is usually expressed as a percentage.
Strain measurement in materials testing is traditionally carried out using some form of contacting extensometer. For example, a typical clip-on extensometer attaches to the specimen with clips or elastic bands and uses knife-edges to accurately track deformation in a specimen during testing. Using an extensometer eliminates measuring extraneous compliance in the loading system, which would otherwise result in a reported deformation from the crosshead extension that is greater than the actual deformation of the specimen. Moreover, when testing typical dog bone-shaped specimens, a crosshead extension often is an inadequate way to measure strain. It will record the deformation of the entire specimen between the grips along with the deflection of the test machine, load cell and grips instead of just the narrow, parallel section that is the area of interest.

Most industries performing metals testing have used traditional contacting extensometers and trust the reliability of the results. Developments in extensometry technology now offer metals testing customers other options, such as noncontact video extensometers based on high-resolution digital cameras and real-time image processing.

Contact extensometer disadvantages
While providing accurate strain measurement in numerous applications, contact extensometers have a number of disadvantages. Knife-edge contact points can create stress concentrations on the specimen, which may cause premature specimen failure. Results also may indicate evidence of extensometer contact point slippage as knife-edges become dull over time. For thin foils and wires, the contact force of the extensometer can increase the apparent stiffness of the test specimen and the weight of the contact extensometer itself can distort delicate specimens causing erroneous results. The process of attaching a clip-on type of contacting extensometer, in a repeatable fashion, requires increased operator skill.
Certain delicate specimens cannot be tested using a contact-type extensometer because they would be ruined by the attachment of the extensometer even before the test begins. Examples of these include fine wire and thin film. The high energy released during specimen failure can damage contact extensometers. To prevent this, the test must be stopped at some point before specimen failure to remove the extensometer. This procedure can potentially introduce even more variability in the test results.

In the past, the clip-on extensometer has been thought of as the more accurate and reliable strain measurement device. However, as imaging technology has advanced over recent years, a new generation of video extensometers has emerged that takes advantage of high-resolution digital camera technology, offering the benefits of noncontact extensometry while meeting accuracy requirements of mainstream standards.

Developments in video extensometers
New video extensometers measure strain by tracking contrasting gage marks placed on the specimen. The gage marks can be dots or lines, and are applied to the specimen by a wide variety of methods. Prior to running a test, the software uses a neural network to search the image for marks that are compatible with a library of acceptable marks. Then, advanced image processing algorithms track the center of the marks, which ensures accurate strain measurement even as the gage marks distort during a test involving high elongation.Most noncontact extensometers can only size relative measurement-for example, the measurement of change in displacement relative to an initial distance.
In contrast, newer advanced video ex-tensometers are capable of absolute measurement, allowing extension to be measured in absolute displacement units in addition to percentage strain. This makes the next-generation video extensometer a Type 1 extensometer system as defined by the ASTM E 83 standard. Before the start of each test, the advanced video extensometer automatically measures the gage length-in absolute displacement units-and uses this for calculating strain. This eliminates errors introduced by inaccurate specimen marking.
Next-generation video extensometers also are capable of transverse strain measurement, making them useful for applications such as plastic strain ratio in sheet metal testing.

Next-generation, noncontact video extensometers are replacing traditional contacting extensometers in many material tests. Furthermore, noncontact extensometry has many advantages over contacting extensometry in terms of productivity, ease of use and performance. NDT
Looking for a reprint of this article?
From high-res PDFs to custom plaques, order your copy today!


