Sixteen Eyes are Better than Two

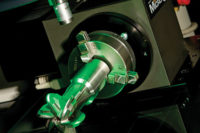
A technician loads tubing into the TubeInspect for optical measurement. Source: Allied Vision Technologies
Like a network of arteries, pipes and tubes-such as those used for fuel or brake fluid-ensure power and safety in cars. When installing up to 12 different lines in a vehicle, every millimeter counts, because space underneath the vehicle is tight, and mistakes in installation-such as of a brake fluid line-can be detrimental to driving safety.
The tubes, shaped into complex patterns by bending machines and delivered in fixed dimensions, are therefore subject to the strict quality criteria of the automotive industry. For that reason, the quality check must be precise yet also fast and uncomplicated, so the correction data can be transferred to the pipe bending machine as quickly as possible.

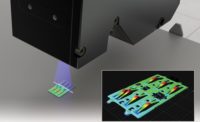
A 3-D model is rendered from the data collected by the TubeInspect system. Source: Allied Vision Technologies
Digital Quality Inspection
Traditionally, the automotive industry uses mechanical gages for quality control; the shaped pipe is inserted and checked visually. However, this inspection process proves to be extremely inflexible and cost-intensive, because the gages have to be manufactured for each tube and vehicle type, and altered for even the smallest changes in geometry.Aicon 3D (Braunschweig, Germany), a provider of optical 3-D measurement systems, developed a different approach to measurement of tube geometry and quality inspection in pipe production. Aicon’s TubeInspect works with 16 high-resolution Marlin digital cameras from Allied Vision Technologies (Newburyport, MA), a supplier of cameras and components for industrial image processing. The subject to be measured is placed in TubeInspect’s optical measurement cell, and its geometry is digitally determined via the cameras. TubeInspect measures tubes with diameters from 4 to 200 millimeters, or from a fraction of an inch up to 7.9 inches.
The measurement process is quick: the measurement of a line with 15 bends takes about 10 to 20 seconds. The results of measurement can be recorded in a database and documented during the process. Once the data has been recorded, the software does a target/actual comparison. Variances are displayed in color onscreen with the aid of a curved surface tolerance calculation. If the tube measured needs correction, the system can transmit the modification requirements via a server directly to the CNC program of the tube-bending machine.

A piece of tubing is measured in TubeInspect’s optical measurement cell; its geometry is digitally determined via the cameras. Source: Allied Vision Technologies
High-Precision Measurement
With the high resolution of the AVT Marlin digital cameras plus parallel imaging from different angles, bends between 5 and 180 degrees, as well as complex bend-in-bend forms, can be recorded without problems. “The internal memory and delayed data transmission (“deferred mode”) of the Marlin cameras from Allied Vision Technologies are especially well suited for TubeInspect,” says Günter Suilmann, head of sales at Aicon. “In this way, even thin and flexible lines can be recorded synchronously by all cameras, even if they are still moving. The FireWire interface (IEEE 1394a) also offers substantial advantages: frame grabber and multiplexer are not needed, which not only simplifies the system architecture but also cuts costs. In addition, cameras with high-image resolution can be used simultaneously, which enhances measurement precision.”Because of its precision and the fast transmission of corrections to the bending machines, the TubeInspect system has proven itself valuable in the automotive industry for several years. It is currently being used at about 40 different worldwide locations by automotive manufacturers and suppliers; it also is being used in application areas in the aerospace industry. Finally, TubeInspect won a 2007 German Industry Innovation Award, bestowed annually by the German “Initiative Mittelstand” (Initiative for small and medium-sized companies) and the publishing house Huber.
Benefits
Looking for a reprint of this article?
From high-res PDFs to custom plaques, order your copy today!


