Software & Analysis
Industrial CT Supports GD&T
Industrial computed tomography can help with your GD&T projects.

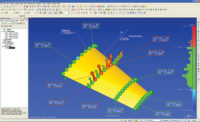
With industrial CT, a GD&T program can be developed for concentricity inspection almost as simple as measuring a basic dimension between two points. Source: Fundamentals of Geometric Dimensioning & Tolerancing – 2nd Edition

Here we compare the ease of measurement over multiple part inspection when using a CMM vs. Industrial CT based on complex callouts needed through GD&T. As you can see, a CMM is a viable solution but only up to a certain point. Then the time and costs multiply drastically as the measurement requirements become more complex. Source: JG&A Metrology Center


Manufacturers of complex component parts understand all too well how important it is to acquire an accurate and precise scale of measurement to check their parts to specification and establish conformity with the data. Much of today’s industry and technology relies on accurate measurement. Manufactured products are measured by instruments to check their conformance to the required fit and function based on GD&T standards. This need is all the more important in the aerospace, automotive, consumer products and medical industry, as part failure can cause the potential for huge recalls.
Industrial CT Scanning and GD&T
Turning to industrial computed tomography (CT) for your GD&T projects is a cost effective solution compared to other traditional methods because of the technological capabilities it can offer. With industrial CT you are obtaining a complete and accurate 3-D model of the part’s internal and external geometries after scanning. Complex parts are scanned in a free-state environment, allowing for both external and internal measurements to be made and validated quickly and accurately. Once the scan is completed, a GD&T program is written around the scan dataset and referenced to the part print for each GD&T callout. From there, the GD&T program is instantaneously applied to future scans of the same part, saving time and money for programming.
The one downfall of the technology is that a part being scanned is still bound by laws of X-rays and CT scanning technology. This means that the part must fit within the maximum scanning window of the computed tomography machine. The CT machine needs to be powerful enough to allow X-rays to fully penetrate the part and the part must be scanned at a high enough resolution to be effectively measured against the part print.
How Industrial CT Scanning Supports Highly Complex GD&T Projects
The challenges mostly come from using existing technologies that cannot complement the part’s quality assurance requirements in a cost effective manner. One particular inspection method that seems to be struggling to meet such measurement requirements in a cost effective manner is GD&T.
|
Tech tips
|
“The main goal for [measurement] uncertainty is to make sure the measurements taken by a certain system (gage, CMM, or the like) are appropriate for the application. The cost of having poor measurements is multiplied as the nonconforming components move through the processes towards final assembly and on to a customer.” – Paulo H. Pereira, Ph.D., ASQ-CQE, Global Quality, Caterpillar Inc.
Illustration A compares the ease of measurement over multiple part inspection when using a CMM vs. industrial CT based on complex callouts needed through GD&T. As you can see, a CMM is a viable solution but only up to a certain point. Then the time and costs multiply drastically as the measurement requirements become more complex. Thus we cannot dismiss the role industrial CT plays with GD&T and the accuracy and cost effectiveness that must accompany such measurement projects.
Case in Point: Concentricity
Concentricity is seldom used in GD&T part prints because the difficulty to inspect the part properly and the time required to perform the inspection is extremely high. Because of this, most part print designers avoid using this symbol and use several other GD&T callouts to hold similar boundaries. With industrial CT, a GD&T program can be developed for concentricity inspection almost as simple as measuring a basic dimension between two points.
Summary
You’re anticipating a highly complex GD&T project that will be time consuming, difficult to measure and not quite sure how cost effective it will be. Where do you turn to and why?
Inspection costs involving GD&T can be drastically reduced because you are obtaining a complete and accurate 3-D model of the part, both externally and internally without needing to destroy it. There are no external measuring forces to distort the attributes of the part, thus not allowing for inaccurate measurements which could inevitably cost you. Where traditional inspection methods could take up to weeks, an industrial CT scan process may be completed in a matter of hours giving you instant results on hundreds of GD&T points once a measured plan has been created around the part print and applied to the scanned data.
Industrial CT Scanning plays an integral part in GD&T when it comes to inspecting highly complex parts with multiple inspection points that need to meet the measurement requirements. Industrial CT scanning is setting a new standard in qualifying pre-production parts quickly and accurately while reducing inspection costs. This is achieved by using the right technology, expert analytical support, and proper calibration of scan data to ensure accuracy. The accuracy, efficiency and reduced turnaround times provided by industrial CT Scanning ensures that it will continue its trend of becoming a required tool for inspection, as industry leaders are identifying both the value in inspection standards and the cost-effectiveness it offers.
The bottom line is you receive a timely and cost saving solution because it reduces the number of inspection uncertainties and it upgrades standards in quality control. By utilizing a nondestructive inspection method such as industrial CT Scanning, you are able to drastically reduce pre-production inspection costs.
Looking for a reprint of this article?
From high-res PDFs to custom plaques, order your copy today!


