Case Study
GCH Gets TLC from Zeiss
In-house inspection proves machining capabilities for precision manufacturer.

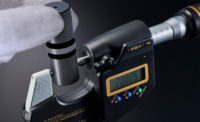
Zeiss Surfcom 5000 inspecting the surface of an aerospace fastener. Source: Carl Zeiss industrial Metrology

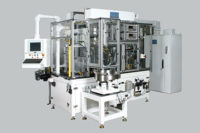
The GCH Group’s quality lab includes three systems from Zeiss: an Accura CMM, a Rondcom 60AS and a Surfcom 5000. Source: Carl Zeiss industrial Metrology

Zeiss Rondcom 60AS testing form of a transmission shaft. Source: Carl Zeiss industrial Metrology

Zeiss Accura measuring a spindle retainer. Source: Carl Zeiss industrial Metrology


For a number of years, the GCH Group out of Warren, MI had successfully used outside resources for their quality inspection and reverse engineering needs. Now they wanted to bring precision inspection in house to reduce machine setup and run-off times, and more importantly to prove that their machining capabilities were top-notch. With a lot of custom parts having target tolerances in the micron and submicron range, they were looking for automated inspection systems that could perform various types of measurements with high accuracy and fast throughput.
The GCH Group needed these quality inspection systems for two of their divisions: the machinery division that provides re-manufactured grinding solutions and the tool group that provides a dependable source for new spare parts and assemblies for machinery. Reverse engineering and quality inspection were needed for the tool group and the machinery division needed to qualify incoming parts and measure parts for machine run-offs. Since most of the machines the GCH Group produces grind round and flat parts, they also needed to measure cylindricity, roundness, squareness and flatness. Machine surface finish inspection was also required. They check waviness, profiles, radiuses and surface finish, meeting customer specifications to print.
The GCH Group’s goal was to have common service and software for all of their quality inspection systems, along with local support in Michigan. They found the solutions they needed from Zeiss: an Accura 9/18/7 coordinate measuring machine (CMM) for incoming inspections and reverse engineering, a Rondcom 60AS for form measurements and a Surfcom 5000 for surface finish inspections. Zeiss also had a technical center nearby in Brighton, Michigan. “Zeiss offered help, listened to us and offered programming support,” says Dan Geddes, President at the GCH Group.
The tool group produces a lot of custom, low-volume parts and measures anywhere from 50 to 300 parts per week. And the type of measurement varies widely, from inspecting spindle shafts to determining housing squareness to checking ovality. Sometimes, production of these parts is outsourced. Even then, they must pass incoming inspection on the Zeiss systems. The machinery side also deals with these same issues, but they also have to consider process validation of machines based on customer requirements. The machine is programmed to the customer required print and the CMM, Rondcom, and Surfcom are used to verify the setup and qualify the machine to the customer’s specifications.
Since bringing the inspection in house and measuring with the Zeiss systems, the GCH Group has seen significant time savings. They have also eliminated any discrepancies and disputes over the results. “Machine run-off time has been reduced from a week to two days,” says Dan. “And if there ever was a discrepancy with the measurements of the external measurement company, we’d have to start the process all over again and it could take two to three weeks.” Machinery setup time has also been reduced by 40 percent. In addition, their operators like the graphical interface of Calypso metrology software and find it easy to understand.
The GCH Group has also become a measurement consultant for some of its customers.
“A lot of them do not have the capabilities in house to measure all of their dimensional requirements and have asked us to help out until they have the right measurement equipment,” states Dan.
“One of the best things about owning the Zeiss systems is that we can now see and prove our quality and performance,” says Dan. “Our customers also know Zeiss equipment is trusted in the manufacturing industry so the CMMs have become great selling tools for the GCH Group.”
Carl Zeiss Industrial Metrology, LLC
6250 Sycamore Lane
Minneapolis, MN 55369
Looking for a reprint of this article?
From high-res PDFs to custom plaques, order your copy today!


