Shaft Measurement 101
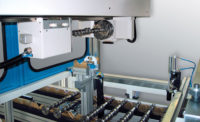
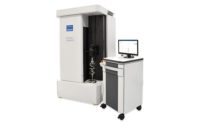
Shaft measurement tools have proven their reliability at manufacturing sites around the world.


In today’s manufacturing environment high-precision noncontact optical shaft metrology is a solid investment, whether it’s an entry level SPC measuring station operated by the workers or a fully automatic system for 100% part inspection.
The hardware and software for these systems are optimized for use in production environments and provide gaging component capability focused on maximum reliability over periods of time. These systems have been designed for continuous operation, reducing wear using a non-tactile optical sensor that also eliminates the risk of collision. Ideal for worker self-inspection, these systems are supported by intelligent and user-friendly man-machine interfaces.
Tremendously high reliability and extreme precision make these types of systems particularly beneficial to the aerospace industry. Examples of existing applications are carrier shafts for aircraft engines and drive parts in helicopters, including a measuring system for rotary parts with a diameter up to 30 millimeters (mm) and lengths up to 200 mm. For particularly large and heavy workpiece applications, additional shaft measuring systems have measuring capacities for diameters up to 480 mm and lengths up to 2,500 mm.
Nearly universal in application for shaft type workpieces, optical shaft metrology offers maximum flexibility as well as the potential to replace more conventional gaging components. Dimensional features such as lengths/distances can be measured as can geometry elements (angles, radii, etc.), form and position tolerances (roundness and run-out), and thread measurements all in a single pass.
Using a simple measuring program to combine these evaluations, the operator can quickly and easily generate quality assurance information during the production process from a single measurement. This is a big advantage, for example, compared to more conventional measuring machines needing to be reset for each measurement and where large numbers of measurements exist. Added flexibility comes from part holding devices using Morse tapers, enabling quick loading of new workpieces that eliminate lengthy setup times.
These systems deliver long-term gaging capability with micron accuracy in very short cycle times, with measurement results being available within just a few seconds. With conventional measurement systems, complete measurement of a workpiece often lasts several minutes.
Robust
These types of optical shaft products have several advantages over competing technologies when it comes to system longevity. The single biggest advantage is the noncontact optical sensor, which helps eliminate contact wear on components. Robust, precision engineered, mechanical components are another significant advantage helping increase overall system reliability. Combining these two features into one package allows optical metrology systems to deliver industry leading reliability, over longer periods of time, than more conventional technologies are capable of.
Measuring principle
The workpiece is automatically scanned opto-electronically, using the silhouette principle, along its entire programmed length. The complete workpiece contour can be quickly and precisely evaluated as a result of the high measuring resolution. The outside contour data of each workpiece is recorded during part rotation between driven centers. Multiple standard measurement functions can be combined in a single optimized part measuring program, which then can run automatically.
Simple to use
User control of these measuring systems is simple. Using pre-programmed standards, measuring programs can be created with just a few mouse clicks. Creating programs, display screens and other part processing results takes place easily and naturally by means of a Windows based graphical user interface (GUI). Depending on the measurement task, the user can use standardized measuring functions that can be quickly combined into one automatically optimized measuring run. Once complete, finalized measurement results can be displayed onscreen for reliable analysis.
New test programs can be created in just a few simple steps. First the workpiece is loaded into the measuring system and clamped between centers. Second the part is rotated and completely scanned, and the results are saved into program memory. (This only lasts a few seconds). Last but not least, new test characteristics may be added by selecting them from the standardized software options. This capability helps guarantee future value for a wide range of applications, and the high measuring speed ensures high productivity.
Automatic system monitoring maintains the calibration states of these measuring systems using integrated, high-precision step disks and temperature sensors, which are also utilized for intelligent temperature compensation. The integrated step disk replaces the normal setting master for daily use. Active temperature compensation automatically takes place during every measuring run, with the measuring system automatically monitoring itself for negative ambient influences. This offers a high degree of stability and quality assurance in production applications.
These systems offer a wide variety of flexibility for automatic or manual self inspection, and have proven their reliability at various production manufacturing sites around the world.
Keith Vince is a product specialist at Jenoptik Industrial Metrology. For more information, email info.us@hommel-etamic.com, call (248) 853-5888 or visit www.jenoptik.com/en-optical-shaft-measurement-systems
Looking for a reprint of this article?
From high-res PDFs to custom plaques, order your copy today!


