Case Study
Vision Systems Inspect Insulin Pumps
COGNEX SYSTEM HELPS FLEXTRONICS INCREASE YIELD TO 95%.


In the past, a top-selling insulin pump was inspected by 20 to 25 quality control inspectors using microscopes. Yield was about 85%, primarily because the subjective inspection criteria used in the past meant that each inspection was a judgment call. The manufacturer asked Flextronics International Ltd. Department of Manufacturing Technology if six areas of the part could be inspected with machine vision in a cycle time of 5 seconds. Flextronics considered using conventional "dumb" cameras and frame grabbers and writing custom software running on a PC but determined it would take 18 months to develop the application using this approach.
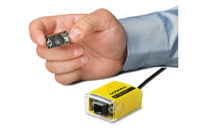
Instead the company used six Cognex® In-Sight® vision systems that Flextronics engineers programmed using a graphical interface to select pre-built algorithms that run on the vision systems themselves. "We were able to program six extremely complicated inspection operations in only six weeks by making use of Cognex pre-built algorithms," said Pablo Espinosa, Senior Design Engineer for Flextronics based in Aguascalientes, Mexico. The complete time to get the vision systems up and running was six months. The vision systems are mounted on a six-station rotary index machine that completely inspects one product every 4.3 seconds and has a capacity of over 13,000 products per day in three shifts. The vision systems inspect to an objective standard, increasing yield to 95% for the extremely complicated and close tolerance product.
Flextronics International Ltd. is an end-to-end supply chain solutions company that delivers design, engineering, manufacturing and logistics services to a range of industries and end-markets, including data networking, telecom, enterprise computing and storage, industrial, capital equipment, appliances, automation, medical, automotive, aerospace and defense, energy, mobile, computing and other electronic product categories. Flextronics generates $24 billion in sales by helping its customers design, build, ship, and service their products through a network of facilities in more than 30 countries and across four continents. Flextronics’ service offerings and vertically integrated component technologies optimize customer supply chains by lowering costs, increasing flexibility, and reducing time-to-market.
A new way to deliver insulin
Flextronics builds the insulin pump at one of its facilities in China. The insulin pump is about 4 by 3 by 1 centimeter in size. The pump is attached to the patient’s skin and controlled by a program running on the patient’s personal digital assistant (PDA), which keeps track of when an insulin injection is needed. When the PDA gives the command, a small needle pops out of the device and injects insulin into the patient. The device typically remains attached to the patient for about three days and while the device is attached the patient can take a shower or swim. Inside the device is a complex mechanism that safely inserts the needle into patient’s skin. Six different areas of the interior of the pump need to be inspected to close tolerances in order to ensure safe operation.
When production began, Flextronics deployed quality control inspectors with microscopes to manually inspect the interior of the insulin pump just before the case was sealed. The specific inspections include the position of the needle, the track that the needle rides on, the mechanism that traps the needle and several others. With the inspection criteria being primarily subjective, it was entirely possible for one inspector to pass a part that another inspector would reject. The critical nature of the product makes it essential to reject assemblies if there is even the slightest possibility that they might not perform their given function. The result is that initially only 85% of production passed manual inspection.
Flextronics and the company that sells the device agreed to develop a vision system to inspect the part in order to ensure the devices were inspected to an objective standard and reduce manufacturing costs. The Department of Manufacturing Technology Engineering at Flextronics has been integrating vision systems for nearly 15 years. In the past, the company primarily used what it describes as “dumb” cameras that do nothing more than acquire an image that is transferred to a frame grabber on a PC. A program running on the PC then analyzes the image and performs the part inspection. “The program needs to be written from scratch which can be very time-consuming,” Espinosa said. “Usually the most difficult part is writing an algorithm that identifies a reference point on the part from which to begin the inspection. This must be done before beginning the inspection because each assembly will be in a slightly different position when its image is acquired. In this case it would have taken about 18 months to develop this application using dumb cameras.”
Pre-written algorithms save time
“Frequently, on more challenging inspection applications we now use vision systems that provide pre-written algorithms that allow us to deliver a quality product in much less time,” Espinosa said. Espinosa started by contacting the Cognex Latin American (LATAM) group who helped develop a detailed proposal by determining the field of view, working distance and resolution required for each inspection operation. Cognex LATAM recommended the use of three In-Sight 1100, two In-Sight 1402 and one In-Sight 1403 vision system. It took 6 to 8 weeks to deliver the cameras so while he was waiting Espinosa worked on the vision programs using a camera borrowed from Cognex. Cognex LATAM worked closely with Espinosa throughout the project including helping in the technical feasibility tests.
Espinosa used the Cognex In-Sight Explorer software to select and configure the algorithms needed to inspect the part. “All of the algorithms are pre-built so I was able to build the code in much less time,” he said. “I started each inspection operation by using the PatMax algorithm to identify the location of the assembly. Then I used blob tools to check for the presence of specific parts, edge tools to identify the location of the part and caliper tools to measure the distance between two edges.” Espinosa dragged these tools into a spreadsheet to create each of the inspection operations. “I had the basic program ready in four weeks before the cameras even arrived.” Once the cameras were delivered, he fine-tuned and finalized the code in another two weeks.
Operation of dial machine
The rotary dial machine is controlled by a programmable automation controller (PAC). The operator loads a part into the first station and hits the start button. The machine indexes and the part just loaded by the operator moves to station number two where a vision system inspects a corner of the part. Each time the machine indexes, the PAC sends a command to each vision system to acquire and process an image. Each camera sends the results of its inspection to the PAC. The part then indexes to station three where another vision system inspects the top of the part. At station four, two vision systems are used to simultaneously inspect two sides of the part. In this station there was not enough room to mount the cameras aiming directly at the product so instead right angle mirrors were mounted near the sides of the part that reflect the image to cameras mounted above. At station five, two additional vision systems are used to inspect the other two sides of the part. The six vision systems inspect every area of the part except for the bottom which does not require inspection.
If the product passes all six inspection operations it is loaded onto a conveyor at station six where it travels to another area for final assembly operation. The HMI identifies products that fail to pass inspection and they are removed by an operator and placed in a container in which they are taken to another area for repair or disposal. The FTP tool in the Cognex cameras is used at the end of each inspection operation to send the image to the personal computer that runs the human machine interface (HMI). The inspection images for each camera are displayed on the HMI and operators can also call up earlier images to investigate problems and identify root causes in order to improve the manufacturing process.
The indexing machine, vision systems, PAC and HMI were all shipped to Asia for installation in the manufacturing site. Espinosa and Marco Esquivias (the engineer leading the entire mechanical design of the test station) spent only two weeks in China supervising the installation of the machine. When Espinosa returned, he helped resolve issues that arose during the prove-out stage by logging into the HMI from his desktop and viewing live inspection images on his desktop computer. He fine-tuned the code and uploaded a new version to the vision systems. “The yield on the five cameras ranges from 96% to 99% which is far better than could have been achieved with human operators,” Espinosa said. “The original cycle time requirement was 5 seconds but the index machine is able to achieve 4.3 seconds, providing 13,000 pieces per day over three shifts.”
Cognex
One Vision Drive
Natick, MA 01760-2059
877-COGNEX1
pr@cognex.com
www.cognex.com
Looking for a reprint of this article?
From high-res PDFs to custom plaques, order your copy today!


