Key Elements of Magnetic Particle Testing
Magnetic particle examination is a very effective nondestructive examination method for the detection of surface and near surface discontinuities.


Magnetic Particle Testing (MT), one of the oldest and most reliable NDT methods, is often not given the recognition it deserves. It is considered a “non-glamorous” yet necessary process in the field of materials testing. And while there are significant variables that must be considered, the procedures for accomplishing the inspections, it is a relatively straightforward and dependable method—if it is performed with qualified personnel, using qualified procedures and proper equipment. And yet with its relative simplicity, abuses still occur. These will be discussed later.
The Beginning
There are a number of different accounts as to how it all began. There’s the story as to how S. H. Saxby in 1868 observed the presence of cracks in magnetized gun barrels by passing a magnetic compass over them. History does not tell us whether this technique actually caused the gun barrels to be rejects or repaired. Probably the most noted early observance of the potential use of magnetism as an NDT was by W. E. Hoke who filed a patent application on April 9, 1919, for the precision gage blocks he developed. It is generally thought that while the blocks were being precision surface ground, the small metal filings congregated at the location of fine cracks that apparently developed during the grinding process. It is generally accepted that MT truly began in the United States through the efforts of F. B. Doane, Carl Betz, and Taber de Forest. Early applications included railroad parts, metal castings and other ferromagnetic materials.
The Basics - How it works
To put it simply, the part is magnetized with a suitable magnetizing force, then small ferromagnetic particle are applied (dry or in a suspension) to the examination area. Magnetic flux leakage fields which occur at the location of discontinuities attract and hold the particles forming an indication. The indication is evaluated based on its size and shape to the acceptance criteria. This method is especially responsive to linear discontinuities such as cracks, nonmetallic inclusions (stringers), lack of fusion, and other conditions that cause a flux leakage. It will primarily detect those discontinuities at or very close to the surface in ferromagnetic materials.
Since the flux lines created with a magnetic field are directional, their orientation with the discontinuities must be considered. The maximum response occurs when the discontinuity is oriented at 90? to the direction of the flux line. While all of this may seem basic to the reader, some of the basics bear repeating to prevent errors that still occur with this relatively simple NDT method. These will be discussed later.
Equipment
The equipment used in MT inspection can be categorized into three groups:
Portable: Permanent Magnets, AC Yokes, and DC Prods. (See Figure #1 for an example of permanent magnets, Figure #2 for an articulated leg AC Yoke)
Stationary: Wet horizontal units and systems.
Accessories: Box demagnetizers, coils, field indicators, particles, light meters
Basic Procedure
The prerequisite to achieving effective MT inspection is to have knowledge of the following:
1. The requirements – codes, specifications, and contract requirements
2. The test objects to be inspected including materials type, shape, size, quantity, etc.
3. The available equipment and accessories.
4. The qualifications of the inspectors
The second step is to develop the procedure to be followed. This should be a complete, standalone, step-by-step set of instructions containing all of the essentials required to produce meaningful, reliable, and consistent test results. The technique and correct magnetizing current should be established and then the procedure should be qualified to confirm it will be appropriate for the parts to be inspected. This is a code/specification requirement in some cases.
In order to obtain meaningful results, the inspection process should include the following:
1. Evaluation of the surface condition. While this is not as critical as it is with penetrant testing, it is important to address any surface roughness that may cause confusion or be interpreted improperly as discontinuities. It’s better to address the surface condition before processing.
2. The surface should then be cleaned with an appropriate cleaner to remove any surface contaminants that may interfere with particle movement on the surface.
3. The part can then be magnetized using the technique established.
4. Evaluate.
5. The part should then be inspected with the flux lines at a direction approximately 90? to the initial test.Note: In some cases it may be necessary to demagnetize the part prior to inspecting at 90? if the residual magnetic field is higher than the field to be used.
6. Evaluate.
7. Complete the test report as required.
8. The part should then be thoroughly cleaned and if necessary, a rust preventative coating applied.
Techniques
There are a number of key choices to be considered when developing the most appropriate MT technique for a given application.
1. Continuous vs. Residual - The continuous technique (current is flowing while the particles are being applied) will provide the highest level of magnetism in the part and therefore produce the greatest flux leakage at the discontinuity site resulting in a more noticeable indication. The residual technique when used should be limited only to those materials with high retentivity.
2. Wet Suspension Particles vs. Dry Particles – In general, the wet suspension particles are used with stationary equipment such as the wet horizontal units and preferred for the smoother surfaces. These particles are also available in pressurized cans for use with portable equipment. However, the dry particles are most commonly used with the AC Yokes, DC Prods, and Permanent Magnets.
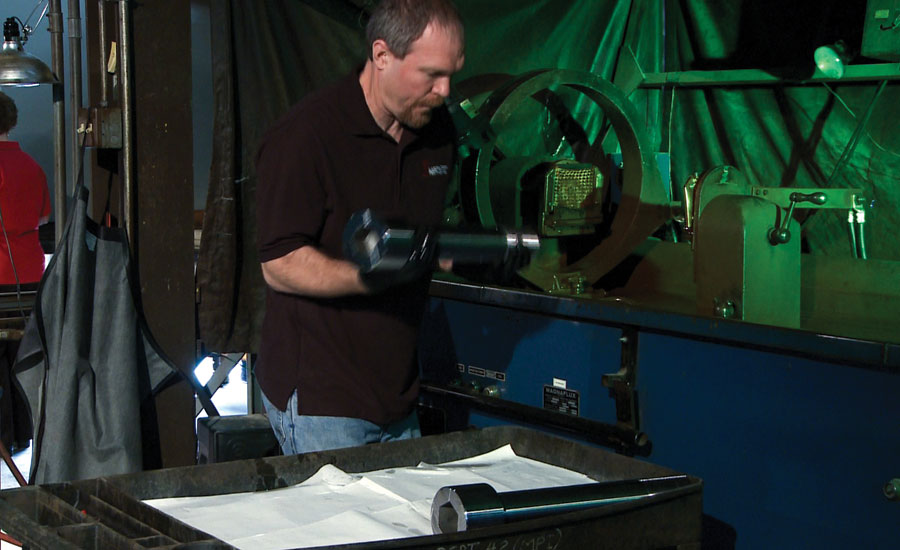
3. Visible vs. Fluorescent Particles – By far, the most sensitive (seeable) are the fluorescent particles. It is always advisable to use dry particles with colors that contrast best with the test surfaces, but with the fluorescent particles, the background is generally black or very dark purple when observing the test surface under a black light. The brilliant glow of the fluorescent particles against the dark background provides high contrast making the indication more visible
4. AC vs. DC – It is generally believed that parts magnetized with direct current will detect subsurface discontinuities. While it is true that this is the general understanding, MT should just be considered as an effective NDT method for the detection of surface and under ideal conditions, those that are slightly subsurface. The variables that determine just how deep under the surface a discontinuity can reliably be detected is influenced by its orientation, shape, size, vertical dimension, and the magnetic characteristics (permeability) of the test material. And with the use of DC there is always that possibility of arc burns where good contact between the test part and magnetizing equipment is not maintained.
Misunderstandings and Abuses
Even though MT is considered a “non-glamorous” and relatively simple NDT method to use, there are far too often procedure processing errors and shortcuts that can result in unreliable test results including:
1. Continuous
a. This technique requires the current (magnetizing force) to be applied to the part at the same time as the particles are applied. In some instances, the particles are applied after the current stops resulting in dependence on the weaker residual field. This is a more serious issue when the material has low retentivity.
2. Two directions
a. As mentioned in the procedure above, it is essential that the magnetic field be applied in at least two 90? opposing directions to assure detection of discontinuities regardless of orientation. There have been cases where the field is applied in one direction only which does not provide the assurance that all discontinuities will be detected.
3. Background Enhancement
a. One sure way to improve the contrast of the indications with the test surface is to apply a fast-drying white background lacquer to the surface prior to the application of dark particles. While this technique improves the visibility of the indication, some see it as an extra step which requires more time. We believe the extra time and small additional cost of the lacquer is justified in the benefits achieved.
4. Terminology
a. One of the major points of confusion in MT and in fact, all of NDT, is the improper use of the term “defect.” The generally accepted definition for “indication” is a response or evidence of a response disclosed through NDT that requires further evaluation to determine its full significance. Discontinuities are defined as flaws, imperfections or other conditions that are not part of the normal structure of the material. The term “defect” is continuously used improperly to describe a discontinuity and implies a defective condition which will essentially cause the part not to be used for its intended purpose. Some codes and standards do not always agree with this definition. To further illustrate this, one would not necessarily be reluctant to fly in an airplane with discontinuities since all planes have them, but no one would want to fly if the plane contained defects. It is hard to understand why there is so much reluctance to use the term defect properly.
Several Common Reference Codes, Standards, and Practices
• ASME Section V, Article 7
• ASTM E709 - Standard Guide for Magnetic Particle Testing
• ASTM E1444 - Standard Practice for Magnetic Particle Testing
• A275 - 15 Standard Practice for Magnetic Particle Examination of Steel Forgings
• ASTM A966 / A966M - 15 Standard Practice for Magnetic Particle Testing
Benefits and Limitations of MT
Benefits
• Very reliable for the detection of surface and slightly subsurface discontinuities
• The equipment can be portable or automated
• Indications appear directly on the surface
• It’s possible to inspect through thin coatings such as paint
• Surface preparation is not as critical compared to penetrant testing
• Equipment is relatively inexpensive as compared to other NDT methods
• Relatively easy to use and requires minimal amount of training
Limitations
• The need for inspecting in two 90? opposing directions
• Some metals, such as aluminum, magnesium, and most stainless steels, cannot be inspected
• Discontinuity orientation with flux line direction must be considered
• Demagnetization may be necessary
• Possibility of arc strikes when inspecting with direct magnetization techniques
• Can be time consuming depending on part size, quantity, configuration, etc.
Conclusions
In conclusion, magnetic particle examination is a very effective nondestructive examination method for the detection of surface and near surface discontinuities. It is widely used for a variety of structures during new construction and in-service applications. In general, it is a quick, low-cost inspection that is often the best NDE method for detecting surface and slightly subsurface discontinuities. NDT
Acknowledgment
Thanks to Martin Anderson, QA/NDT training manager, Global Technical Services, for his contributions to this article.
References
Magnetic Particle Inspection, A Practical Guide. David Lovejoy, Chapman & Hall, 1993
Handbook of Nondestructive Evaluation, Second Edition, Charles J. Hellier, McGraw-Hill, 2013.
Looking for a reprint of this article?
From high-res PDFs to custom plaques, order your copy today!


