CASE STUDY
Automated Car Body Measurement
Fixturing provides a solution for a VW automotive application.


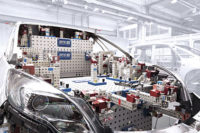
In the car body area of their Emden plant Volkswagen AG has taken a pioneering series measuring area into operation. From a loading area with eleven parking places the measuring plates, mounted with car body parts, automatically go into measuring stations. The responsibility for the entire transport system—consisting of eleven transport measuring plates with rail transport, computerized drive and safety technology—lay with Horst Witte Geraetebau. The mechanical engineering company from Bleckede, Germany, has provided a process-safe system, which is characterized by compact components and high precision—and thereby absolutely suitable for measuring room applications.
Volkswagen EmdenVolkswagen in Emden is the largest industrial employer west of Bremen and north of the Ruhr area. The Emden plant has a total area of 4,100,000 square meters, of which about 40 percent is developed. Further facilities include parking spaces for the shipment of vehicles and a vehicle test track. The models Volkswagen Passat Sedan, Passat Variant in the eighth generation, Passat Alltrack and Volkswagen CC will be made. In 2013, about 9,200 people were employed there, and 208,800 vehicles were produced. The plant was founded in March 1964 during the “golden age” of the Volkswagen Beetle, of which in Emden in 1978, 2.36 million units were built. But other Volkswagen vehicles also come from the plant on the North Sea coast, amongst others the Transporter, Golf 1, Audi 80, and Santana. The most important and most successful model is the Passat, which has been manufactured in Emden since 1977. For the Volkswagen Group, the port of Emden is one of the central hubs for the import and export of new vehicles. Meanwhile, the seaport of Emden is the third largest automobile transshipment port in Europe after Zeebruegge and Bremerhaven. Here almost all Volkswagen Group brands from European and overseas locations are handled. About 800 ships, 100,000 cars and 50,000 trucks per year come to the Ems estuary to deliver or pick up vehicles. Every working day some 6,000 new vehicles pass through the location and the harbor. In total over 1.2 million vehicles per year are imported and exported – and the number of units is increasing. |
For 50 years, the Volkswagen plant has existed in Emden. Since then the East Frisian town with its seaport has been the “Gateway to the World” for the automotive group. Where once the first VW Beetles were built for the North American market, the site later became leading plant for the globally successful Volkswagen Passat. In order to maintain local innovation and performance capabilities for the future, by 2018 Volkswagen will have invested around one billion Euros in the Emden plant.
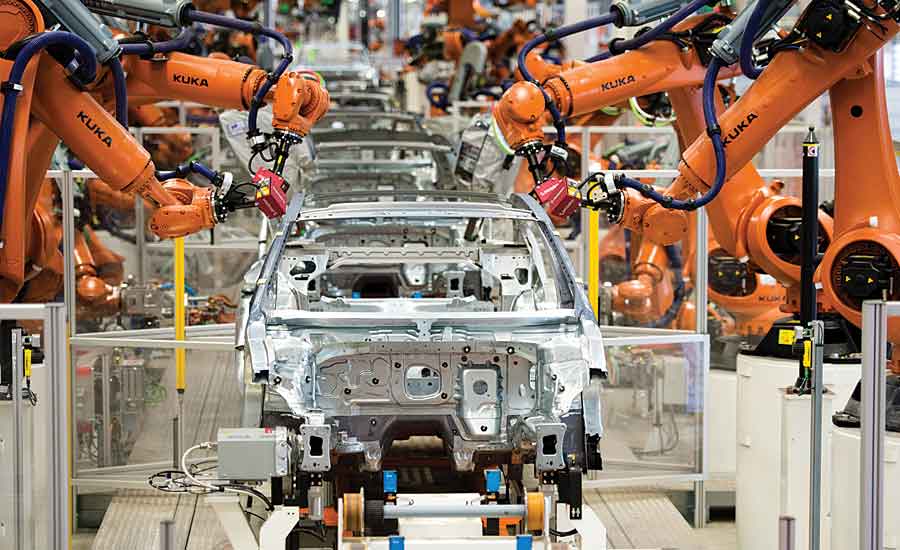
Volkswagen has made its first mark with the new car body hall, which began operation in mid-2014. On more than 63,000 square meters surrounded by pioneering technology—including over 1,000 installed robots—the new Volkswagen Passat is built here in its eighth generation, and for the first time in this segment Volkswagen is using a modular transverse matrix (MQB—Modulare Querbaukasten) as a basis.
An important element of the new body hall is also the complete newly designed Series Measuring Room, which is no longer traditionally within the manufacturing area, but is arranged with almost 900 square meters and greater flexibility on the periphery of production.
Guenther Fisser, responsible as project manager in the new measuring area, said: “In our new series measuring area, we measure a total of 26 defined main subassemblies from which the new Passat as Sedan, Variant and later the CC are derived. Taking into account the different versions, for example, right and left hand drive or different motor versions, it is possible to make up to 96 different vehicles using the modules.”
Series measuring room sets new standards
To equip the series measuring area in a similarly innovative way it was necessary to develop visions early on in the process. Guenther Fisser describes the basic idea: “Our primary goal was to increase efficiency similar to our colleagues in manufacturing. We aimed to take advantage of advances in measuring technology to perfect quality assurance. On the other hand, it was necessary to save time, and this mainly appeared possible to us during the loading process of the measuring equipment.”
Thus, the vision of a measuring room developed containing a setup area in which all modules can be fixed onto measuring plates without any time-consuming exchange of supports and fixtures. These plates should then go automatically into the measuring ranges, where the required inspection results are captured and passed on for automated evaluation. Also suitable measuring systems for capturing elusive design elements should be present.
In order to turn this idea of a semi-automated measurement into reality, those responsible explored the technical possibilities and entered discussions with potential suppliers. Alone the demands to be made on the horizontal and vertical plates that would be required were enormous and clearly restricted the circle of suppliers. On the one hand the plates were to be highly accurate, but on the other include a walk on function. They were to be characterized by the most compact design possible, but still contain extensive drive, control and safety technology. Moreover, one requirement was that the whole system should be automated on a floor-level rail guide in order to maintain maximum freedom of movement in the area in every way.
Witte develops customized automation
Finally, Horst Witte Geraetebau Barskamp KG (Bleckede, Germany) was selected. “Witte is known to us as a high-class manufacturer in the field of fixturing technology and grid plates, with whom we have cooperated in different areas of quality assurance for many years,” says Guenther Fisser. “Once again the company met our demands and agreed to develop a customized solution. In a word: the result is as unique as our entire measuring area.”
Witte took over the responsibility for the entire transport system—consisting of eleven sandwich measuring plates with rail transport, computerized drive and safety technology. The measuring plates alone are pure high-tech. The proven Witte sandwich plates in aluminum are used here as a basis for measuring fixtures as well as transport plates. They offer highest precision and rigidity with relatively low weight. But the essence lies inside the aluminum sandwich plate system. In addition to the elements for rigidity, space had to be provided not only for the components needed for electronic controls, drive and safety technology, but also for hydraulic components and batteries. It was also important for the developer to provide the necessary cavities to integrate it all whilst not compromising the rigidity of the plate.
The next critical point was the movement of the transport measuring plates on the floor-level rails. For this Witte developed a roller system with electric drive, the integrated batteries of which are charged at the parking positions in the loading area. To get from each of the eleven loading stations to the three measuring areas opposite, the rail system includes a cross transport path. The technique developed by Witte to turn by 90° into the cross transport path into a confined space commands respect from Guenther Fisser: “This was an important criterion that spoke for Witte as partner. Another was the highly accurate positioning of the plate in the measuring area.”
Accurate positioning in the measuring environment
Whereas normal driverless transport systems allow positioning in a range of several millimeters, Witte has a much more accurate solution to offer. The repeatable, accurate positioning of the transport/measuring plates, to tenths of a millimeter, is made possible by a system embedded in the floor. Witte uses a similar system for the parking positions in the loading area.
An important element in the collaboration involved work safety. To ensure this at the required level, Witte equipped the plates of the series measurement area with a safety system that secures each side of the plate with optical scanners during operation. If a plate moves towards an obstacle it will stop automatically at a certain distance. If the obstacle is removed, the plate starts moving again.
The complete coordination with the other participating companies was also demanding. Early in the design phase Witte had to determine the room layout in consultation with the client, and manage the floor level installation of the rails with the correct track width with the construction company. Witte also positioned over 70 RFID tags next to the rail network, which provide permanent position monitoring of the plates.
Always in communication with the host computer
The overall coordination in the series measurement area is provided by a master computer, with which all Witte plates, including drive computers and safety technology are permanently connected by means of IW-LAN. It ensures that the measurement processes function automatically. Minor operator support is required at the beginning when new parts modules are delivered. They have to first be identified and registered which is done by Datamatrix and RFID scanners stationed at the two entrance gates. The master computer then allocates the modules to one of the eleven transport plates, five of which are equipped with vertical fixturing supports and six with horizontal.
When the sandwich plate is loaded, the host computer communicates with the measuring equipment and a so-called supervisor, which manages all measuring programs. Within seconds the plate is assigned to a measuring location and the corresponding measuring program. Once the measuring location is free, the plate moves towards the measuring location.
Measuring technology with perspective
Already in the car body production hall, quality-related assemblies pass through robot-assisted inline measuring stations, which measure 100% of each component. However, since these cannot cover all functional dimensions, it is an essential task of the Series Measuring Area to secure the inline measurement technology. Modules are regularly taken from series production and delivered into the measuring area, in order to check all test characteristics. For the three car projects Sedan, Variant and CC there are approximately 10,000 measurement points from which approximately 1,200-1,300 functional dimensions are generated. From the detected values metrology engineers finally create a master record which ensures compliance and correlation of the in-line metrology in the car body production area.
For this task, there are two duplex coordinate measuring machines (CMMs) sized 7,000 x 3,000 x 2,700 mm available in the measuring room. They generally register the required inspection points tactilely, but they are also able to scan using optical sensors.
Whereas quality statements via CMM are proven technology, a further station is setting a standard for the future: a photogrammetric duplex measuring cell, automated with a double-sided multi-axis robot system on linear axes. Guenther Fisser is especially proud: “I’ve never seen such a measuring cell in series measuring. Our system is able to measure all cut-outs for front and rear windows, doors and decklid in a minimum of space and in no time at all. You can also capture design features, such as the so-called tornado line or the roof edge line on the side part and show the ultimate visual quality. Measurement capabilities extend to complete digitization of the body that lasts no longer than 20 minutes.”
The components are measured in the robot cell without spraying, gluing or modifying them in any way—a very important criterion for use in series production. In addition, it would be the first time that communication between two photogrammetric sensors allows a real-duplex operation in measurement mode.
Guenther Fisser sums up: “Our new Series Measuring Room, with its advanced measurement technology and automated transport offers the best perspective for a successful future. We are well equipped for any future measuring tasks, and are highly competitive due to increased efficiency.”
Looking for a reprint of this article?
From high-res PDFs to custom plaques, order your copy today!


