Metrology Looks Towards Automation
Metrology and inspection solutions aim to stay in-line with factory automation.

Walking the floor of the International Manufacturing Technology Show in Chicago—between the 100,000-plus attendees and the thousands of booths—it was impossible not to notice the ongoing trend towards speed and automation in every aspect of manufacturing. It’s no different in metrology, as more manufacturers look to automate their inspection processes.
“We have seen a very big upswing in applications that require automation,” says Mitutoyo Solutions Manager Ken Myers. “As you know, with the reshoring of manufacturing taking place in the U.S. and North America as a whole, there is still a concern about labor cost, which is what pushed it overseas in the first place. So we see many manufacturers utilizing their skilled labor in more productive ways to achieve higher throughput, while still keeping labor costs to a minimum.
“There’re also trends to more flexibility in the inspection processes, so the traditional, fixed, dedicated gages are being replaced by CMM’s, vision systems and other types of automated or CNC-type systems.
Laurent Porte, managing director of Metrologic, has seen this increased need for inspection automation reflected in the demand for in-process solutions.
“People are telling us, ‘we want to inspect faster. Whether it’s manual inspection or even CMM inspection, we want to inspect faster because—by the time we take our parts to the CMM room—the part has to cool down, we have to inspect it and generate a report. Many, many other parts have been manufactured and run through the line, so if we have a defect we don’t see it very quickly.’
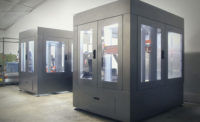
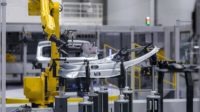
“So the idea is to bring the inspection means into the manufacturing line and to basically detect an issue as early as possible. And what we see is the need for two things: either in-line automation cells, so a cell that’s installed in the production line, whether that’s an assembly line or whatever is being manufactured. Or we also see standalone cells that are installed alongside.”
Non-Contact Metrology
In addition to portable CMMs and those equipped with scanners, many manufacturers are also looking towards non-contact laser scanners to match the speed of the manufacturing line.
“I see some people are looking for a quick verification on geometry, making sure nothing is flawed or nothing is blatantly wrong with the part,” Porte adds. “But I also see people who are doing the actual full inspection, GD&T tolerances and verification of the parts to say ‘I checked my parts at the final assembly stage, and I’m confirming that it’s OK.’”
Automated laser scanners may not yet match the accuracy of high-end CMMs, but for inspecting stamped parts, sheet metal, welded assemblies, and other large automotive applications that require tolerances of plus-or-minus 0.5 mm or above, robotic scanning is a good fit, Porte explains. “Below that, it’s arguable, and I think you still need to stick to conventional methods.”
While the automotive industry is the obvious growth area for in-line metrology, there are also applications in the aerospace and energy sectors, among others.
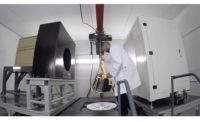
Pete Morken, senior applications engineer at Nikon Metrology, pointed to a recent project using Laser Radar technology to check the geometric integrity of flat or parabolic mirrors and understructure used in solar energy, checking for faulty bending and misalignment.
“They had hundreds, if not thousands, of mirrors that were all focused on one spot on a tower, and they had an automated process where we would verify the shape of each of the individual mirrors. They were just (inspecting) one mirror after the next, this all affects the focus of the solar light on that one spot, so that was important.”
Laser Radar directs a focused laser beam to a point on the object being measured and recaptures a tiny portion of the reflected light to determine absolute range to the measured point, according to Nikon, as opposed to laser trackers that use an SMR (spherically mounted retroreflector) or other probing device to be held manually against the object being measured. Combined with measured horizontal and vertical laser beam angles, the 3D coordinates of the acquired points are determined in real time with laser radar. The system can run unattended and be set up on multi-axis robots for automation like other laser scanning products.
Cost
Whether or not a laser scanner will save money over a CMM depends on the size and accuracy of the machine.
“We have a customer who is looking at a new, large CMM and it would be about $700,000,” Porte says. “And they’re saying ‘what would be my cost if I went with a robotic laser scanner.’ And I think it’s going to be about $500,000, so it’s going to be cheaper. But if you have a smaller CMM, that would be cheaper, as well. So, it’s not necessarily cheaper, but it’s comparable. What it brings to you is more flexibility. We talk about flexible automation in manufacturing, and not so much with metrology. But now with robots, you get that flexible automation, where you can really inspect in a volume with a lot of ease because it is robotic and it can go in any direction.”
Trend Origins
Porte says he first began to notice more 3D robotic laser scanners at the previous IMTS, two years ago. In the time since, the selection and accuracy has multiplied.
“Robotic inspection cells have existed for a very long time, but mainly on assembly lines in automotive plants. But they are basic point scanners, not line scanners or areas scanners. And what they will do is verify gaps ... and sheet panel positions fairly well, they give you those points. But that gives you an amount of info that is very limited, as compared to now, what we can do with the Nikon Laser Radar, which is extremely fast and can measure thousands of points very, very quickly, or the new scanners from Creaform, Steinbichler, Hexagon and API that can acquire millions and millions of points— where what you can do is not just verify position, but you can verify the overall actual form of the part. So the more we can acquire and analyze the data faster, we can stay within the cycle time.”
Computers and Software
Faster PCs with quad-core, 64-bit processors have helped allow for the quick processing of large volumes of data.
“The ability to open a CAD model fast, when you do online or near-line inspection is very critical,” Porte says. “If you have to wait minutes, you’re dead in the water.
“Your ability to acquire and analyze very large point clouds is also extremely important. So we at Metrologic have worked very extensively on our Metrolog X4 platform to be able to achieve those results. So we can manage large scale data in a matter of seconds. Same for point clouds, we can manage them in a matter of seconds, do the analysis extremely fast.
Software platforms like Metrologic’s also aim to allow manufacturers the flexibility to quickly align the robot with the part being inspected and make other adjustments.
“When you look at the iPhone, I believe one of the reasons for their success is they have a very powerful interface, yet it is very user friendly, very easy to use. It will almost kind of guide you, it will sense where you need to go, but in the background it’s very powerful. So we want to bring all these things together, so it doesn’t become a nightmare to manage something that should stay quite simple.
Looking for a reprint of this article?
From high-res PDFs to custom plaques, order your copy today!


