Image Processing
Recent trends and long-established demands on machine vision.

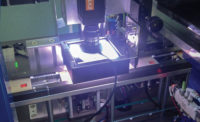
Small camera with big lens. Source: EVT

Connector 3D pin inspection with EyeVision software. Source: EVT

3D point cloud detail of pin inspection. Source: EVT

Connector 3D point cloud. Source: EVT

Thermal imaging EyeVision software milk jug. Source: EVT

EyeVision software screenshot of thermal imaging. Source: EVT

Thermal image with EyeVision software. Source: EVT


If something exists that really has the ability to multitask, then it would be a machine vision system: they inspect, guide machines, control sequences, identify component parts, read codes and deliver valuable data for optimizing production. And this all can be carried out at nearly the same time.
For several years now—or has it been a decade already?—the application areas for image processing systems have spread enormously. On the one hand industrial cameras, e.g. smart cameras, have become faster, more robust and, what’s more, their resolution has increased. Also 3D sensors have improved and developed, so that they have outgrown their childhood diseases. In addition, machine vision software is also developing steadily. A few years ago only engineers with programming knowledge could create inspection programs. Whereas now even users without programming skills can put together inspection programs for their application with software that is easy-to-handle. Due to the drag-and-drop functions or other intuitively self-explanatory software functions, simple components can be put together for a complex total flow.
This is a major improvement, because all machine vision systems, regardless if they are smart camera or PC-based systems, depend on their software. These vary from a simple interface driver, which can only captures images, up to the use of complex pattern matching tools.
So the selection of the hardware and software has a major role in image processing circles and the increasing demands of production plants have had a huge influence on the development of machine vision systems. But some must-haves in image processing have not and maybe will never change.
The basis is mainly the visual error detection. Then and now the customer demands a flawless product in utmost quality. Back then a human eye was sufficient to detect errors, but now more and more manufacturers are using smart cameras, vision sensors, or other machine vision systems.
There are defects that can lead to material faults, which can be avoided because of better lenses, new technologies and the higher resolution of industrial cameras and whose detection is of utmost importance. So, as the camera sees more than the human eye, the demands on product quality have changed as well. Or was it vice versa and the demands have influenced the development of machine vision?
New applications can be solved using a 3D sensor and 3D command set to measure the point cloud. Regarding 3D there are different methods, which can be useful for different applications. For example a time-of-flight sensor has a technique similar to radar and therefore is mostly used for 3D-object detection, but not for accurate measurements. Applications for time-of-flight sensors are automatic loading and unloading of boxes or containers with a robot.
A fringe projection 3D sensor allows for fast measurement. The high speed of the fringe projection is useful for the inspection of completeness, form deviation, position of component parts or volume measurement.
But the most common technique is the laser line scan with on-board preprocessing. The 3D laser profile measurement is based on the principle of triangulation. For a typical setup, the laser is positioned directly above the object and the camera is positioned with an angle of 30° to the laser. A laser triangulation sensor has significant advantages so it is good for a detailed measurement. An example would be the inspection of pins on a connector. There one can measure the wobble circle and pin depth. When capturing a 3D image from a connector, one can see very clearly if the pin is bent or if the pin is set too deep into the connector or if it is sticking out too far. This is because the inspection program not only measures the pin-peaks in x- and y-direction but also in z-direction.
Relatively new are terms such as nondestructive testing. Due to the new development of thermal imaging in machine vision, it is now possible to detect the quality of a product, according to the temperature, without changing the product, or without damaging the product. Thermal imaging cameras capture data such as if a seal edge is completely gasketed or if fiber-reinforced composites are broken inside.
This means that, for example, in the food & beverage industry the inspection of packaging sealing, fill level or the temperature of perishables is a significant part of quality control. Up to now some quality characteristics could only be checked by taking samples. Nowadays, a continuous inspection of all products is possible, thanks to thermal imaging. To inspect a nontransparent plastic bottle and its contents, often thermal imaging cameras are used. And what’s more, the label print, the flawlessness of the exterior and fill level of the bottle can be inspected at the same instant. This then results in a higher process efficiency and productive capacity with checked quality. The thermal imaging camera recognizes the radiation of the temperature of the liquid inside the bottle. The IR-image is then evaluated via machine vision software.
The definite benefit: instead of having to take samples and insert them into measuring plants to control the quality of the product, the image processing system is integrated into the production process and measures each component, without having to reduce the production flow and speed.
In fact, it is a long-established demand on machine vision: to keep up with increasing production speeds. A legitimate question therefore would be: can machine vision systems keep up with the constantly decreasing cycle time of production plants? Especially because machine vision needs a lot of computing time. Hence, to solve complex applications, more and more powerful processing power is necessary. It is therefore essential to mention that, compared to the production speed, the image processing systems benefit from the disproportionately fast growing computing power of processors.
One example for a fast production process is the pressing technique. In the past a punching machine produced about 25 pieces per second. Now the punch press can produce up to 40 pieces per second. This means an increase of about 60%. During the same period the computing power has increased by 3,000%. It’s true that the applications have become more complex and need more computing time, but not to the same extent as the computing power. Therefore the available computing power is more than sufficient for the bigger part of machine vision applications.
That is the reason why today smart cameras are used for machine vision solutions. The computing power of smart camera processors is much less than those of PC-systems, but still are many times higher than the production speed.
There is another point to consider. An increasing speed also results in a bigger information flow-rate. But how to cope with the increasing throughput?
The availability of the data is guaranteed by the different software protocols integrated into the image processing systems. This is important when considering Industry 4.0 and the necessity to save the data and to have all quality related data at one’s disposal, even for batch size 1.
For this we have standard protocols such as TCP/IP or also OPC UA or PROFINET, which communicate with the connected SCADA systems and receive the inspection orders from the central computer and then forward the inspection results. Those systems have sufficient resources to control even a big amount of data.
Another trend is the miniaturization of the image processing hardware. Is it really a demand of the production plants that industrial and smart cameras have to shrink to the size of a thumbnail?
Of course there is a market for compact and small systems, even when they are then built into a big production plant, where there would be space for an embedded system. But it is another question, if this is really necessary for the machine vision solution.
Surely there are applications where there is not much space for the camera. An example would be a robot arm for grabbing small objects. This means that the robot arm itself should be quite small as well. In this regard the miniaturization for the semiconductor industry has moved things forward and so now almost all demands in size can be fulfilled.
In a nutshell, there are applications where the cameras have to be smaller and smaller, but for the majority of cases, this is not necessary. If you just have a look at the physics, the increasing miniaturization can lead to absurd constructions. For example, the lenses are sometimes much bigger than the cameras. And therefore the camera does not get mounted on the production plant, but the lens, and the camera is then mounted on the lens.
And finally, one should mention that image processing is part of everyday life. Every smart phone now can capture images, for example, saving data from captured business cards into the address book.
Looking for a reprint of this article?
From high-res PDFs to custom plaques, order your copy today!


