As the new year brings new budgets, the reality of muted economic growth for 2017 becomes clear when the subject of corporate spending arises. Even when new budgets have been approved for capital expenditures, which include metrology systems, there could be a hesitance to begin the procurement process, including resistance right from the top of the organization. According to the Washington based Business Roundtable CEO Economic Outlook Index, expectations for revenue, capital spending, and employment declined from the previous 2016 quarter. This recent survey suggests that although capital expenditures may be budgeted for the new year, executives are looking to prioritize spending based on productivity and technology that boost company competitive advantages.
Quality or manufacturing professionals that seek to add new metrology technology must now compete with other entities within the organization, all competing for dollars that will be the high priority capital spending within the company. While many times it is a specific project that initiates the procurement of a measurement system, touting the broader application and the capability to support both new and existing projects is key to raising visibility and priority when proposing capital expenditures. Justifying investment is all about value and is a critical element in the success of keeping a measurement system high on the list of corporate spending priorities.
Use Multisensor Technology to Improve Value
To rise to the top of the corporate priority spending list, one must show high value and return on investment. Measurement systems that can show versatility by satisfying the current project requirement and having capability for the future have the best chance to rise to the top of spending priorities.
The value proposition for choosing a multisensor measurement system, compared to a single sensor machine, is productivity and cost savings:
- Multisensor metrology uses two or more different sensors to acquire data points from features and surfaces. Using multiple sensors allows the user to optimize the measurement process, producing results far faster than could be done using systems with a single sensor.
- From a productivity standpoint, being able to measure all dimensions in one setup reduces costs compared to doing fewer of them on multiple single sensor machines.
- Training costs for metrology personnel are reduced with a variety of sensors being supported by a single metrology software instead of separate single sensor machines having unique measurement software.
- A multisensor system can take up less factory space, compared to multiple single sensor machines.
- Getting all measurements from a single system with common software avoids the potential problems from machines with different resolutions and calibrations.
- When programming part measurements from CAD, much of the work can be done off-line, away from the measuring system allowing it to be used to support production. Full 3-D software can aid programming and system operation with real time kinematic models of the system and sensors.
Versatility is a Key Attribute of Multisensor Technology
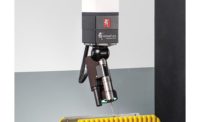
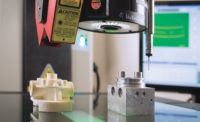
Versatility is a key attribute that allows the project engineer to optimize the measurement process, and is one of the important elements in the business case for multisensor technology. A typical multisensor system would have a selection of contact and noncontact sensors for acquiring measurement data points. Such a combination might include a touch-trigger probe (contact) along with a video/vision sensor and a laser (both noncontact sensors). The engineer would decide which features need to be measured and which sensor will provide the optimum combination of speed and accuracy for every measurement. For example, a turbine blade would need hundreds (or thousands) of data points to accurately represent the complex surface geometry.
While this could be done with a CMM-style scanning touch probe, it would be far more productive to use a scanning laser, which can collect a vast quantity of data points quickly and accurately. It is also critical to measure cooling holes on the blade using a vision-based measurement sensor, the best technology choice, both from an accuracy and speed standpoint. On a multisensor system, the entire measurement process could be automated, changing sensors automatically, without having to move the part between single sensor machines. All measurement should be performed by a single metrology software package that is designed to control multiple technology sensors. The ability to measure parts using a single setup keeps measurement uncertainty low—a crucial point that enhances overall accuracy.
The project engineer must understand the tradeoffs between the multiple sensor technologies available. No single sensor technology can measure every feature on today’s complex parts; therefore a variety of sensors may be needed to complete the entire part inspection. A typical multisensor system might have some of the following sensors:
Laser – (noncontact sensor) all lasers are not created equal, each configuration is designed to handle different measurement challenges. A triangulation laser, for example, may have difficulty measuring a deep hole, whereas a through-the-lens laser could easily and accurately measure that feature.
Data sampling rate: low (single point) and high (surface scanning).
Speed: high
Accuracy: medium
Optimum feature type: complex and variable surfaces with low reflectivity
Touch – (contact sensor) is the most common type of sensor on a CMM. There are many types and styles of touch probes, each suited for general measurement use, or specifically configured for hard to reach part features. A scanning probe adds contact contouring capability and collects a medium number of data points, and is driven by metrology software
Data sampling rate: low (single point) to medium (analog scanning)
Speed: slow (single point) to medium (analog scanning)
Accuracy: high
Optimum feature type: sharp, hard surfaces and features that are large enough for a physical probe to touch
Video – (noncontact sensor) optically magnifies the image of a part captured by a camera and converts to a video signal that’s analyzed by electronics and software to determine dimensions of edges and features.
Data sampling rate: high
Speed: high
Accuracy: high
Optimum feature type: defined edges, multiple features of similar geometry
Interferometric Probe – (noncontact sensor) a specialized measurement method using the phenomenon of interference of light waves. The probe has a steep imaging angle, allowing access to surface features that are recessed or located adjacent to vertical surfaces, as well as a long working distance.
Data sampling rate : high
Speed: high
Accuracy: high
Optimal feature type: thickness measurements on small, smooth, flat or transparent surfaces (glass), or small holes and recesses that may not be accessible by other probes.
Micro Probe – (noncontact sensor) although this sensor looks like a miniature touch probe, it is based on piezoelectric principles and is known as a dynamic single-point data capture method. This type of sensor is free from stylus bending and mechanical hysteresis since the probe doesn’t physically touch the part.
Data sampling rate: low
Speed: slow
Accuracy: high
Optimal feature type: soft, flexible, or fragile surfaces or edges and tiny features that do not allow regular touch probe back off and approach distances.
Software is Part of the System and the Solution
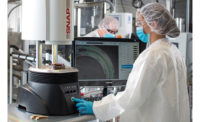
Modern metrology software interfaces easily with 3D engineering design files via standard CAD formats, such as IGES or STEP. This metrology software utilizes the 3-D design model to create measurement routines that will direct the multisensor machine to automatically measure the entire part, or measure just specific dimensions that are deemed critical. This measurement routine can be used over and over once the part goes into production. The programmed routine can also be easily modified for similar geometry parts.
Generally, the metrology software will analyze the measured dimensions, compare them to the CAD drawing, and show any variance. The engineering team can then determine if deviant dimensions meet the original design intent, and decide if these deviant dimensions can be corrected by changes in the manufacturing process, or in some cases, simply by changing the CAD drawing.
The interaction between the CAD drawing and the actual measured part can be a key element in both engineering and manufacturing productivity. For this reason, make sure that the system metrology software supports multisensor functionality, and the metrology software is part of the budgeted expense.
Bottom Line Conclusions
Be bold and confident when pursuing these metrology expenditures. Metrology systems have proven to be long term contributors to company measurement capability, capacity, accuracy, and productivity. Take the time to fully understand current measurement needs, and look into the future for new requirements. Configure the requested multisensor measurement system carefully, and this expenditure will be one with long lasting results that will affect the company bottom line in a positive way.


