Nondestructive Testing of Implanted Medical Device Materials
Detecting defects in medical devices before they are implanted is critical to ensure the safety and reliability of such devices.

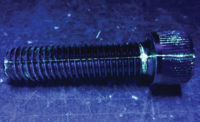
An example of tubing subject to ultrasonic testing.

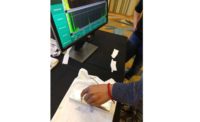
The ultrasonic signal from a typical defect.

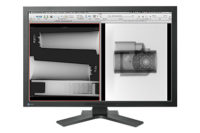
A chart recording showing the indications from the reference standard (left) and a typical defect (circled, right).

A chart recording showing a region below the minimum required wall thickness.

A chart recording showing a region with too wide a variation in wall thickness.


Nowhere is the need for material integrity more obvious than in medical devices that are implanted into human beings. A failed device inside an aircraft or power plant may, under some circumstances, cause a problem. A failed device inside a human being will always cause a problem. Therefore, assuring the integrity of the materials used for manufacturing implanted medical devices and the actual medical devices themselves is extremely important.
Nondestructive testing (NDT) is commonly used to detect defects in material without damaging the material or making it unsuitable for use. NDT contains a variety of methods which can detect defects open to the material surface and contained within the material itself (subsurface). Detecting these defects in medical devices before they are implanted is critical to ensure the safety and reliability of such devices. Two common methods used are liquid penetrant testing (PT) and ultrasonic testing (UT).
Liquid penetrant testing uses an inert colored liquid (called a penetrant) which penetrates into surface defects such as cracks or pores. The excess penetrant is removed from the surface, leaving only the penetrant which has formed a reservoir in any of the surface defects present. A developing powder is then applied to the part, which draws the penetrant out of the defects, creating a visible indication of the defect which can be seen under suitable special lighting.
The most commonly used specification for this inspection is ASTM F601 which is Standard Practice for Fluorescent Penetrant Inspection of Metallic Surgical Implants.
The first processing step is to thoroughly clean the part because any dirt, oil, machining fluids, or other surface contaminants can prevent the penetrant from entering into the defects. It should be noted that a majority of surgical implants are titanium, so it is critical to use non-chlorinated solvents for pre-cleaning to avoid possibly causing stress corrosion cracking in the material at a later time.
The penetrant is then applied, usually by placing the parts in a basket and immersing into a tank of penetrant, by spraying, or brushing the penetrant onto the part. It is important that penetrant be applied to the entire region to be inspected, including any holes and grooves. These areas can be stress raising features and are extremely critical to the reliability of the implant.
The penetrant is given a specified time, called a dwell time, to find its way into surface defects. After this time, excess penetrant is removed, usually by a strictly controlled water spray. Afterwards, the parts are thoroughly dried in a circulating warm air oven at 125 degrees Fahrenheit.
A fine powder, called developer, is then applied in a thin layer to the entire part. A specified time, called developing time, is given to allow the penetrant to seep back out of any defects. The parts are then inspected for indications of defects in a darkened area under an ultraviolet black light.
The most important limitation of liquid penetrant testing is that it can only find defects which are open to the surface. Penetrant testing is commonly used on finished parts with complex geometry, which is typical for implanted medical devices.
Also, because the liquid penetrant testing is usually being performed on finished implants, most manufacturers require a process material list of every material used for the liquid penetrant testing (cleaners, testing materials, gloves, etc.) to be documented and frozen unless a change has been approved.
Ultrasonic testing is very dependent on part geometry, so it is typically used on raw material with simple shapes, such as round tubing and bar, rather than finished parts. Common industry specifications are typically used for inspection, along with customer-specific requirements, depending how the material will be further processed.
Ultrasonic testing uses high-frequency sound waves to inspect the surface and the interior of materials. A probe converts an electrical pulse into a sound wave, the sound wave travels into the material through a liquid coupling medium and reflects off any boundaries it encounters, whether a defect or another surface of the material. A portion of the reflected sound is received by the probe, converted to an electrical signal, and displayed on a screen.
The time taken for the sound to travel gives information on the size and location of defects or the thickness of the material. For defect inspection, the amount of sound received is compared to the sound received from a precisely manufactured artificial defect, called a reference standard. This comparison allows a technician to estimate the size of a defect compared to the known reference standard. For wall thickness measurement, the time taken for the sound to travel through the material is measured and converted into a thickness measurement.
In this example, the material is round metal tubing with a very precise outside diameter and wall thickness. This material will be inspected for surface and subsurface defects. Additionally, the wall thickness and the variation in the wall thickness will be measured.
Ultrasonic testing is often done using automatic equipment. For this test, thousands of ultrasonic pulses are sent into the part each second, and are received and processed individually by the test system. The results are sent to a digital chart recorder, where they can be immediately evaluated by a technician.
The circled regions on the chart on the previous page recording show where the signals received from the probes exceeds the signals received from the set of known defects in the reference standard (shown at the left of the image). These indications show that this region of material contains defects which are larger than those in the reference standard.
This circled region on the top chart recording shows where the wall thickness of the tubing is below the required thickness. Material which is too thin will produce parts with regions which are too thin, which might fail in service.
The circled region on the bottom chart recording shows where the wall thickness variation is above the allowable amount. Too high a variation in thickness can generate wide variations in finished part thickness, which can be unsuitable for service.
The nature of implanted medical devices means that assuring their integrity is of critical importance. Nondestructive testing, often using multiple methods, is an important part of that assurance.
Looking for a reprint of this article?
From high-res PDFs to custom plaques, order your copy today!


