Boost Productivity, Profits with Active Controls
Increasing machine uptime has never been easier.

The Productivity+ CNC plug-in software application running on a CNC machine tool control. Source: Renishaw
The proverb “time is money” applies to almost every profession today, but especially to manufacturing, and certainly to CNC machining. Lights-out facilities are becoming more prevalent, and the importance of active controls with automated feedback is growing, too.
Here are three kinds of active controls that can be applied during the metal cutting process for increased productivity, reliability, and profitability.
1. Workpiece inspection probes
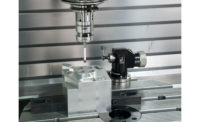
A great place to start is with workpiece inspection probes. At Renishaw, these on-machine probes allow metal cutting to automatically adapt to variations in the machining process, such as part distortion, tool deflection, and thermal effects. They also update coordinate systems, parameters, offsets, and logical program flow depending on actual material conditions.
In general, on-machine probes offer many advantages over fixtures and manual settings with dial indicators. For example, simply mounting a Renishaw probe automatically establishes fixture, job alignment, and rotary axis setup. From there, the probing system provides in-cycle part measurement with automatic offset correction.
It’s common sense that manual setting and manual gauging results in more human error and machine downtime. The common-sense solution, then, is to automate—and this is where humans can get creative. At Renishaw, inspection probing also facilitates adaptive machining, in that the probes provide in-process feedback to minimize variation.
2. Non-contact tool setter
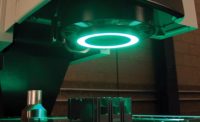
For high-speed, non-contact broken tool detection, turn to a tool setter. Look for one that can do rapid in-cycle checks on a variety of machine tools, and can be mounted outside of the working environment to save space, if necessary, with easy installation and setup.
For example, the Renishaw TRS2 is a fast, flexible, and cost-effective solution for maintaining in-process control. Though Renishaw offers many forms of automated tool setting, the TRS2 is special for its ToolWise tool-recognition electronics.
With ToolWise, each tool spends approximately one second in a laser beam in order to be detected; and if all’s well, the machining cycle continues. However, if no tool is detected during the user-defined time period, other options could automatically ensue. Through software programming (more on that later), and depending on the machine’s configuration and setup, the machine could stop, continue to the next operation, move on to another part, or substitute a replacement tool via an automatic tool changer.
As with in-cycle probing, the key word with tool setting is “automatic.” Compared to manual and contact methods, automated and non-contact tool detection provide significant benefits, with cost savings being number one. Common sense applies here, too, in that less scrap, machine downtime, and rework due to manual errors translates to reduced waste, higher productivity, and increased profits.
3. Smart software
The third active control is the most comprehensive. Probe software, that ultimate control center, should not only be active in-process, but also predictive in the setup stage and informative in post-process reporting. Moreover, the software should provide interactive programming of inspection and measurement routines, logic statements for on-machine decision making and process control, and detailed reporting of inspection and updates.
Renishaw’s version of this probe software for machining centers is Productivity+. Besides a standalone version of the software, Renishaw offers several Productivity+ plug-ins, including for GibbsCAM and Mastercam.
Besides simplifying common tasks like component setup and part verification, Productivity+ can assist in more complicated, in-process control tasks—tool condition monitoring, tool geometry updates, and adaptive machining, to name a few—to allow adaptation to variations in real-time cutting conditions.
Gianni Prioriello, software and applications engineer at Renishaw, has been supporting and providing training for Productivity+ for about three years.
“It’s pretty powerful software where you can actually create in-process inspection and create lights-out machining with minimal interactions from an operator,” Prioriello says. “And there’s less machine downtime due to a broken tool, misalignment, or any sort of machining error.”
Of course, a programmer could err, or the machine could malfunction outside of what the software controls. And yet, it only takes a few clicks and keystrokes to do today what would have taken hours to complete not so many years ago, and to far less accurate results.
“The software is as smart as the person telling it what to do,” Prioriello says. “But instead of having an operator with gauge blocks and mics checking the process and making that judgement call, we’re using the probe and the software to do that, with picked-up speed and efficiency.”
Looking for a reprint of this article?
From high-res PDFs to custom plaques, order your copy today!


