Air Gaging in a High Production, Automated Manufacturing Environment
Air gaging continues to evolve and stay relevant in today’s automated world.

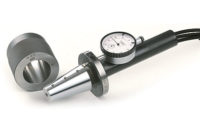
A multi-circuited air probe is shown here.
The biggest trend we are seeing in the manufacturing industry is automating the inspection process using robots. According to a projection from ABI Research, the number of industrial robots sold in the U.S. will jump nearly 300% in less than a decade. There were 40% more robots sold in 2016 in the U.S. than in the four years prior, according to data collected from the Robotic Industries Association. This trend continues because the cost of the robot is declining even as the capability of the robot is rising as well as a difficult labor market placing hiring strains across the market. Another factor for the rise of the robots is continuous improvement and the desire to inspect 100% of the critical dimensions of a given part. Air gaging continues to evolve and remain a relevant form of metrology in today’s automated world.

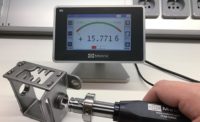
Here is a four channel column with digital inputs/outputs.
So how could air gaging fit into this environment? Isn’t air gaging basically used as a go/no go gage to simply check if the parts are good or bad? The answer: not anymore. Air gaging has evolved with the demands of customer requirements and is being used in fully automated measuring stations to perform 100% inspection and provide feedback to the machine tool for offsetting. The air gaging rings and probes haven’t changed much over the years except for being able to measure smaller and smaller diameters. The major advancements have come in the control units. They are often referred to as comparators, columns, or measuring computers. These devices can have digital inputs and outputs, analog inputs and outputs, Ethernet, Profibus, USB, RS232 and many others. These communication protocols allow for the gages to function in semi-automatic or fully automatic measuring modes including calibration.
The Measurement Procedure
Here is an example of how the measuring procedure could be set up. The first thing that would happen is the calibration of the gaging system. This can be done either manually or automatically. Typically, if it is done automatically, the MIN and MAX masters will be in the form of the workpiece being measured. This makes it much easier for the robot to load the masters onto the gage because the robot is already configured to pick up and load the workpieces. In either case, the MIN master is loaded onto the gage and then either the start button is pushed manually or is triggered from the PLC (programmable logic controller) through one of the communication protocols such as the digital input/outputs. The MIN calibration can then be stopped through several procedures. You could manually press the stop button, or it can be triggered through the digital input/output or a countdown cycle could have been started from the start procedure. You would then remove the MIN master from the gage and place the MAX master on the gage and repeat the cycle. This calibration cycle can be controlled either using a timer to trigger the cycle, a parts counter, manual trigger, or some other trigger. Calibration is typically done one time per shift, but some customers require it more or less frequently.

A robotic cell with six measuring stations using a robot is shown here.
The Measurement Cycle
The measurement cycle of the workpieces is very similar. The robot would load the workpiece onto the gage and then signal the start of the measurement. There could either be a countdown cycle and then the gage would stop on its own or it can wait for the signal from the PLC to stop the measurement. The control unit would then report a signal if the part was good or bad. The robot would use this signal to sort good and bad parts. The control unit could then report offset values back to the machine so that adjustments could be made without human intervention. This is typically done using an algorithm and normally uses at least a three piece average for making adjustments. The control device has full statistical process control (SPC) that can be monitored to see your manufacturing process and can be exported out of the system to be saved.
This setup could be used to check only one diameter or there could be multiple stations for the robot to pick and place allowing the measurement of many features. To date, the most features we have measured on a single station is just over 200 but the capability is much higher. We have also integrated tracking serial numbers read from a data matrix engraved on the part so that the measurement data for each individual part is stored and can be recalled at any time. The capability of these devices is growing rapidly and will allow for more integration in the future to match the continued demands of today’s quality professionals. Air gaging can measure more than just simple inside and outside diameters. It can measure perpendicularity, taper, parallelism, runout, flatness, and many others.

This is a scanning device for measuring IDs and ODs.
Now that we have discussed some of the capabilities and a sample of how the automation works, let’s talk a little about the cost of a system like this. With all the capabilities, you might think that an automated measuring cell will cost a lot of money. Surprisingly with the cost of robots and the measuring system itself declining in recent years, you can get into a simple automated cell for under $40,000. This device can run 24/7 so the return on investment on a system like this might be as short as three months. With that type of return, it is hard not to take a serious look at automating your measuring system.
Looking for a reprint of this article?
From high-res PDFs to custom plaques, order your copy today!


