Multisensor: Make It Part of the Process
Advanced multisensor measurement systems can become an integral part of an Industry 4.0 process at any level.

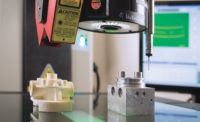
Unique multisensor cluster arrangement that makes vision, laser, and touch probe readily available for rapid measurements.
Advanced manufacturers today are trending towards Industry 4.0—changing the way business runs. More emphasis is placed on access to real-time data from production and quality sources. Faster and more integrated data collection is a priority, along with cost reduction and faster time-to-market. As adoption of Industry 4.0 progresses, there is a need for faster setup, faster inspection, and more in-process measurement data to monitor and control processes for optimum efficiency.
As the additive manufacturing market segment grows, so does the need for speedy first article inspection to assure prototypes and production meet design intent. This scenario is ideal for multisensor measurement.
Model-based enterprise is being adopted by many companies as a means to streamline the manufacturing portion of the supply chain, and reduce costs at the same time. Advanced multisensor measurement systems offer data collection versatility and can become an integral part of an Industry 4.0 process at any level.
Why Multisensor?
Multisensor measurement systems are essential when versatility is a more than a preference. Multisensor systems can handle more measurements in a single setup than a single sensor system in one setup, which translates to higher productivity while minimizing measurement uncertainty.
Smart manufacturing is the ability to tightly integrate machines and measurement systems so they can work together in sharing information. A multisensor system, paired with modern 3-D metrology software, offers the ability to collect measurement data from almost any part, and optimize elements of design and manufacturing workflows.
With a typical first article inspection, all features on a part must be measured. When challenged with many dimensions and complex geometry, even a small decrease in measurement time by using a multisensor system can lead to significant productivity gains.
Vision based multisensor systems can perform both contact and noncontact data collection through support of touch trigger probes, continuous contact scanning probes, point and line scan lasers, and white light sensors. Understanding the advantages of each type of sensor is key when optimizing a measurement routine. In many cases additional sensors cannot be added later to a measurement system (in a field upgrade), so understanding current and future measurement needs is important in developing a multisensor strategy.
So, which measuring sensors to use?

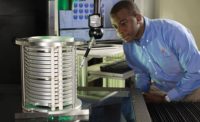
A thin stylus touch probe collecting points on the outer surfaces of a cylinder that’s illuminated by green LED surface light.
Multisensor Technologies
Vision metrology provides versatile and accurate measurements with high productivity. Vision metrology, sometimes called “video metrology,” is a noncontact measurement method that can quickly measure features exhibiting distinct edges. This is particularly useful on certain types of parts or materials that may have flexible or fragile features that cannot hold up to tactile probing, and since tactile measurement captures data points one at a time, vision is much faster. The same applies when there is a high density of features that may not be easily accessible by touch probes. Large parts with fine features are the most challenging to measure and offer the most opportunity to expand your inspection process beyond use of a single sensor system.
Advanced vision metrology systems may offer fully telecentric optics. Telecentricity is an optical characteristic that assures an image is a constant size, regardless of the location in the field of view, and therefore is measured accurately. This technical attribute can have substantial implications on productivity and measurement accuracy because the user can measure topographically rich objects without having to re-establish focus for every surface and feature. (There are many ambiguous claims by manufacturers regarding this important characteristic; those claims should be investigated thoroughly before making a purchase decision.)
Vision metrology systems may also include single or dual magnification optics, or zoom lenses, some with automatic calibration. Make the effort to match the system optics with anticipated part feature sizes and measurement accuracy needs.
The above advanced optics options are one reason for the wide price variation of vision-based multisensor systems.
Lasers are a popular and highly versatile noncontact measurement sensor that can quickly and accurately measure a feature height or depth, and surfaces. Some vision-based metrology systems offer multiple laser options, depending on the anticipated part feature types and sizes to be measured. Lasers range sensors often use triangulation between the emitter and detector to measure features, and the laser imaging reflection angle is the key differentiator when it comes to the ability to measure a particular feature. Through-the-lens (TTL) lasers are completely integrated within the existing optical system. The steep imaging angle of some TTL laser sensors contributes to a long working distance and provides access to surface features that are recessed or located adjacent to vertical surfaces. An off-axis style laser configuration offers a larger triangulation angle which is also highly accurate, but gives up working distance.
Another sensor option is the interferometric range sensor. This technology offers measured point resolution in the sub-micrometer (< 0.1 µm) range, and provides excellent performance on both specular and light-scattering diffuse surfaces. This type of sensor is fast and accurate, and due to its steep return angle, is well suited for surface contours or measurement deep inside bores or blind holes.
Chromatic confocal sensors are another noncontact measurement technology. Sometimes known as a rainbow probe, this white light sensor is an electro-optical device that measures surfaces without contact by analyzing the optical spectrum of the returned light. This type of probe is particularly useful for measuring translucent features that may not be detectable by other noncontact methods.
Tactile sensors physically touch the part during the measurement process. Using a touch trigger probe, you can accurately measure part features that are difficult to image, or surface boundaries that are inaccessible to vision systems. Touch trigger probes typically measure one point at a time. Touch probes are the most common sensors on CMMs. When using a CMM, access to multiple sensors would be accomplished using a sensor change rack for each individual sensor. As each sensor is selected, the CMM would pick up that sensor, re-calibrate, then begin measuring.
New innovations, such as an articulating multisensor cluster, offer immediate availability of multiple sensors without having to wait for each sensor to be switched or recalibrated. Several sensors are available at any time and the desired sensor can be activated without having to exchange it. Further, there is no need to recalibrate each time a different sensor is used. This modern CMM feature results in significantly higher throughput when measuring with multiple sensors.
Using advanced 3-D metrology software, a scanning touch probe rapidly follows a part surface contour and collects many data points at a user defined velocity and data sampling rate. The scanning probe automatically adjusts point density when the probe is rounding curves, and can measure “unknown” features when programmed to do so.
One other type of probe that looks similar to a touch probe, but on a smaller scale, is sometimes called a feather probe. It is used for access to very fine or fragile features that may be deformable, such as solder joints or coatings. The measurement trigger point is activated by way of a resonance frequency-change threshold, resulting in gathering a data point with miniscule physical contact.

A point laser for diffuse surfaces scanning a critical component.
Metrology Software Enhances Value
With any multisensor measurement system, advanced metrology software is a key element. Metrology software provides a way for users to interact with the measurement system—controlling, monitoring, displaying, and reporting every aspect of the measuring process. Its interface clearly displays 3-D relationships between parts, sensors, datum alignments, and machine tooling.
Also important in a multisensor system is the ability to calibrate multiple types of probes and optics to ensure that all sensors are referenced to the same coordinate system, and that the software can accept points taken from any sensor.
Typically, advanced metrology software may require development of a measurement routine to be developed for each part, but nearly all measurement machine manufacturers offer automatic software tools that streamline this process. The best metrology software makes extensive use of CAD models and other innovative features to automatically and effortlessly generate measurement routines. As the measurement routine is executed, collected data can be integrated into the workflow automation process.
As part of an Industry 4.0 implementation, the broader use of measurement data could include manufacturing process optimization and GD&T tolerance analysis. Many compatible third-party software packages are available that could add this functionality, and more. Some advanced metrology software may integrate portions of this peripheral functionality right into the base package.
Each time a software package adds new functionality, an additional learning curve may be an issue to deal with, and it could be an extended period before that investment of time and effort pays off. Most software vendors offer training and although the additional cost can be a significant cost-of-ownership factor, it may be a wise investment to assure getting the full benefit of new and/or additional software features.
Summing It Up
Multisensor metrology systems have been in use for over 25 years and are a mainstream measurement solution.
The key qualities of multisensor systems fall in line with trending Industry 4.0 needs—measurement data integration, cost of ownership, and versatility. The ability to measure more dimensions in one setup leads to lower measurement uncertainty, higher productivity, and real-time data. These machines typically have a lower cost of ownership when compared to the collective costs of multiple single sensor machines.
Multisensor measurement systems should be part of the manufacturing process and are a “must have” for the well-equipped metrology toolbox now and in the future. Q
Looking for a reprint of this article?
From high-res PDFs to custom plaques, order your copy today!


