Computed Tomography: A Look Inside
CT is paving the way and creating opportunities.

Using software to program and collect dimensional measurements is much easier on digital scan data than on physical parts using traditional tools such as CMMs and vision systems.
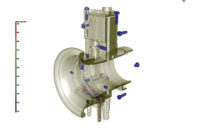
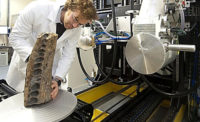
Over the last couple of years, numerous articles have been published by OEM equipment providers on the uses and benefits of industrial CT scanning for manufactured parts. This exciting and relatively new technology has yet to realize its full potential. Industrial CT, just like the medical CT for human use, is the process of gathering 2D X-ray slice images and compiling them into a full internal and external 3D digital data set, then using that data to solve problems or validate product. Just to be clear, there are perhaps upwards of 50 different X-ray techniques for various uses, most of which are not commercially deployed or available. For this discussion we are talking about CT scanning industrial products on a rotary stage with a cone beam low energy X-ray source.
There are several companies that manufacture CT scanners of this configuration. While some of these machines are great imaging devices, few are accurate metrology grade systems with credible statements of measurement uncertainty. We are talking about high end metrology systems in this piece. This article focuses on the perspective of one A2LA accredited lab for CT in the Unites States and the experiences of its clients. Most of the chatter and hype about CT comes from the realization of the power that CT yields from a single scan. The power to analyze geometry, porosity, leak path, assembly and/or design defect, tool wear, conformance to CAD, process and tooling issues, fiber orientation, mold flow, FEA, and the list goes on. The power to perform all of this validation, fix problems with fewer process and tooling change iterations and ship conforming product in a fraction of the time is at your fingertips with CT. The potential financial rewards are staggering.
Driven by global competition, lean initiatives, and the pressures to get better product to market faster, major companies are looking for solutions. We are seeing a paradigm shift in the way manufacturing is going about product validation, production monitoring, and problem solving. CT is paving the way and creating opportunities. The key is understanding how to integrate CT into the process. Much of the time tested and legacy data gathering techniques and practices for product validation involve the expensive and time consuming process of sampling large quantities of parts and gathering large amounts of geometry measurements for comparison to print nominals and tolerances. Then comes the task of analyzing, making process, tooling, or design changes and then repeating. Several iterations of these steps taking weeks or months is not uncommon. At the heart of this is the long process of data gathering with traditional tools. But it is also due in part to the fact that discrete dimensional data alone doesn’t always provide all of the answers and thus decision making becomes difficult at times.

Since CT scans do not rely on line of sight to acquire geometry data, there is nothing missing from the scan as in structured light or laser scans.
These old practices are giving way to new lean initiatives where product blueprints are being drafted with fewer dimensions combined with requirements for 3D or CT scanning and then part to CAD overlay comparisons. These new initiatives have gained in popularity as confidence in manufacturing processes and technologies has improved. Manufacturing professionals seem to find that once processes are dialed in then variation within cavities, dies or stations is more unlikely. Measurement tools such as CT are more reliable and introduce less measurement error. Intuitively, therefore, manufacturers can rely on fewer samples for validation. Finally, if the old adage “a picture is worth a thousand words” is true, then having a clear and immediate view of both external and internal material conditions allows for instant realization of problems. The correct realizations the first time around lends itself to fewer iterations of changes and shortens the cycle. Even at the R&D stage, we often hear customer claims that product flaws, defects and functional problems that have plagued engineers for weeks or months have been solved in an hour after the review of a single high resolution CT scan.
One key time saving benefit of CT scanning is with the application of metrology or dimensional measurement. First, using software to program and collect dimensional measurements is much easier on digital scan data than on physical parts using traditional tools such as CMMs and vision systems. With CT, you don’t have to worry about programming machine movements around the physical part, around and into features and fixture obstructions like you would with traditional CMM measurement. You don’t have to program lighting parameters or focus and edge detection tools common to many vision systems. Programs can be written with the CAD model well in advance of part production which can shave days or weeks off the measurement process. Also, the digital data and any associated programming lives on forever and can be reviewed and edited at a later date without the need for physical parts and the time consuming repeat of setups. This all translates into a dramatic time and cost savings benefit. While CT scanners are expensive assets to own and operate and require X-ray expertise and subject matter experts to utilize fully and correctly, the benefits and upside potential are hard to ignore.

Measurement tools such as CT are more reliable and introduce less measurement error.
Finally, CT scans produce voxel (volume pixel) data which can be converted to an .Stl file which in turn can be used as a template for the reverse engineering of a part into a solid model. Since CT scans do not rely on line of sight to acquire geometry data, there is nothing missing from the scan as in structured light or laser scans. It is also worth mentioning that metrology grade CT scanners are just as accurate as most CMMs and traditional high end metrology tools.
Many manufacturers are turning to outside labs with subject matter experts to gain access to the technology without having to take on the cost of ownership. In some cases, they will acquire software to program or process CT data and leave the scanning to the outside lab as a strategy to gain the benefits without the burden of the expensive equipment.
The many clients that have migrated over to CT from traditional metrology services is a testament to the fact that some truly remarkable benefits are being realized. I expect this trend to continue.
Looking for a reprint of this article?
From high-res PDFs to custom plaques, order your copy today!


