Choosing the Optical Measurement Device That’s Right for You
This form of noncontact detection applies to applications across most verticals and sectors.

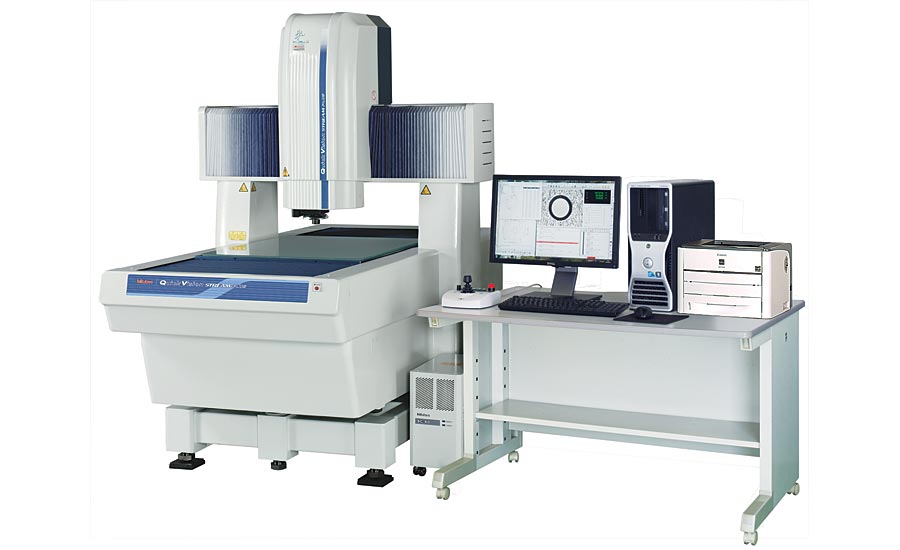
This CNC vision measuring system utilizes a stroboscopic illumination system and post image processing technology for continuous vision measurements during stage movement. This eliminates the need to accelerate, decelerate and hold stage motionless while a measurement is made, dramatically improving throughput.
Optical measurement refers to noncontact measurement using various light sources. It usually requires at least one lens, a light source and a detector. It differs from other forms of inspection in that instead of using a tactile measurement method like a touch probe, it uses either a point of reference (e.g. a crosshair) or a computer to calculate edge detection. Two of its greatest benefits are its capability to measure features too small or fragile to measure by touch, and the fact that it is faster in comparison to other forms of measurement.
The medical, plastics, aerospace and automotive industries are where optical measurement has, and will continue to have, significant impact. But, in reality, this form of noncontact detection applies to applications across most verticals and sectors. Adopters of modern optical measurement devices are looking for easy-to-use technology that supports the acquisition of more accurate data in less time. As a result, there’s a rising demand for in-line measurement and faster processing of acquired images as well as image stitching capability and larger fields of view. There’s also a growing demand for innovative components like liquid lenses. But when deciding which—if any—optical measurement devices are right for you, all factors must be considered.
Profile Projectors/Optical Comparators
You can think of this optical measuring system as a high-accuracy overhead projector similar to what schools used in the 1970s, ‘80s and ‘90s. It can accommodate objective lenses up to 100x magnification, use either contour or surface illumination, and has either a microscope-style stage or metal stage with T-slots that can hold up to 100 lbs. The stage is married to high-accuracy linear scales, which provide positional feedback, and a crosshair is typically etched onscreen as a measurement reference point. Measurement throughput can be increased by adding edge detection, usually in the form of an onscreen fiber optic detector.

These ultra-fast varifocal liquid lens always will be in focus, even with height differences. It provides real-time all-focused images by scanning the focal length range at speed, requiring no mechanical power or auto focus mechanism when scanning.
Operation is fairly straightforward, with a user placing a workpiece on the stage with the necessary fixturing, then bringing the workpiece into focus by adjusting the Z-axis position. Once there’s a focused image on screen, the user moves the stage so the onscreen reference reticle is aligned with the feature of interest. The user then can zero the scales on either the X- or Y-axis and move the stage to the next position on the feature. The scale readout will determine the distance traveled with increased measurement repeatability made possible with the use of edge detection software. Final data is stored and analyzed by an optional 2D processor.
Advantages: The design of the objective lens, coupled with a screen size that can measure 14 inches or larger, means profile projectors typically have a larger field of view. Having been a familiar staple for decades, they are one of the easiest measurement devices to use. Unlike a measuring microscope, profile projectors tend to inflict a low level of eye strain. And, overall, they tend to be the least expensive option while remaining one of the fastest.
Disadvantages: Profile projectors/optical comparators have a lower optical resolution in comparison to measuring microscopes as well as a lack of digital processing capability and low throughput. Lighting options are also limited, sometimes only including contour illumination.
Measuring Microscopes
It’s important to point out that measuring microscopes are different from traditional microscopes. Unlike a traditional microscope, in a measuring microscope the stage is connected to linear scales that provide positional feedback, and a reticle is either built into the eyepiece itself or located in the light path as a reference point for measurement. In addition, a measuring microscope contains both in-line illumination for applications that require reflected light and transmitted illumination that allows for contour or profile measurements.
In terms of operation, measuring microscopes function in a similar manner to profile projectors. A workpiece is placed on the stage, and an image of the feature of interest is then brought into focus by adjusting the coarse and fine focus knob. Once a clear image is viewable, the user aligns the built-in reticle and then moves the stage to the next edge of the feature. The resulting scale readout shows the distance traveled. As with profile projectors, edge detection software can be added to achieve greater accuracy and repeatability towards determining the exact edge of a part.
Advantages: With a measuring microscope, you can use high numerical aperture objective lenses, which provide high optical resolution down to 1µm or .000040 inch. This allows you to detect things with a measuring microscope that you can’t see with any other optical measurement device.
Disadvantages: While you gain optical resolution when using a measuring microscope, you sacrifice field of view in the process. This makes it more time consuming to measure features separated by great distances on large parts. Measuring microscopes also have a smaller field of view and low throughput while coming in at a higher cost. And finally, although some microscopes are motorized, most measuring microscopes are not computer numerical controlled (CNC).
Vision Measuring Machines
These optical inspection machines are built on a platform with at least three axes and at least one objective lens. Using a computer to automatically detect features and calculate measurements from those detected features, vision measuring machines are most often computer-controlled although manual models do exist.
In addition to a machine frame or base with at least three axes and an objective lens, all vision measuring machines have an image detector and a computer. The frame holds the part being measured along with the lens and detector. The detector itself interprets light gathered by the objective lens and transforms it into an electrical signal that the computer then uses to calculate dimensions based on measured edges (e.g. distances, diameters, etc.). The detector is either a charge-coupled device (CCD) or a complementary metal oxide semiconductor (CMOS).
Unlike profile projectors/optical comparators and most measuring microscopes, vision measuring machines use computers for control and edge detection and, therefore, require software. In CNC vision measuring machines, the software drives the camera to a given location on the part being measured and detects points on edges and surfaces in the field of view of the camera. The software then uses the detected points to construct features such as lines and diameters. Most vision measuring machine software can also output ASME or ISO tolerancing (e.g. true position, parallelism, etc.) and can usually output measured values in various formats, including text file output, direct to SPC and more.
Because vision measuring machines have some limitations regarding what features can be measured, additional sensors are often added. The most common being a touch probe, which allows the machine to function similarly to a coordinate measuring machine (CMM). Lasers can also be added to speed or improve the accuracy of Z-axis measurements or for the purposes of 3D scanning. In terms of 3D scanning, chromatic position sensors (CPS) can also be used and, though not a sensor, focus image stacking, also known as points from focus, can be added to enable the standard vision measuring machine camera to generate a 3D scan of any part being measured. Finally, white light interferometry (WLI) can be added to generate a 3D scan using interferometry rather than focus stacking.

This motorized measuring microscope provides a clear observation image with excellent color quality, ultra-long working distances without chromatic aberration.
Advantages: Vision measuring machines have a high throughput and are ideal for measuring parts too small for a CMM (vision measuring machines are as accurate, yet faster), or for parts that cannot be touched due to contamination or flexibility reasons. In comparison to profile projectors/optical comparators, vision measuring machines can see and measure the same features in a faster and more accurate manner. In comparison to microscopes, vision measuring machines typically have larger working distances, larger fields of view and larger measuring envelopes. And while modern vision measuring machines will always come with automatic edge detection and computer calculated measurements, microscopes typically only offer these features as optional add-ons.
Disadvantages: The main drawback of vision measuring machines is that they are the most expensive type of optical measurement device on the market. Vision measuring machines also have lower resolving power than microscopes and typically do not offer magnifications as high as microscopes do.
Other Innovative Components – What to Look For
Modern optical measurement solutions incorporate next-generation technologies that propel the inspection and measurement field forward. In addition to weighing your device options, it’s important to also keep an eye out for innovative capabilities and components like enhanced software processing (i.e. stitching), 3D imaging and, most importantly, liquid lenses.
Liquid lenses consist of either a water and oil mixture or a proprietary fluid that changes shape as electricity or sound is applied. Changing the liquid’s shape changes its optical properties. This results in a varifocal liquid lens that can expand the depth of field of the optical system when used in conjunction with extended depth of field software, allowing the user to gather sample information from different heights for higher throughput optical inspection. It’s a cutting-edge component that can be used with a variety of optical measurement devices and a tool that should not be overlooked.

This profile projector is a high performance, horizontal mean projector equipped with highly accurate linear glass scales. Blurred or distorted images will not be produced when a workpiece is angled, making the PH-A14 suitable for thread pitch measurements.
Final Considerations
When it comes to achieving high-level optical measurement, users across all industries are continually challenged to control machine and component costs while finding easy-to-use, fast and accurate devices that operators can intuitively operate. Before making an investment, it’s crucial to take into account additional considerations to help you reach and exceed your goals:
Look for a device and component manufacturer with an in-house calibration lab to ensure that all equipment related to optical systems undergoes NIST-traceable calibration.
Prioritize which optical instrument factors are most valued in meeting your specific needs (e.g. throughput, ease of use, cost, field of view, data export, optical resolution, etc.).
Focus on quality. To avoid being tempted by flashy software or sub-standard hardware, research and evaluate accuracy specifications pertaining to each device, and thoroughly vet the reputation of device manufacturers within the metrology market (i.e. Can the manufacturer stand behind the accuracy statement? Are the results repeatable?).
Decide whether field of view or magnification is more important to you, especially if considering a vision measuring machine. A large field of view allows most or all of a part to be measured, but with that larger view comes smaller magnification and weaker optical resolution.
Develop a strong understanding of the skill and experience of the operator in order to choose the most appropriate optical measuring solution. Q
Looking for a reprint of this article?
From high-res PDFs to custom plaques, order your copy today!


