Quality 101
How to Choose the Best Shaft Measurement Tool for your Specific Application
There are Three Primary Options Available Today for Shaft Measurement: Optical, Tactile, and a Combination System

The shaft is a ubiquitous item in every mechanical system; in fact, the vast majority of machining that goes on in the world is related to making either shafts or the pieces that hold them together. Shafts contain a number of key functional elements, such as splines, tapers, grooves, threads, cams and gears, which all have associated critical dimensions to allow mechanical systems to perform the function for which they were designed.
In the not so distant past, the critical dimensions on a typical shaft were measured with an array of hand tools such as calipers, micrometers, snap gages, and possibly a layout surface plate. However many of the diameters, lengths, angles, groove widths, fillet radii, or chamfers on these parts are ideally suited for modern specialized shaft measurement systems. Ever-increasing accuracy requirements and declining cycle times are also creating the need for rapid, precise measurement directly in the production environment. At the same time, shafts are often used in safety- and performance-critical applications, so ensuring precision, quality and high reliability is of the utmost importance.
There are three primary options available today for shaft measurement: optical, tactile, and a combination system. The optical systems have become common over the past few decades because of their flexibility and speed. More recently, combination systems have gained popularity because they allow the speed of the optical system to be combined with a tactile probe that can measure features the optical probe cannot see.
So how do you choose the best option for your specific application? A good approach is to first define the functional requirements of the inspection task and let that steer you toward the optimal tool for performing the tasks as identified.
Optical Shaft Measurement Technology
A wide variety of advanced, fully automated optical shaft measurement systems are available that offer efficient and precise measurement of rotationally symmetrical workpieces. These systems enable highly accurate measurement of numerous characteristics in a matter of seconds, and fully automatic measuring sequences can be performed both in the lab and in the harsh environment of the shop floor—eliminating operator influence from measurement results.
High-resolution matrix array, or CCD cameras, and line scanning are two commonly used technologies in optical shaft measurement systems. Line scan technology creates images of the part’s dimensions via cameras containing a single row of pixels. As the object moves past the camera, the image is reconstructed line by line. Line sensors are sometimes slightly tipped relative to the axis of the part to better measure dimensions such as edges and shoulders. Part and feature diameters are indicated as a series of connected points or dots, and measurement computations are made with a “calculated” image of the part. However, small features are harder to measure due to the lower resolution between the individual lines.
High-resolution matrix array systems have emerged as a more modern and accurate technology. While matrix array measurements were initially seen as a slightly slower option to line sensors (due to the larger amount of data processed) a number of advancements, including faster processing time and measurement optimization programs, have quickly closed that gap. Think about how much the camera in your smart phone has advanced over the past 10 years and you have a good idea how much the cameras in measurement systems have also advanced.
The higher resolution of a matrix array camera has proven to be the most accurate method because measurements are more stable and precise, and it allows much smaller features to be measured compared to a line scan. Zoom functions further allow even the most minuscule details to be measured, which are difficult—if not impossible—to test with conventional measuring tools.
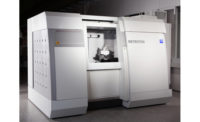
 Shaft measurement can be performed with a variety of metrology tools. Source: Mahr
Adding Tactile Shaft Measurement Technology
Despite the many benefits of optical technology, it can only see what is visible from the outside, as the measurement process typically involves backlighting the part and obtaining a silhouette image for measurement. There are a number of elements that can’t be seen in silhouette.
For example, there might be a keyway or hole in the shaft that other features need to be located relative to. A keyway can’t be seen in silhouette, but it is critical to the function of the shaft, so a measurement is needed. There are several types of tactile probe technologies available ranging from simple to complex depending on what feature needs to be measured.
The simplest tactile probe is capable of measuring discrete points. Similar to coordinate measuring machines (CMMs), these probes allow multiple points to be measured, and use their coordinates to fit geometric shapes, such as lines or circles, to them. In this way, the keyway from the example above could be measured by touching a few points along the length on each wall and fitting lines to those points to represent the sides of the keyway.
Scanning probe systems are slightly more sophisticated. These probes don’t just measure single points, but rather they are brought into contact with a surface by the moving axes of the system and moved over the surface, continuously collecting data points. These systems collect hundreds or even thousands of points per scan and are able to more precisely represent a surface than the simple point probes. They typically are sensitive in only one direction and the system needs to have additional axes of motion to orient the probe so that it can measure in a direction perpendicular to any surface on the shaft.
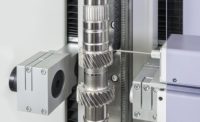
 Specific shaft measurement systems can accomplish required tasks significantly faster than other tools, with more precision, and do so directly in the production environment. Source: Mahr
Finally, a third class of tactile probes are the 2D scanning probe systems. Like the scanning probes described above, these are moved over the surface to continuously collect measuring points. The key difference is that instead of being sensitive in only one direction, they are able to measure in all directions of a 2D plane simultaneously. Because of this they can be used to measure much more complex surfaces.
Features such as splines and gears naturally go along with many shafts. Utilizing a 2D scanning probe system allows accurate measurement of the gear teeth profiles’ complex geometries. The involute profile of a gear tooth is a mathematical construction known as a generatrix. Proper measurement of this profile requires simultaneous scanning with two moving axes of the shaft system and a 2D probe system capable of measuring deviations perpendicular to the surface at all times. Only with this class of tactile probe system can this type of measurement be achieved.
This solution has numerous advantages. With the combination of an optical and a 2D scanning probe, a shaft with dozens of diameters, lengths, fillet radii, chamfers and a typical helical gear can all be measured in 5-10 minutes, depending on the number of teeth checked on the gear.

Shafts are often used in safety- and performance-critical applications, so ensuring precision, quality and high reliability is of the utmost importance. Source: Mahr
Conclusion
Shaft measurement can be performed with a variety of metrology tools, from handheld devices such as micrometers and snap gages to high-end coordinate measuring machines (CMMs). However, specific shaft measurement systems can accomplish the required tasks significantly faster, with more precision, and do so directly in the production environment. Optical systems are very popular due to the speed of measurement and flexibility they permit in measuring varying part types. However, optical systems cannot measure what they cannot see so sometimes it is necessary to add tactile measurement capability to the optical system. There are several options available for the tactile system, which vary in capability and complexity. By combining the right type of tactile probe system with the right type of optical system, you can achieve the highest level of precision and maximum flexibility for your application requirements.
As the trend continues toward increasingly smaller features and tighter tolerances, shaft measurement devices that are easy to program, perform efficient and highly accurate measurements, and can accommodate a wide range of parts are increasingly becoming the method of choice for the measurement of rotationally symmetrical workpieces in production—ensuring the utmost in quality control during production.
Pat Nugent, vice president, product management at Mahr Inc.
Looking for a reprint of this article?
From high-res PDFs to custom plaques, order your copy today!


