Measurement
5-Axis CMM Measurement
CMMs of the Future will Provide Immediate Feedback to Help You be Proactive When it Comes to Planning Maintenance and Workload.

New CMM software can take a CAD model and automatically generate the part program needed, making part measuring even faster. With this, you can have the CMM ready to measure parts long before the first pieces are manufactured.

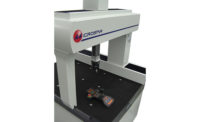
A 5-axis probe provides faster measurements of parts with many different dimensions, eliminating the need for switching probes or using multiple machines for accurate results.

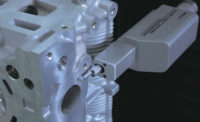
A 5-axis CMM measures an automotive piston ring, providing many different dimensional measurements on one machine, including inner diameters, steps, bore depths and even roundness, something that would have required multiple machines in the past.

A 5-axis probe is the ideal way to measure the highly complex dimensions of a turbine stator blade.


Today the demand for faster, more accurate measurement is growing. One method of achieving this goal is to turn to 5-axis rapid touch trigger measurement as part of a CMM. Let’s dive into why this technology is beneficial and why adoption is on the rise.
5-Axis Measurement: How It Works And Benefits It Provides
5-axis rapid touch trigger measurement is considered the next step below constant contact and drag scanning measurement because it measures individual touch points by physically touching a point to measure it in rapid succession. This is accomplished by the probe head itself moving while taking point measurements.
When compared with conventional probing, 5-axis rapid touch trigger measurement is much faster. It can reduce measurement time 60%-70%, depending on what is being measured. And when compared to a regular CMM machine, 5-axis rapid touch trigger measurement offers benefits in certain measurement situations. For example, when measuring a part that has many holes and many points in each hole, this is an ideal application for 5-axis rapid touch trigger measurement as well as when measuring complex surfaces with tight access (e.g., an impeller for a turbo system). The ability to infinitely position the probe head at any angle allows access to areas that a traditional fixed probe head could not reach.
Mostly, anything that a conventional CMM with a fixed probe can measure, 5-axis rapid touch trigger measurement can also measure because it’s a better alternative when it comes to ensuring measurement flexibility, especially since standard probing systems are restricted in terms of the angle that you can set.
Some motorized probe heads have fixed angular degree increments, and you can’t set an angle between the fixed angular increments. With 5-axis rapid touch trigger measurement, however, you can achieve infinite positioning of probe heads at any angle. This is because a 5-axis head can move the touch probe independently, instead of the probe being stationary and the entire CMM machine itself having to move.
This increases speed and flexibility of measurement, as well as accuracy. Why? Because it makes a difference if the machine is moving vs. whether the probe is moving. Forces generated by the movement of the machine can negatively impact measurement accuracy. The extended reach of a 5-axis touch probe could positively impact accuracy given you’re not limited to the effective working length of the stylus itself to determine how far you can go down into a hole to complete a measurement.
In addition, in terms of flexibility, you can do five-axis moves, with the ability to move the machine and rotate the probe head at the same time. This means you are not limited to the CMM measuring volume with the additional length of a fixed probe system. For example, if you are near the limit of your machine measuring volume and you need to clear a surface and then drive down deep into a bore, with 5-axis rapid head movement you could plan an arc path so both the CMM machine and 5-axis probe head move synchronously together to give you the needed clearance to accomplish this measurement.
Integrating With Software
With a probe system, you’re collecting measurement data and then applying tolerances to the results. That’s where measurement software that can support the output becomes important. Using compatible software with 5-axis rapid touch trigger measurement, you could evaluate feature characteristics more accurately, and with improved repeatability, given that you’re connecting more points in a shorter span of time. So, while on a conventional probe system, you may only take four- or five-point measurements that result in a small amount of data, with a rapid touch probe for 5-axis measurement you can take ten-to-twelve-point measurements in half the time. The result is more data to plug into statistical analysis for the software to analyze.
Industry Best Fit
In terms of industries where 5-axis rapid touch trigger measurement is popular, aluminum die-casting and machined casting facilities, where there are many machine features or drilled holes, top the list. The automotive sector also benefits, given the complexity of automobile part features.
Aerospace is another industry where 5-axis rapid touch trigger measurement is growing, given the turbine blades and engine housings being produced. Many of these engine housings have hundreds, if not thousands, of holes intersecting into complex, cylindrical surfaces. And 5-axis rapid touch trigger measurement is very satisfactory for certain turbine blades within the jet engine, making it a more economical choice.
In addition to automotive and aerospace, really any industry that needs more points in the same amount of time, and needs to generate more information for greater repeatability and accuracy, can embrace 5-axis rapid touch trigger measurement. Because, at the end of the day, people across all industries are transitioning to five-axis machines primarily due to the capacity restrictions of other machines.
There’s a need to measure more parts per hour or per shift, and current technology can’t keep up with the demand for parts being produced. If, conservatively, 5-axis rapid touch trigger measurement reduces the cycle time by 50%, shops essentially could run two times more parts than on the traditional system. And that’s a bonus for many industries.
A Note About Calibration
Many who use a CMM have a traditional fixed indexable probe head and anywhere from six to twelve different tools may be needed to measure a part due to complexity or feature size. They all have to be calibrated at some time, and each tool could have ten, fifteen, even hundreds of different dedicated positions or probe orientations. Calibration time for a rack like this could take hours.
With 5-axis rapid touch trigger measurement, you can simplify the complexity and typically reduce the number of tools needed by at least half. That means less tools to begin with, with one tool taking only about six minutes to calibrate to use for any angle needed. This reduces calibration times from hours down to minutes. If you have tools with many different probe angles that need to be calibrated, this will positively impact your efficiency and time management.
Working With An Automated Parts Programming Tool
With Model-Based Enterprise being developed and integrated within product design, this information can be pushed downstream to be used for automated parts programming. Once you have the PMI (Product Manufacturing Information) information annotated onto the 3D model, you load the CAD model file into the CMM software, even if it’s a 5-axis rapid touch trigger measurement system, that you will use to measure the part. It will automatically generate the part program needed, with all moves, measurements and tolerances, in advance.
This makes measuring the part even faster, as well as the result. Typically, days’ worth of programming time can be reduced to minutes, or at least significantly reduced when compared to sitting at a CMM and programming from a blueprint, depending on how well the annotated models come in with the necessary information. Using automated parts programming, a program could instead be automatically generated and ready to run on a CMM within an hour. This frees up valuable machine time and valuable programming time. A simulated program can be posted down to the CMM when the part is ready, so you have all the information up front and can have the CMM ready to measure parts long before the first pieces are manufactured.
A Look Ahead
Dimensional Measuring Equipment (DME) probe technology increases measurement data requirements for analysis with reduced measurement time. For this reason, the necessity for technology like 5-axis touch trigger probes will become the preferred choice for automated measuring equipment.
In addition, as manufacturing is moving to make things faster and more accurate, the ability to monitor the whole process is becoming more critical. “Smart,” IoT-integrated CMMs of the future will provide immediate feedback to help you be proactive versus reactive when it comes to planning maintenance and workload. For these reasons, you’ll want to ensure your CMM can transition to an automated future.
Gene Hancz is a CMM product specialist and Andrew Kirsten is an application engineer at Mitutoyo America Corp. For more information, email marketing@mitutoyo.com or visit www.mitutoyo.com.
Looking for a reprint of this article?
From high-res PDFs to custom plaques, order your copy today!


