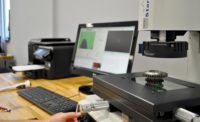
Why In-Line Inspection Can Save Time and Money
To simplify and hasten the measurement process, manufacturers are bringing measurement to the production line for verification, minimizing the time needed to refine machining.

As technology evolves, so do consumers’ tastes. We want more connected products that require increasingly integrated electronic components — such as household electronics that are connect to our phones. And these complex products need multifaceted components, such as electronic parts with embedded software and microprocessors. Ultimately, these complex components require increasingly tighter tolerances, sharper transparent requirements, and more robust testing.
This all feeds into a greater emphasis on quality.
In addition to the growing demand for complex parts, manufacturers are also under pressure to make parts more quickly and cheaply. Some find that they can boost their productivity by changing the location of where they conduct metrology processes.
Conventionally, components manufacturers have used on a measurement process where skilled operators use computer-controlled equipment to validate randomly selected parts in batches, usually post-production and offline in a quality laboratory or other controlled environment.
But this measurement process can result in frequent stops to move parts to the lab for validation, which can create bottlenecks and elongate manufacturing time.
To simplify and hasten the measurement process, manufacturers are bringing measurement to the production line for verification, minimizing the time needed to refine machining.
Moving measurement closer to the point of production quickens the quality assurance process, delivers real-time feedback, and helps to integrate automation and robotics into the manufacturing process. Some say that in-line or near-line measurement is becoming the new status quo.
To convert your measurements from lab to shop floor, first make sure you have the right CMM to get you there. For example, your CMM must be durable enough to remain accurate under climate variations and be easy to maintain. To do this, manufacturers should track the equipment’s effectiveness, making sure it meets expectations for cycle time and reduced inspection time.
Looking for a reprint of this article?
From high-res PDFs to custom plaques, order your copy today!


