NCSLI
The Importance of Close Out Calibrations
Our intent is to bring awareness to the importance of close out calibrations and where not possible as in the case of catastrophic failure, having a system in place that provides confidence that non-conforming parts have not been released.

Image Source: gsagi / iStock / Getty Images Plus
Equipment failure is a part of any manufacturing process lifecycle, but if the failure is equipment that is required to be calibrated as part of routine maintenance or quality requirements are closure calibrations considered? Catastrophic failures often lead to equipment being scrapped or undergoing a major repair that does not allow an organization to follow ordinary calibration processes. If the equipment isn’t working properly, how can you verify that it is meeting the required specifications? Obviously, you cannot. However, consideration should be given to whether any product that was manufactured since the previous calibration was impacted. If the equipment is assumed to be within tolerance prior to the failure is the basis for that assumption documented and justified, or could there be product or items that do not meet all requirements that have escaped notice?
There are too many detailed considerations to address in this simple article, but the intent is to bring awareness to the importance of close out calibrations and where not possible as in the case of catastrophic failure or equipment loss, etc., having a system in place that provides confidence that non-conforming parts or materials have not been released.
Why is it necessary to calibrate my equipment when I am no longer going to use it?
RELATED ARTICLES
“If it is broken or missing there is no way to calibrate it, so I just need to get a replacement and get the line moving.”
Having a process in place to determine the impact of potential Out of Tolerance (OOT) equipment is critical to reducing risk associated with non-conformance. This may be as simple as a cross check of the previous production run against daily checks or a known acceptable prototype. There are numerous articles on the cost of poor quality that can be referenced as a basis for putting a process in place to eliminate this risk.
“What can I do?”
One approach is establishing calibration intervals [1] based on equipment usage and failure history. Example, you have a fixed torque screwdriver system in your final assembly run and you know that after 1,800 hours of usage you expect failures. History shows that slippage or other issues occur after 1,000 hours of usage. The torque screwdriver has a recommended calibration interval of 12 months, but 1,000 hours is less than six months on your production line. This is where evaluation of the equipment usage and failure history could prevent unnecessary risk of OOT conditions. Shortening the calibration interval to less than 1,000 hours on each torque screwdriver would reduce risk of nonconforming product being released and would also potentially show equipment that is needing maintenance or nearing end of cost-effective life.
In the case of a hard failure of a calibrated piece of test equipment the question that needs to be answered is “Was it in tolerance when it failed or had it gone out of tolerance prior to the failure?” If there are other quality checks after the point of failure it may be used as a justification for the assumption that it [failed equipment] was in tolerance as the product met following requirements.
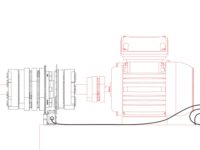
Figure 1

Knowing your process and the impact each step has on the next is key to determining how to complete an effective evaluation but in this mock process here are some things that could be implemented to reduce the risk on production.
- Daily checks of torque screwdriver via a working standard or similar check.
- Final Assembly verification with a random sample pulled and verified for appropriate torque or compared to a known ‘good’ product.
- In depth analysis of what an incorrect torque setting impact would be. (E.g., torque under set and product not sealed correctly or prone to leakage, or over torqued and damage to other components)
- Calculation of the cost of complete production run failure. A small production run may only have three items and can be reprocessed. Example: Incorrect torque on bottle caps of cold medicine that is then heat sealed with safety shrink wrap could have caps not secured adequately but ‘shrink wrapped’ on and not discovered until much later. The cost is not just the loss of revenue for recalled product but also the loss of consumer confidence and potential liabilities.
Reducing risk is the goal in this simple exercise and providing confidence in the status of both the final product and the calibrated equipment in the case of a failure or OOT situation.
A key is reducing the frequency of false-acceptance and false-rejection of product, test results, or research and development decisions in which accuracy of measurements are key to product quality.
Failures will happen with calibrated equipment and being able to identify and minimize the risks when they do will ensure minimal impact on your bottom line.
[1] NCSL International has a Recommended Practice -1 (RP-1) Establishment and Adjustment of Calibration Intervals that provides industry guidance for determining calibration intervals and is available at NCSLI.org.
Looking for a reprint of this article?
From high-res PDFs to custom plaques, order your copy today!


