NDT | Thermography
Validating Thermography System Performance
The combination of advanced infrared camera technology and dedicated software analysis tools has made active thermography a viable alternative to traditional methods.

An Active Thermography system combines an IR camera that measures surface temperature with excitation and processing components to detect subsurface defects. Modern systems (right) integrate all functions into a single handheld unit. Image Source: Thermal Wave Imaging, Inc.

An Active Thermography system combines an IR camera that measures surface temperature with excitation and processing components to detect subsurface defects. Modern systems (right) integrate all functions into a single handheld unit.


Active thermography (AT) has become a popular method for nondestructive testing, quality control and material characterization that is widely used in the aerospace, automotive and power generation industries. The combination of advanced infrared (IR) camera technology and dedicated software analysis tools has made AT a viable alternative to traditional methods for many applications, offering contact-free, wide area subsurface inspection capability that is robust enough to accommodate production environments. However, as companies integrate thermography into their quality programs, they may be unfamiliar with the technology, and encounter challenges when trying to validate and document the performance of a thermography system to ensure that all components are operating within their specified ranges. In this article, we will review the basic principles of AT, and discuss how it is being used in industry today and the process of integrating it into an organizational quality system.
How It Works
While there are numerous variations in how energy is applied (pulsed, step, modulated) and the data is analyzed (time / frequency domain), they are all based on the same fundamental principles of thermal diffusion. The surface of a part is heated, and cools as the applied heat propagates into the structure. The presence of an internal defect (e.g. void, delamination, inclusion) or structure (e.g. joint, spar, substrate) interferes with normal thermal diffusion process. The entire heating and cooling process is monitored by an IR camera, so that an internal defect or feature with a lower thermal conductivity than the surrounding host material (e.g. a void) will obstruct the inward flow of heat and cause a transient “hot spot” to appear in the IR image of the surface in the vicinity of defect. The opposite result occurs when a low thermal conductivity feature (e.g. a metal stiffener) absorbs inbound heat and generates a cold spot on the surface. Although simple hot/cold spot detection is not sufficiently sensitive to accommodate most modern industrial inspection requirements, dedicated signal / image processing are routinely used to increase range and sensitivity, and provide measurement of material properties.

Anatomy of an Active Thermography System
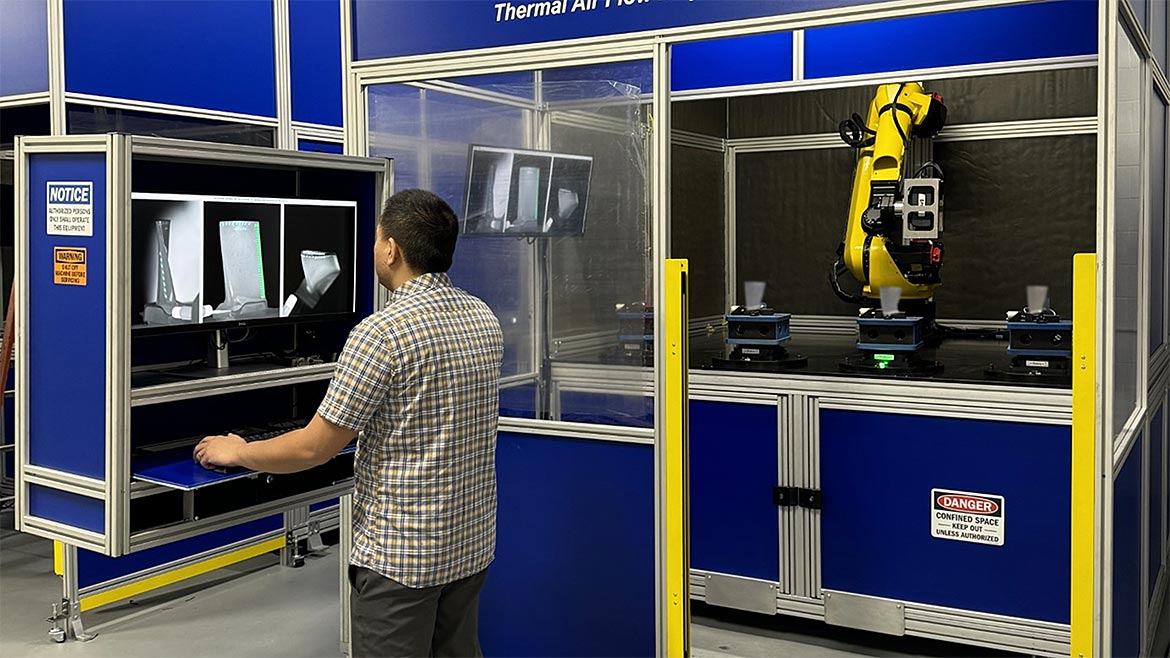
Used alone, an IR camera has limited utility for QC / NDT applications. In addition to the IR camera, which measures the surface temperature of the part, detection, measurement or characterization of subsurface defects or material properties requires thermal excitation of the part under test, as well as processing and analysis of the image output data from the IR camera. Taken together, excitation, temperature measurement, and processing functions comprise an AT system, which can be as simple as a human inspector using a handheld IR camera and heat gun or even the sun and his/her eye, brain and experience to interpret the camera images to find water trapped in an aircraft control structure, or as complex as the fully automated flash thermography systems used to test spot welds, measure coating thickness or evaluate solar cells in modern manufacturing. For reliable and accurate AT results, it is essential that each of these system functions are appropriate for a particular application, and that they function properly individually, and together as a system.
Excitation: A transient thermal excitation is uniformly applied to the surface of a part using light, forced air, direct contact or electromagnetic radiation. The excitation may be a brief pulse from a flashlamp or laser that lasts for a few milliseconds or less, or a longer one lasting several seconds from a heat lamp or hot air gun. The excitation may also be modulated or scanned across the surface of the part, either in close proximity or at a standoff distance of several feet. Optical sources are most widely used in industry as they are relatively easy to control spatially and temporally. For a particular application, the source must couple effectively (e.g. be absorbed, and not reflected) and operate on an appropriate time scale. As an example, heat transfer in an aluminum part occurs in milliseconds, appropriate for a flash or pulsed laser source. However, in the same part in fiberglass, heat travels the same distance in several seconds, so that a heat lamp could be used effectively.
Temperature Measurement: An IR camera measures IR radiation from the surface of an object, which is a function of its temperature. It does not “see through” most industrial materials, but it can be used to infer subsurface structure when it is used with a thermal excitation source to heat the surface of a sample. Cameras vary in sensitivity (usually expressed as Noise Equivalent Temperature Difference, or NETD), wavelength range, frame rate and the number of pixels in the focal place array sensor. The “best” camera for a particular application is one where the wavelength is sensitive to temperature change in the material of interest, the frame rate is high enough to capture the cooling response to the stimulation being used, and the pixel density is sufficient to detect the minimum required defect size. Uncooled microbolometer cameras are small, inexpensive low-maintenance devices that operate in the 8-14 mm spectral range. They measure the change in resistance as IR radiation is absorbed by an array of small sensors, which is then correlated to temperature. However, measurement or detection of deeper, or subtler, defects may require the greater sensitivity of larger, cryogenically cooled cameras, which are quantum devices that collect incident IR photons, operating in either the 2-5 or 8-14 mm range.
Processing / Analysis: Modern AT systems use a dedicated PC to process data from the IR camera and present it in a format where it can be analyzed by an inspector or automatically with additional software. Widely used processing approaches techniques (Thermographic Signal Reconstruction, Principal Component, and Pulse Phase) analysis all provide consistent, repeatable results with significantly greater sensitivity than unprocessed images from the IR camera. In most cases, the techniques offer similar performance, however they may vary in terms of processing time, quantitative measurement capability and ease of interpretation.

Evaluating AT System Performance
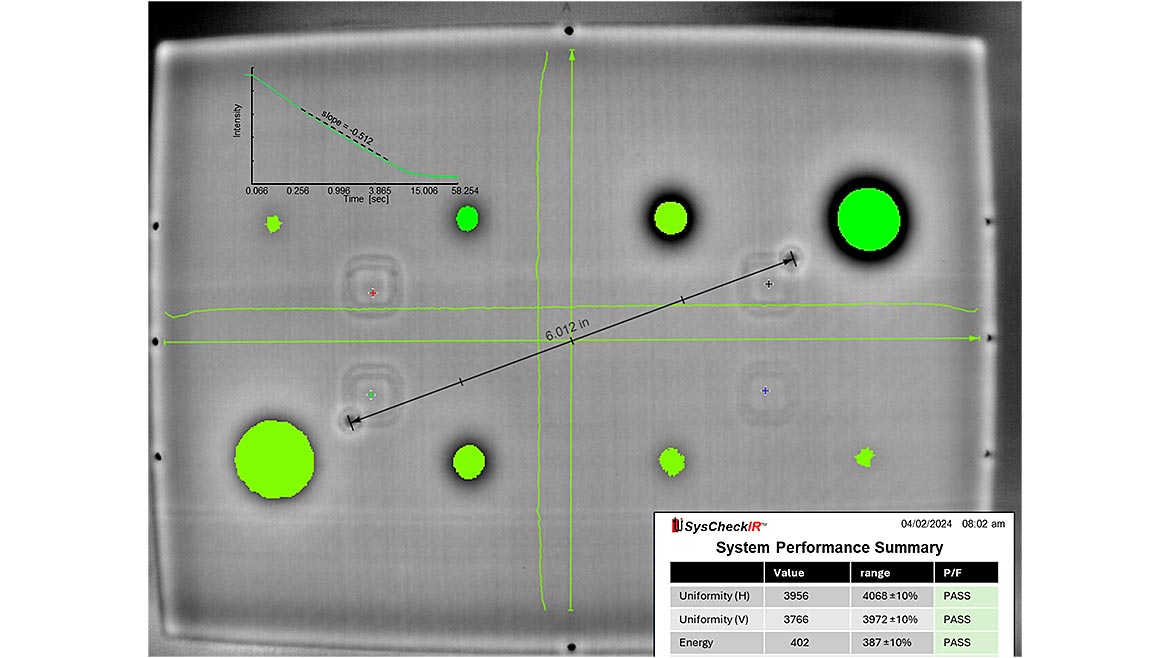
IR cameras have been widely used for many years in predictive and preventative maintenance, where a single image showing the steady state temperature of a part or machine may be sufficient for diagnostics. Since the IR camera is the only instrument required, it needs to be maintained and calibrated per the manufacturer’s requirements for optimal operation. The situation is more complex in AT; in addition to the IR camera, there is a thermal excitation source and in most modern AT systems, a computer performing additional signal processing to increase sensitivity and enable automation and measurement of subsurface features. When combined in an AT system, several conditions that involve camera, excitation and processing must be met:
- Excitation Uniformity: Spatial variation of the excitation should cover the target area with less than a specified degree of variation (e.g. 10%).
- Excitation Level: The amount of energy delivered to the sample should be greater than some minimum threshold level.
- Camera Response to Excitation: AT systems collect a sequence of images to capture the response of a part over time. The response of a single pixel temperature-time history for a given part should be repeatable and consistent with modeled response for the particular part and type of excitation. For example, for a 0.5” flat metal plate the early segment of the time history view on a log-log scale should be a straight line with slope -0.5.
- Signal to Noise: Results for programmed subsurface features should yield consistent signal to background ratios above a minimum acceptable threshold.
- Flaw Size Measurement: The system software should accurately measure the size of programmed defects to a specified degree of accuracy.
Integrating Active Thermography into a Quality Program
Once technical feasibility has been established for a particular application, the process of implementing and adopting AT into an organizational quality program is identical to that of other NDT technologies. There are several companies that specialize in Level 1-3 AT specific training in accordance with ASNT TC-1A or NAS-410, and there are guidelines for developing AT standard practices and procedures (e.g. ASTM E2582-21.) However, a question that often comes up once AT is operational is how to track and validate system performance on an ongoing basis? Companies using IR cameras for maintenance or very basic NDT/QC tasks have relied on application-specific NDT reference standards and annual calibration by the camera manufacturer, but that may not be adequate for a modern AT system used in measurement, automated or high-volume production. In addition to the camera, the excitation and processing elements of the system must also be functioning properly.
One recent answer has been the use of a System Performance Validation (SPV) kit, which incorporates a reference sample and dedicated software for use with the AT system. Unlike an NDT reference standard, which is constructed to mimic a particular defect or condition (e.g. void, crack, inclusion), the validation standard is engineered to allow measurement of specific AT system performance metrics that should remain invariant for a properly functioning system. Ideally, the baseline settings for acceptable performance are established by the manufacturer or during initial acceptance of the AT system. The SPV test, which requires only one to two minutes, would be run daily, or at the beginning of every shift, generating a report grading the state of all critical system functions as PASS or FAIL, with a numerical value indicating where they fall relative to the acceptance range. Daily reports may be logged so that system performance can be tracked over time and maintenance (e.g. replacement of lamps, camera calibration) can be scheduled without interruption of normal production.
Looking Ahead
In addition to the broad acceptance that AT has gained for QC/NDT of composite materials, it is proving to be useful for newer ceramic structures and coatings that are difficult to inspect with ultrasound. Dedicated AT signal processing methods have advanced far beyond the early hot / cold spot days, to a stage where quantitative measurement or depth or thermal properties rivals traditional methods for many applications. On the horizon, the combination of AT and AI may lead to a new generation of tools.
Looking for a reprint of this article?
From high-res PDFs to custom plaques, order your copy today!


