Home » gaging
Articles Tagged with ''gaging''
Column | Emily Hoshor and Sharla Rouwhorst
When ordering gages, two key factors should be considered.
Read More
Measurement
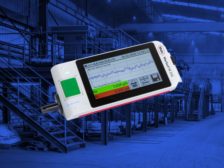
Maximizing Precision: How to Care for and Integrate Your Handheld Gages
Quality control is crucial for meeting high product standards, and handheld gages are key to achieving such precision. But how exactly do these tools ensure accurate measurements?
February 19, 2024
More than Laser Gages - Available Today
The added twist in recent years has been the use of a chromatic or "color" focus effect where different colors of light focus at different distances.
August 2, 2023
Measurement
Digital Gaging: Embracing The Accessibility Afforded By Today’s Technology
Data reliability is more important than ever.
May 30, 2022
Measurement
It is Never Too Late to Teach an Old Custom Gage New Tricks
There are myriad ways to breathe new life into existing gages without the need to invest in new gaging.
March 8, 2022
Measurement
Gaging Evolves For Precision, Productivity, Ergonomics & More
Gage design is continually being enhanced and refined.
December 6, 2021
Measurement
Modern Gaging Trends: Technology Evolves to Meet the Needs of Today’s User
Implementing these new technologies will make today's gages easier to use, offer more capabilities in an easier-to-read fashion and survive point of manufacture gaging.
September 1, 2021
Measurement
Innovation is Changing the World of Handheld Gaging
Within the Manufacturing Innovation Process, Metrology has Played a Predominant Role.
July 1, 2021
Special Gage Solutions Optimize Measurement for Many Unique Applications
Discover gaging solutions for manufacturers in the automotive, aerospace, power generation, food and medical industries.
April 7, 2021
Stay in the know with Quality’s comprehensive coverage of
the manufacturing and metrology industries.
eNewsletter | Website | eMagazine
JOIN TODAY!Copyright ©2024. All Rights Reserved BNP Media.
Design, CMS, Hosting & Web Development :: ePublishing


