NDT
Why Identifying Carbon is Crucial for Site and Inspector Safety
Each material has its own set of characteristics, which include tensile strength, malleability and thermal conductivity.
October 6, 2020
Why COVID-19 makes materials analysis in quality control more important than ever
Thanks to the continued development of material analysis technologies like LIBS, OES and XRF, testing in-house couldn’t be easier.
October 6, 2020
A guide to Force Measurement in Static Materials Testing
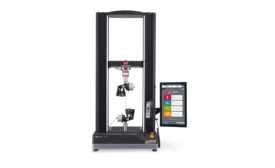
Force testing is the most fundamental element of materials testing and continues to be critical to the safety of the world around us.
October 6, 2020
Understanding Accuracy for Computed Tomography
If you take time to understand these definitions, standards and testing methods, you’ll be able to determine the accuracy of CT in your specific application.
October 5, 2020
Why Pre-Build Calibration is Critical to Part Quality for Metal Additive Manufacturing
Measure twice, weld once.
October 5, 2020
NDT Headline
Carestream NDT Executive Honored by British Institute of Non-Destructive Testing
September 14, 2020
Quality Headline
Training the Next-Generation of NDT Inspectors in FMC/TFM
August 31, 2020
NDT Case Study
X-ray CT for Quality Assurance of Metal AM Parts
The technique of choice for seeing inside metal structures is industrial X-ray computed tomography.
August 6, 2020
NDT Leak Testing
Supply, Demand and Cost: Don’t Let That Helium Just Drift Away at the End of a Leak Test
How can you make the most of this increasingly precious commodity for your critical quality assurance needs?
August 5, 2020
Stay in the know with Quality’s comprehensive coverage of
the manufacturing and metrology industries.
eNewsletter | Website | eMagazine
JOIN TODAY!Copyright ©2024. All Rights Reserved BNP Media.
Design, CMS, Hosting & Web Development :: ePublishing
