Featured on Home Page
NDT | Back 2 Basics
Robotic Computed Tomography Ready for NDE 4.0
Besides the automation of a CT system for NDE 4.0, it is very important to digitize the whole process for NDE.
August 8, 2022
NDT | Phased Array
The Hilbert Transform’s Role in Transforming TFM
With improvements to TFG technology, more users of conventional phased array are showing interest in incorporating the method into their procedures.
August 8, 2022
Management
Why Quality Certifications Matter
Accreditation is critical to ensuring there is an effective quality management system that affords greater process control, reduces risk, and ulitmately results in increased customer satisfaction. And, thanks to the pandemic, it got a little easier.
August 8, 2022
NDT | Certification
Certification Records for Nondestructive Testing (NDT) Personnel
Before an individual can become certified in an NDT method, a number of prerequisites must be fulfilled.
August 8, 2022
NDT | Eddy Current
From Innovation to Sustainability: How ECA Makes New Technologies Durable
The industries that are most inclined to adopt advanced NDT technologies such as eddy current array are often those oriented toward innovation.
August 8, 2022
Test & Inspection
Making The Case For Automated Testing To Ensure PLM Success
August 8, 2022
Software & Analysis
Inspection Software Must Itself be Inspected
Software decreases the time to identify and eliminate quality risks, reuces risk-related expenses, improves compliance capacity, and optimizes labor.
August 1, 2022
Test & Inspection
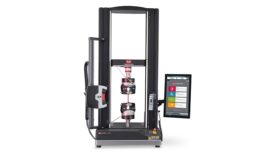
Reduce Testing Downtime through Quality Measures
Testing system downtime causes shipment delays, upset customers, and lost revenue.
August 1, 2022
Stay in the know with Quality’s comprehensive coverage of
the manufacturing and metrology industries.
eNewsletter | Website | eMagazine
JOIN TODAY!Copyright ©2024. All Rights Reserved BNP Media.
Design, CMS, Hosting & Web Development :: ePublishing


.jpg?height=168&t=1659976174&width=275)


