Home » Publications » Quality Magazine
Quality Magazine

2021 June
Cover Story
Back to TopFeatures
Back to TopMeasurement
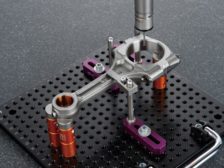
5-Axis CMM Measurement
CMMs of the Future will Provide Immediate Feedback to Help You be Proactive When it Comes to Planning Maintenance and Workload.
June 15, 2021
Software & Analysis
A Corporate Commitment to Quality Requires a Digital-First Approach
Four Trends Shaping the Next Gen in Quality Management
June 10, 2021
Measurement
CMMs Go Collaborative
Is Your Coordinate Measuring Machine Future-Ready?
June 8, 2021
Quality 101
How to Choose the Best Shaft Measurement Tool for your Specific Application
There are Three Primary Options Available Today for Shaft Measurement: Optical, Tactile, and a Combination System
June 7, 2021
TEST & INSPECTION
Changing Face of Additive Manufacturing Inspection
As Manufacturers Embrace Increasingly Complex Materials and Processes, Their Inspection Methods Evolve with Them.
June 1, 2021
Columns
Back to TopOther Dimensions | Hill Cox
Plain Ring Gage Calibration
Short Range Comparison Techniques are the Most Popular for Calibrating Plain Rings.
June 15, 2021
Face of Quality
Redefine Audit Strategy
Organizations Have Been Forced to Redefine Their Quality Audit Strategies.
June 8, 2021
Speaking of Quality | Charles W. (Wes) Shelton
Measurement System Analysis More Than a Line on a PPAP Submission
June 1, 2021
NDT
Back to TopNDT | Leak Testing
E-Mobility Gives Automakers a Host of Leak Detection Challenges
EV battery cells, battery packs, electric motors and other systems modified for EV applications all require leak testing to assure both quality and safety.
June 9, 2021
NDT | Back 2 Basics
The Most Common Misunderstandings about Magnetic Particle Testing
When in doubt, always check with a certified Level III or contact your NDT product supplier.
June 9, 2021
NDT | Radiography
Neutron Radiography and Turbine Blades
Neutron Radiography Works on the Same Basic Principles as X-Ray Imaging Except With Neutron Radiation Instead of X-Radiation.
June 8, 2021
NDT | Training
Remote Visual Inspection an Important Part of the NDT Toolbox
Remote Visual Inspection has Provided Key Inspection Data While Maintaining Safety for its Operators.
June 7, 2021
NDT | Back 2 Basics
The Basics of Digital X-Ray Inspection
Conventional Radiography Will Continue to Have a Pace in NDT, but Digital Radiography is the Future
June 7, 2021
Stay in the know with Quality’s comprehensive coverage of
the manufacturing and metrology industries.
eNewsletter | Website | eMagazine
JOIN TODAY!Copyright ©2024. All Rights Reserved BNP Media.
Design, CMS, Hosting & Web Development :: ePublishing


