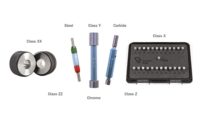
The use of the go/no-go fixed limit gage is considered one of the simplest forms of pass/fail attribute inspection. If the go fits and the no-go does not, the product is considered in tolerance. When inspecting a cylindrical hole, if the go does not enter, the hole is too small (undersize). If the no-go enters, the hole is considered too large (oversize). The questions and problems do not begin to arise until the size of the hole drifts closer to either the small side of the tolerance or the large side of the tolerance. This is when the discussion of the selected gage diameters, tolerances and gaging force come into play.
Go and no-go gage dimensions and tolerances are derived based on the product dimensions and tolerances. The general rule of thumb is that the go plug gage diameter (plus tolerance) would represent the smallest diameter of the product tolerance for the hole. The no-go plug gage (minus tolerance) would represent the maximum diameter of the product tolerance for the hole. The sum of the go and no-go gage tolerances should not equal more than 10% of the total product tolerance (the 10% Rule). The go gage is fairly straightforward. The go must pass freely through the entire length of the hole. The fun starts when the no-go is used. The amount of force required for the gage to enter the hole becomes a point of discussion. This is due to a certain level of subjectivity. The questions asked are: How far is the no-go allowed to enter? How much force should be applied? Should the tolerance on the no-go gage be plus?
How far is the No-Go plug gage allowed to enter the hole?
The simple answer is: the no-go plug gage should not enter the hole. This assumes that there are no chamfers or corner breaks on either the gage or the part. Most standard plug gages have a slight corner break to prevent the gage user from damaging softer materials with a sharp edge and to allow easier entry into the hole. When you combine this corner break with a radius or chamfer on the ID of the part, you will get some entry into the part. Anything deeper than the combination of these features would be a failed product.
How much force should be applied to the No-Go plug gage?
The gage should never be forced. This is difficult to quantify. Some customers have done extensive testing attempting to quantify this as a specific force. This generally becomes hard to reproduce accurately on a shop floor or at incoming receiving. The key to solving this problem is to not allow the size of the hole to drift up to the high side of the tolerance. In some cases guard banding may need to be applied to ensure that the products do not reach a borderline or out of tolerance condition (see ASME B89.7.3.1-2001 for more information on guard bands). If guard banding is used, be sure to ensure that the remaining tolerance inside the guard bands is able to be produced and measured by the measuring and manufacturing equipment used by both the customer and vendor.
Should the tolerance of my No-Go plug gage be Plus tolerance instead of Minus?
This is a decision for the informed gage user. The discussion usually starts by someone stating that you can’t put a .250” diameter pin into a .250” diameter hole without some allowance (tolerance) for fit. If the hole diameter tolerance is .250” +.004”, then the minimum size is .250” (go) and the maximum size is .254” (no-go). The operator/manufacturer states they are allowed to manufacture up to .254” diameter. Based on the part specification, the part is in tolerance at .254”. If the tolerance on the .254” no-go is applied Plus (i.e .2540 +.0002), there is an opportunity to accept product larger than the maximum .254” diameter.
The geometric features, i.e. roundness and straightness, as well as the surface finish of the product being inspected, need to be considered before deviating from the premise of the 10% Rule. (The Roundness, straightness and taper tolerance for plug gages are held to ½ the diameter tolerance, see ASME B89.1.5. This is done to ensure that the dimensions and surface finish of the gage do not add errors or further uncertainty into the measurement.)
The nature of the materials should also be considered. Ductile and thin walled materials will require further controls to ensure that the force applied to insert the gage does not distort or alter the product.
It is important to note that the 10% Rule is a starting point. It is not an absolute value. Probably the most important factor to consider is ensuring the customer and vendor are aligned in both the measurement requirements and the accuracy of the devices used. This is one of the largest reasons for rejections and measurement discrepancies.
Remember, your gages are your best friends. If they are ordered and used correctly, they ensure that only in-tolerance product is accepted. Using gages as lapping sticks, reamers, hammers or other types of “delicate” adjustment tools will shorten the life of the gage. This misuse may cause out of tolerance product to be accepted, good parts to fail inspection or damage the parts you have worked so hard to manufacture or inspect to become scrap.


