Tracking Progress: Re-evaluating Laser Tracker Technology
Handheld probes and scanners drastically expand possible applications


Laser trackers have long been the portable metrology tool of choice for companies serving the aerospace, automotive and other large-scale manufacturing sectors. Applications for these systems include in-place inspection, metrology-assisted alignment and assembly, prototyping, aerospace tooling, automotive body-in-white measurements, reverse engineering, and part mating for oversized parts and assemblies. A laser tracker system excels in terms of accuracy, reliability and durability for large-scale metrology applications. Yet, its primary advantage is portability. The sheer weight, size and length of some parts make it impossible to measure them on a traditional coordinate measuring machine (CMM).
TECH TIPSA laser tracker is a portable coordinate measurement machine that uses a laser beam to accurately measure and inspect the features of an object in 3-D space. A laser tracker system excels in terms of accuracy, reliability and durability for large-scale metrology applications. Handheld scanning, probing and machine control products have increased the laser tracker’s flexibility and the number of possible applications has grown exponentially. |
In the past, laser trackers were seen as cost prohibitive for smaller organizations. For them, alignment and certification tasks are executed, with varying degrees of success, using makeshift solutions. Today, as customer specifications require tighter tolerances, in the range of thousandths of an inch, manufacturers are investigating the feasibility of laser trackers with renewed interest. Documenting quality control processes is another industry trend forcing companies to re-evaluate their measurement procedures. Since their inception in the early 1990s, market maturation has brought laser tracker prices down, thereby increasing accessibility. Major advances in laser tracker technology have also sparked more attention to expanded usage and functionality.
Technology Explained
A laser tracker is a portable coordinate measurement machine (PCMM) that uses a laser beam to accurately measure and inspect the features of an object in 3-D space. The laser beam is sent to a spherically mounted retro-reflector (SMR) to measure angles from the tracker’s two mechanical axes, the azimuth axis, and the elevation or zenith axis. This data is then combined with a distance from the laser to calculate an X, Y, Z coordinate.
The early predecessors to today’s laser trackers used laser interferometers to measure distance and were tedious and time consuming. Every time the laser’s beam was broken, the operator would have to walk the reflector back to the home position on the tracker. This would waste time, and consequently money, especially if the reflector was tracked out 20 to 30 feet during the measurement cycle. There were work-arounds, but it wasn’t uncommon to break the beam repeatedly if the tool had a lot of obstacles in its line of sight, such as workers or cables.
In 1995, an absolute distance meter (ADM) was incorporated into laser trackers and revolutionized the way they were used. If the beam was interrupted, the operator no longer had to return to a known location to “reset” the unit. The operator simply relocated the beam and continued with the inspection. In their first iteration, ADMs were both slow and significantly less accurate than their interferometer counterparts. The technology advanced very quickly and today there are ADMs available that are even more accurate than the interferometers to which they were once compared. Some units have even incorporated both individual ADM and interferometer technologies into a singular measurement unit called an Absolute Interferometer or AIFM.
There is one line of laser trackers where the operator does not find the beam; the beam finds the operator. A PowerLock camera integrated inside the tracker uses a conical field of view to pick up the reflector. This advancement expedites inspection time as the operator only needs to be in the general vicinity of the tracker to lock a beam on a reflector.
Absolute Distance Meter VS. InterferometerInterferometers (IFM) are the most accurate system for measuring large distances. However, a change in distance, or relative motion, is all that they are capable of measuring. An IFM is unable to determine an absolute position in 3-D space without having a known starting point. Absolute distance meters (ADM), on the other hand, measure absolute distances (i.e. distances to a known point in a 3-D coordinate system) with extreme precision. Unfortunately, even the fastest ADM will never achieve the speed of an IFM for dynamic measurements. All absolute distance meters depend on integration time, which is the time required to perform the operations that determine the target’s position. A useful analogy is the shutter speed on a camera. The longer the exposure time, the harder it is to take a clear picture of a fast-moving object. The same is true with integration time. The longer the integration time, the more likely error is to be introduced into the measurement of a moving object. It is only by combining these two (ADM and IFM) technologies into a single device that an operator can get both infinite dynamics as well as a near instantaneous absolute reference if the laser beam is interrupted for any reason. |
New Capabilities
Although extremely accurate, a laser tracker is limited to measurements within its line of sight. Without a clear line of sight, multiple moves of the tracker may be required to complete a full inspection on a single tool or part. Besides wasting precious time, station moves degrade the accuracy of the measurements as compound error builds with each move. The solution to this drawback has been the introduction of handheld measurement accessories.
Handheld laser tracker accessories function by monitoring a known pattern of infrared diodes on a probe or scanner. When probing a point, the tracker calculates the X, Y, Z position of the probe, while a camera calculates the probe’s rotation values of RX, RY, RZ. The two are combined to get six degrees of freedom (6 DoF) data. These tools provide a broad range of new capabilities and innovations not possible in prior generations of laser trackers.
No Station Moves are Required
When using handheld technology, no direct line of sight is needed to the measurement point. Based on this advancement, the tracker can be set in one position to measure the entire part within a spherical volume of up to 328 feet. Keeping the tracker in its original position helps ensure accuracy and data integrity. This is beneficial on large objects with obscured features since a handheld probe or scanner can be manipulated to gather 3-D data inside or behind the part and even upside down.
SMRs Become Optional
Spherically mounted retro-reflectors, also referred to as corner cubes, are small in size and often dropped, broken or misplaced. They can be difficult to use, especially in challenging applications where an operator may need a free hand to grip a railing. They also have a limited range of measurement. When using a corner cube, the beam from the laser tracker must enter at an angle of ±22 degrees or less. Using a handheld probe, the incidence angle widens to ±45degrees which eases inspections and greatly increases their speed.
Additionally, target kits, which are used in conjunction with retro-reflectors, can introduce a source of potential error. A common mistake is the confusion between imperial and metric sizes. For example, a 25 mm reflector holder cannot be visually distinguished from the one-inch size (25.4 mm).
Handhelds Interact with the Tracker
Handheld probes contain multiple controls on either side of the device for acquiring 3-D coordinate data and interacting with the measurement software. These controls are a time-saving feature since the operator does not need to return to a computer to enter data. This potentially reduces the required manpower since only one person, instead of two, is needed to take measurements.
Some laser tracking systems allow information to be entered with a remote. However, these do not provide the necessary feedback in real time to ensure the inspection has been completed correctly. A system with a remote is also a disadvantage in applications with limited accessibility.
Scanning Applications are Improved
In the past, the only way to scan a part with a laser tracker was to rub an SMR over its surface. For applications that benefit from laser scanning, handheld scanners that can collect hundreds of thousands of points per second are tracked by the laser tracker to allow huge point clouds that are inherently accurate over large volumes. Using this technology, the CAD model can be interrogated on the fly, dropping inspection time from days to a few hours.
Fixtures Become Flexible
Without knowing an object’s absolute position in space, fixtures might be needed to hold a part for inspection. Design iterations require fixture changes that may be costly and time consuming. The ability to inspect all sides of an object allows mathematical models to be created within the software, essentially creating virtual fixtures. The operator can then manipulate the models within a virtual environment rather than creating new fixtures within the physical environment. Design engineers greatly benefit from increased product variations in a given assembly cycle, large-scale prototyping capabilities, savings on material costs and getting the product to market faster.
Automation of Robotic Systems
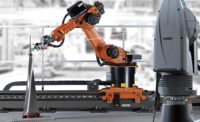
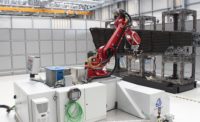
Laser tracker systems facilitate robotic automation and enable less precise, lower-cost robots to be used in higher accuracy applications. Corner cubes are able to assist a laser tracker to calibrate an industrial robot by taking into account the link lengths, twist angles, joint zeros, link offsets and stiffness parameters.
Another way to automate a robot is to guide it to its required positions using six degrees of freedom. This capability allows robot manufacturers to correct the end effector during a calibration cycle with less poses. It also allows the exact location of the tooling center point (TCP) to be known in real time.
The final way to automate industrial robots is to enable on-machine inspection of oversized parts. The easiest way to think of this is to consider the robot as an extremely repeatable operator. Though the robot moves a handheld device over the part to inspect it, the measurements are recorded by the laser tracker instead of the machine. This ensures the accuracy of the results is based on the accuracy of the tracker, not the less accurate NC machine.
Future of Laser Trackers
As laser tracker technology has become more economically accessible, the laser trackers themselves have also become smaller, lighter, faster and increasingly user-friendly. Handheld scanning, probing and machine control products have increased the laser tracker’s flexibility and the number of possible applications has grown exponentially. Options such as battery operation and IP54 (Ingress Protection) have allowed today’s laser trackers to go where people never thought possible. As demand for this technology continues to expand, its availability has expanded to even the smallest job shops. Laser trackers are demanding a second look from a larger audience.
Looking for a reprint of this article?
From high-res PDFs to custom plaques, order your copy today!


