Expand Your CMM’s Capabilities
Moving from tactile and scanning systems to newer optical and laser sensor technology increases the productivity of your CMM.


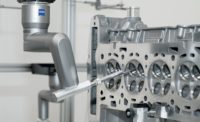
During the past 25 years, coordinate measuring machine (CMM) sensor technology has expanded from tactile and scanning systems to now include optical, laser and surface finish sensors, effectively expanding the CMM’s capabilities. While each CMM sensor technology has its own advantages and limitations, the expanded measuring capability provided to the CMM compels anyone with measuring requirements to consider adding additional sensor technology to a current CMM or purchasing a new CMM.
OPTICAL SENSOR
Optical sensors for CMMs provide noncontact measuring capability that perform micro-form measurements by image processing that cannot be measured with a traditional tactile probe, such as flexible work pieces that may be deformed by slight measuring forces. While centering microscopes mounted on the manual or CNC CMMs have been used since CMMs came into use, they have an inherent disadvantage in that the operation of identifying positions is dependent on the human eye and can result in possible measurement errors. Optical sensors developed specifically for CNC CMMs use state of-the-art image capturing technology with automatic edge-detection software for the calculation of dimensional deviations.
TECH TIPSOptical sensors for CMMs provide noncontact measuring capability that performs micro-form measurements by image processing that cannot be measured with a traditional tactile probe. The laser sensor makes it possible to use the CMM not only as a traditional part inspection system, but also as a universal tool that can be used throughout the entire process enterprise. Surface finish sensors are the most recent CMM sensor technology offering. The addition of a surface finish sensor to a CMM adds another automated measurement capability that streamlines the inspection process. |
In general, the CMM optical sensor utilizes processing software with an array of image, lighting and auto-focusing tools similar to that of a dedicated vision measuring machine (VMM). Image tools are fully programmable for feature type, size and location with respect to the optical sensor location for gathering data points. Edge detection is accomplished by processing the pixel values within the captured image.
CMM optical sensors are often equipped with co-axial light passing through the lens system for optimized surface lighting and ring light for lateral illumination. Dedicated vision systems also include stage illumination (also known as back light), used for high-contrast edge lighting specifically for features that pass through the work piece. Optical sensors typically perform X-Y measurements using image tools and edge detection. The Z (height) measurements are accomplished with the use of auto-focusing by moving the sensor up and down in the machine Z-axis.
Additional key functionality for the CMM optical sensor includes:
- Various objective lenses for the optical sensor increase the range of detail and work pieces that can be measured.
- CMM sensor selection by mounting the optical sensor into an automatic probe changer allows for fully automated measurement programs.
- With micro-form measurement, it may be difficult to remove burrs and dust from the work piece which can result in measurement error. The optical sensor software should include an outlier removal function.
The CMM and VMM share overlapping sensor technology, therefore, the choice of machine platform may not always be obvious. Consider as the typical example a work piece with tactile or scanning sensor requirements and optical sensor requirements. Should the machine platform be a CMM or a VMM?
With the capability of multiple sensor CMM or VMM platforms, a general rule to follow would be 80/20. If the work piece requires 80 percent tactile or scanning sensor and 20 percent is an optical sensor, then the CMM would be the ideal platform. If 80 percent of the measuring is optical based, then the VMM is the better choice. Overall work piece size may be a consideration as CMMs are generally available in larger sizes than VMMs.
LASER SENSOR
Laser sensors for CMMs provide noncontact measuring capability that capture large amounts of work piece point data geometry (or point cloud), in a relatively short time frame. The laser sensor makes possible the measurement of elastic on thin-walled work pieces not suitable for contact measurement with tactile sensors. Because a laser sensor captures large point clouds, it is the ideal sensor for measuring free-form surfaces, sheet metal and thin-walled parts.
With data acquisition of 75,000 points/second and higher, the laser sensor benefits CAD-based feature inspection, free-form surface inspection and reverse engineering. Laser sensor scanning paths used to measure the work piece are defined by a starting point, scanning length and scanning width. These parameters can be defined using the CMM or a CAD model.
The basic single-line laser sensor is available with varying combinations of scan length and scan depth and should be taken into consideration when selecting a laser sensor. Scan length determines the maximum width of scan, and scan depth determines the maximum depth of features in which measurement points can be acquired. For example, a laser sensor with a laser length of 60 millimeters and scan depth of 60 millimeters (60 x 60) would be able to collect measurements on a flat part 60 millimeters wide with each pass of the laser sensor. However, to ensure complete coverage, each subsequent pass should overlap the previous scan. The amount of overlap on a flat work piece may only need to be about 5 millimeters.
Work pieces with shapes and features of varying heights may require more overlap to ensure complete coverage and take into account the depth of coverage. In this example, if the scan depth is also 60 millimeters, then the laser sensor would require additional scans for any features more than 60 millimeters in height, as well as necessitate the repositioning of the laser sensor probe attitude with an articulating probe head.
For increased 3-D measurements and to reduce the number of probe attitude position, laser sensors are available in a line laser cross-type that enables simultaneous scanning with three laser beams, allowing efficient measurement of complicated 3-D shapes. This type of laser sensor is also referred to as a cross scanner. Having three crossing beams extends the coverage of 3-D shapes, thereby reducing the number of passes or probe attitude changes that may be required.
While lasers enjoy the huge benefit of collecting a large of amount of point data faster than the traditional tactile or scanning sensors, the measurement error of the laser sensor is higher. Laser sensors scanning error may be 20 microns (0.020 mm or 0.00078 inch), where tactile and scanning sensors are generally in the one to two micron range (0.010 to 0.020 mm or 0.000039 to 0.000078 inch).
The laser sensor makes it possible to use the CMM not only as a traditional part inspection system, but also as a universal tool that can be used throughout the entire process enterprise:
Development – Optimized design utilizing measurement point cloud data significantly improves the efficiency of the development process, even when no master model or CAD data is available for the work piece.
Prototyping – Shortens the entire process from prototyping to mass production because simulations can be used to compare prototypes with CAD data, check for part interference and set clearances, and optimize machining settings.
Production – Allows the obtained data to be used for correcting dies, for example, by controlling the variability in mass-produced products and feeding analysis data back to the preceding process step.
Inspection
- Feature-by-feature comparison by using the point cloud or mesh data to construct features for comparison back to design data (CAD).
- Cross-sectional shapes where the point cloud/mesh data can be cut at a specified position for comparison to the CAD data.
- Planar shape comparison using point cloud or mesh data compared to the CAD data with the planar shape errors displayed on a color map.
SURFACE FINISH SENSOR
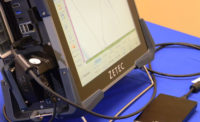
Surface finish sensors are the most recent CMM sensor technology offering. The addition of a surface finish sensor to a CMM adds another automated measurement capability that streamlines the inspection process while utilizing a single work piece inspection device with the benefit of a single report.
This method of surface finish measuring is performed with a skid-type measurement with a 90-degree diamond stylus tip contacting a planar (flat) surface on the work piece. Surface finish should comply with a standard—ISO 97, JIS 01, VDA and ANSI being the most common.
Commonly reported parameters for surface finish include:
- Ra – the arithmetic mean deviation of the profile where Ra is the arithmetic mean of the absolute values of the deviations from the mean line.
- Rq – the root mean square deviation of the profile where Rq is the arithmetic mean of the squares of profile deviations from the mean line.
- Rmax – the maximum height of the profile where Ry is the sum of the height (Yp) of the highest peak from the mean line and depth (Yv) of the deepest valley from the mean line.
The process of measuring surface finish begins with selecting the planar area to be analyzed, then positioning the surface finish sensor stylus so that profile being measured (also known as the profile trace) is level, parallel and perpendicular to the grain (direction of lay marked by the cutting tools). The surface finish settings for measuring are set via the surface finish sensors in the dedicated software, which also provides the analysis tools and functions.
In addition to the surface finish sensor measurement settings, selection of the measuring stylus is dependent on the application. A standard stylus would measure unobstructed flat surface, although a dedicated styli for various holes, grooves and gear-tooth applications may be required.
SUMMARY
While the many sensor technologies available for the CMM may not be as thorough and as comprehensive as its dedicated technology counterpart, the overwhelming benefits of single setup, single reports and increased productivity merit a serious evaluation of using the CMM for more than just dimensional inspection. The time and cost savings justifies the addition of other sensor technology beyond traditional tactile and scanning probes.
Looking for a reprint of this article?
From high-res PDFs to custom plaques, order your copy today!


