The Versatility of Vision Metrology
In the manufacturing world, speed and accuracy are high priorities. Vision technology provides both.

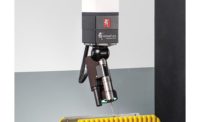
Some vision measurement systems offer “one button” simple operation and rapid measurement results, making them ideal for in-process inspection solutions. Source: QVI

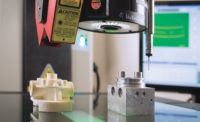
When configured in a multisensor configuration, vision measurement systems can handle any complex inspection task. Source: QVI

Video metrology systems can compare thousands of measurement data points to a 3-D CAD model, allowing for dimensional analysis and manufacturing optimization. Source: QVI


Up until the late 1970s, the contour projector or optical comparator was the mainstay of automated two-dimensional inspection systems. Since then, while there have been many advances in projector technology, video based image analysis has jumped to the forefront for noncontact inspection and measurement tasks.
Driven by advances in optics, cameras, electronics and software, vision metrology systems have increased in performance, speed, and versatility. The ability to quickly collect and analyze hundreds or thousands of accurate measurement data points makes acquisition of vision based, noncontact metrology systems a high ROI business investment.
VISION VERSATILITY
Key factors that make vision (video) measurement systems attractive are ease of use, measurement throughput, accuracy, repeatability, and the ability to use other sensors that may be necessary to measure all features of a part.
Although a video-only measurement machine could be suitable as a dedicated in-process inspection system, video-based multisensor systems can offer the measurement capability of a single sensor technology, or of several technologies, all in one machine. This added utility provides complete “first-article” inspection capability without the measurement uncertainty of moving the part to another measurement machine.
A high-resolution camera in a video system is used for high-speed, noncontact measurement of part features. When configured on a vision-based multisensor machine, a touch probe could measure contours, vertical surfaces and underhangs. Integrated laser probes can rapidly collect large numbers of data points to characterize complex shapes, contours and profiles. These laser probes may also be suitable for transparent or translucent surfaces, and difficult geometries, such as deep narrow slots, or small blind holes. Noncontact (video and laser) and contact (touch probe) technologies allow for measurement of a myriad of parts and features, all combined into a single measurement machine. One multisensor metrology machine will most likely be less expensive than several single technology machines, and will occupy less valuable facility space. Additionally, personnel training costs will be minimized, as operators will only need to master one measurement system, rather than several. Best success will be attained with systems and software that have been designed with multiple sensors in mind from the start, rather than as an afterthought.
While measuring microscopes are limited to a small field of view and shallow depth of focus, some benchtop vision metrology machines feature a Large Field-of-View (LFOV), up to 100mm, which is ideal for 2-D measurement of small parts. Compared to other measurement methods (a touch probe, for example), vision measurements can be completed in seconds rather than minutes, and allow for rapid measurement of multiple small parts simultaneously. In some cases, a part may be aligned automatically by software, eliminating expensive fixturing, while allowing for quick, accurate measurements and maximizing throughput in a production inspection environment.
Higher performance vision measurement systems use software that is compatible with 3-D CAD models, and through sophisticated optics provide high accuracy measurement and dimensional analysis for small, challenging part features. These more advanced systems extend the many vision based productivity advantages, when compared to alternate technology approaches to measurement, such as use of a CMM (coordinate measurement machine) with a touch probe. Larger parts may be measured by way of floor-standing vision measurement machines that have a motorized moveable stage. These higher performance vision-based systems generally offer larger volumetric measurement ranges for all three (X, Y, Z) axes.
TECHNOLOGY FEATURES ENHANCE ACCURACY
Today’s automated video measurement systems optically magnify the image of a part captured by a camera and use advanced edge detection software algorithms to determine edges and feature locations on the part. It is the speed and precision of this software based edge detection process that makes video measurement highly suitable for a production environment. This modern, progressive software determines the location of feature edges based on grayscale values of high-resolution megapixel camera images.
Some vision metrology systems offer advanced telecentric optics. Telecentricity is an optical characteristic that assures an object is a constant size and shape regardless of its distance from the lens. A complex telecentric optical system provides a flat image, across the full field of view, without any curvature or distortion, so a part can be placed and measured anywhere within the field of view and still be measured accurately. Other vision metrology systems may include single magnification optics, dual magnification optics, or a zoom lens with automatic calibration. Selection of the system optics would typically match the part feature sizes and measurement throughput needs. The capabilities and accuracy of these various options are one reason for the wide price variation of vision measurement systems on the market.
Most vision based measurement systems have multiple, programmable illumination sources to provide the right light for the right measurements. Edge contours, through-holes, slots, and various surface detailed features require specific lighting to maximize image contrast for accurate edge detection.
MAKING BUSINESS SENSE OF IT ALL
With a multitude of vision metrology manufacturers and models available, performance and prices vary widely. The key to making a wise choice is to make sure the measurement machine features match the intended purpose for use.
A LFOV measurement machine offers high-throughput measurements for most small parts, making them ideal as in-process production inspection machines. If all the items being measured are small, there is no need to spend extra money for a machine that offers a large measurement envelope.
For parts that have very small dimensional features, vision metrology machines can have high versatility when equipped with advanced optics or added multiple sensors, such as touch probes, lasers, and micro-probes. Vision based metrology offers excellent productivity and high accuracy for any measurement routine within their machine measurement volume.
Additionally, most vision metrology machines offer integrated functionality, with Statistical Process Control (SPC), reporting, or analysis applications, further enhancing throughput and utility of the investment.
In the manufacturing world, speed and accuracy are high priorities. Vision technology provides both, and may be the one of the most versatile of all metrology solutions, providing rapid payback as a quality and/or manufacturing expenditure.
Looking for a reprint of this article?
From high-res PDFs to custom plaques, order your copy today!


