The time is the late 1960s. Detroit muscle cars roam the streets. Woodstock is just around the corner. Passenger air travel is growing at an unprecedented rate. To stay ahead of this growth curve, Boeing designed a new 747 jumbo jet that will carry more passengers than ever before. Roughly in the same timeframe, BAC & Sud Aviation (now BAE and Airbus respectively) were challenged to fly a plane full of passengers faster than the speed of sound from New York to Paris in just 3.5 hours. During these amazing times, engineers were tasked with the impossible.
Imagine being tasked to attach the aircraft wings to the fuselage of either of these incredible machines. Each aerostructure would have its own unique set of challenges, not least of which would be the tools available at that time for large-scale precision alignment. Assembly tasks like these are difficult even with the advanced technology available today. Now visualize the challenge as the only solutions you had available to accomplish this job were optical scopes and plumb-bobs.
Laser Trackers Enable Portable Measurement
Manufacturing innovations like these aircraft have pushed metrology, the science of measurement, forward. By combining hardware and software, engineers can solve problems in new ways that simply did not exist before. Now fast forward thirty years to the late 1990s. Technological advancements delivered a tool known as the laser tracker, the current standard for large-scale alignment and verification. A laser tracker is a portable coordinate measurement machine (PCMM) that uses a laser beam to accurately measure and inspect the features of an object in 3D space. Its laser beam is sent to a spherically mounted retro-reflector (SMR) touching the object to measure two angles and a distance, thus calculating an X, Y, Z coordinate.
Laser trackers quickly found their home in large-scale manufacturing, because no other measurement solution could accomplish those tasks. Their magical ability to return a 3D coordinate from these strange steel spheres (SMRs) allowed engineers to perform wing-to-body alignments or even tooling verification faster and more accurately than ever before. However, first generation laser trackers had their own special issues. When the line of sight was interrupted between the laser tracker and the SMR, the operator would have to walk the steel sphere back to a home position to pick up the laser beam from the tracker.
This limitation reduced operator efficiency, and consequently cost money, especially if the reflector was being tracked at 20-30 feet during the measurement cycle. There were work-arounds, but it was not uncommon to interrupt this connection repeatedly if there were physical obstacles in the work area like workers or cables. This issue was solved when the first absolute distance meter (ADM) was introduced. However, laser trackers still required a skilled hand and a well-trained operator to truly be a successful tool.
A noncontact scanning ADM is now integrated into this laser tracker.
Automotive Industry Drives a Breakthrough
Going back to the very beginning, all laser trackers still have one thing in common. They track an SMR and return a 3D coordinate. Ironically the same function that unites these products was a limiting factor in the widespread adoption of the technology. In 2004, an innovation changed the industry. A major automotive OEM challenged several metrology leaders to design a system that could track a handheld scanner around an area the size of an automobile with tracker-like accuracies, yet utilizing noncontact scanning for surface digitalization. Driven by this industry need, the first large volume wireless probe worked like a “walk around CMM.” It allowed the operator to use the common stylus on the probe to measure a part similar to using a CMM or portable arm.
This significant breakthrough removed the line of sight and challenging tooling issues of using an SMR with traditional 3D trackers. Early benchmarks showed probing a part or tool could provide up to an 80% increase in throughput over traditional SMR measurements. This technology created a dramatic shift in the way objects were measured that the SMR, the very tool that enabled the laser tracker to function, became a historic tool that was seldomly used to measure parts.
This laser tracker operates with a single battery powered IP54 sensor for factory floor usage or remote outdoor applications like wind power applications.
Scanning Makes an Entrance
Around the same timeframe that 6DoF (degrees of freedom) probing and scanning was changing the workflows and applications for laser trackers, 3D terrestrial laser scanning was starting to find similar applications in large scale manufacturing. This high-speed LIDAR scanning technology was originally deployed for geospatial land surveying. An operator could collect millions of points very quickly to capture the surface of buildings or the surrounding landscape. If a sensor like this could recreate the physical dimensions of a building, could it do the same for an airplane or car? This fundamental shift in measuring from physically touching a part to measure it to “just scan it” has allowed manufacturers to completely rethink their metrology workflows and equipment.
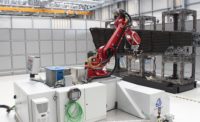
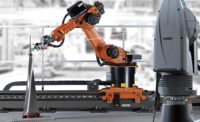
The idea of scanning with a laser tracker is not new. An operator in 1995 could be seen dragging an SMR over the surface of an aerostructure to create a simple point cloud. Laser tracker based large-volume scanning has accelerated over the past six years. An example is a laser scanner with extreme speed that is tracked by a laser tracker and attached to a COTS robot. This scanner-tracker integration effectively turns a standard robot into a very accurate shop floor measuring machine.
This advanced Metrology Enhanced Automation application shows how a manufacturer can capture the power of 7DoF to engineer low accuracy robotics coupled with a laser tracker. This system is able to obtain fast, highly-accurate results in a high volume, large part production environment during machining processes by implementing real time control strategies.
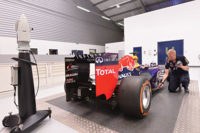
On the other end of the spectrum, there are handheld scanners with an ultra large stand-off area of up to three feet with a scan line of over two feet wide that captures huge amounts of data very rapidly. Other contemporary scanners allow the operator to measure objects the size of an average car from a single station (position) in less than 30 minutes. The need to scan very large objects quickly with metrology grade accuracies has driven different manufacturers to integrate their laser trackers to several different scanners. In addition to the hand scanners described above, there are also examples of structured light scanners located by laser tracker, as well as terrestrial laser scanners using laser trackers to control their global accuracies.
Terrestrial Scanning Debuts
Laser trackers have the inherent ability to hold very tight tolerances over very large distances. This important feature renders the marriage of laser trackers and terrestrial laser scanners as a natural progression. Terrestrial laser scanners can measure millions of points very quickly, but it can be a challenge to register these point clouds together while maintaining metrology grade accuracies. It is exactly this need that lead the industry to another advancement in laser tracker technology—a scanning absolute distance meter that pushes laser trackers into the next level of usability. A scanning ADM that measures at an internal rate of over one million points per second is now integrated in a new line of laser trackers. The technology can register sub millimeter noncontact surface scans with metrology grade SMR laser tracker measurements—all within a single battery powered IP54 sensor for factory floor usage or remote outdoor applications. This new product line effectively bridges the gap between laser trackers and lidar scanners.
The MEGAROB project developed a flexible, sustainable and automated platform for high accuracy manufacturing operations in medium and large complex components using a spherical robot, a 7DoF-enabled laser tracker and an overhead crane.
Glancing Back, Moving Forward
Manufacturing has changed dramatically since that aerospace engineer was tasked with aligning the wings to the fuselage of the 747 more than 50 years ago. The modern airplanes replacing this legendary gem require an increasing amount of data-driven processes with an even higher level of precision was achievable before. In the past, some level of misalignment in the aerostructure could simply be “trimmed out” during flight testing, but today that equates to inefficiencies of the aircraft. To reach the fuel efficiency requirements of the burgeoning aerospace industry, new inspection processes and technology must continue to advance.
I have been involved with laser trackers since the early days and witnessed the evolution of this solution as it has grown and matured at a consistent rate. It has been amazing to watch some of the smartest minds in metrology push the power and usage envelope on this technology, considering its humble roots. Today, laser trackers are utilized in almost every type of large-scale manufacturing from aerospace to power generation. The emerging trend towards noncontact scanning is pioneering another giant leap for a technology that seems to have no limits. Q


