Getting Started with In-Process Gaging
Take advantage of all the benefits of in-process gaging.

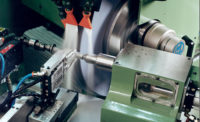
Today we see a trend where more companies are looking for ways they can run lights-out with fewer workers. In-process gaging can help with the automation that many shops need. Source: BLUM
Historically, in-process gaging has not been widely used in the machine tool industry, but today that’s changing. Gaging companies have been evolving their products and making them easier to use, while enabling users to do more with gaging routines.
There’s a perception that in-process gaging adds to cycle time. However, when done properly, this functionality will likely save time and resources by reducing scrap and eliminating operator error. Here I’ll review some of the things you should consider if you’re interested in getting started with in-process gaging.
Consider Your Parts
The first step when considering gaging is to think about the parts you produce. Is there a point in the process where the part is clean (free of chips or coolant), or you can make it clean for measurement? Contaminants can throw off your measurements, so the parts must be clean. It’s also important to consider your angles of approach to the part. Do you have a clear path where a straight probe will work? If not, you can investigate other options such as angle probes or multi-tip probes. In any case, the size and shape of the probe selected should be able to access the part while clearing all its features.

In-process gaging can be performed on any type of machine tool. Source: BLUM
It’s also important to do some planning to confirm that you have the macros that will be needed to make your in-process gaging work. This is another area where we’ve seen vendors placing a focus. Today there are a lot more macros available so shops can do more with gaging routines.
Temperature Can Be a Factor
For critical features with close tolerances, temperature can be a factor. For example, let’s say the part is an axle shaft. The shaft is just under one inch because ultimately, it’ll need to go through a hole in the housing that’s exactly one inch in diameter. If I take a measurement of that shaft when it’s 90 degrees, it might read over one inch but when it cools down it’s under one inch. The point is, temperature should be considered when investigating in-process gaging.
Evolution of Probe Types
Probes are fairly straightforward in terms of components. The round probe consists of a receiver and a shank, and they come in different sizes. In the early days of usage, probes were hardwired, which meant that if you broke or damaged the wires, the probe would be dead. This caused some difficulty because replacements were needed. The next generation of gages used radio-style probes, which functioned very well for working within the line of sight, but if you got out of the line of sight the probe was inoperable. The current technology uses a multiple signal receiver, so we can put up to four probes in the machine that have different configurations of styli and measure the features differently.
Setting Up the Mastering Device
The probe itself is nothing more than a tool in the machine. Due to the variability of machine conditions, you may not always know where the probe is located at any given moment. This is where the datum sphere—your mastering device—comes into play. The datum sphere is a fixed point that you locate in your machine and use to calibrate the probe when you use it to measure a part. In order to ensure consistent readings from part to part, first you use the datum sphere to calibrate the probe before you measure the part.
The thing to consider here is, where do you have room to put the datum sphere? This should be a spot that allows you to cut the part and also allows good access. Once you’ve determined the placement, then you measure the sphere and create a location that becomes the master data point. This becomes your comparison point for later measurements.
If your tolerances are wide open, you might be able to do without the datum sphere. But if you have tight tolerances you need to make sure you’re recalibrating the probe. Bottom line is, if you can’t use a datum sphere, you should expect a little more fluctuation in your measurements. If you can use one, you’ll be able to achieve a tighter range of values.
Compatible Machine Types
In-process gaging can be performed on any type of machine tool. Keep in mind a probe is essentially a tool, so it goes into your machine just like any other tool. One machine type where some extra consideration might be needed is the turret lathe. Here, the probe is always exposed, which means there’s potential for damage. This is a scenario that could require some extra care.

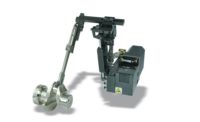
A probe measures a part’s dimensions. Source: Renishaw
Gaging Apps on the Rise
The latest development from the on-screen gaging companies are apps that can quickly create code or do some quick measuring. This enables quick measuring cycles. The operator can either run those cycles for quick checks, or copy and paste them into their own programs. These apps are handy because they provide the code already written and tested versus requiring the operator to create it from scratch.
Investigate Your Options
Today we see a trend where more companies are looking for ways they can run lights-out with fewer workers. In-process gaging can help with the automation that many shops need, but the things I’ve just mentioned should be considered upfront. Gaging companies are more than happy to help investigate the options, often alongside the machine tool builder. I encourage users to consider taking advantage of all the benefits of in-process gaging and tap into the experienced resources that are available to them.
Looking for a reprint of this article?
From high-res PDFs to custom plaques, order your copy today!


