Manufacturers Show Their ‘Metal’ Using the Imaging Power of Digital Microscopes
Improving the quality of metal-based products.

Quality control of products with metal-based materials can be challenging, from working with recycled metals to the rise of additive manufacturing (AM).
In a traditional manufacturing environment, mass production creates one of the major challenges to ensuring quality control. As with many other materials, manufacturers of large volumes of metal-based products must be able to quickly scan samples for impurities, cracks, and other defects. Marcel Lucas, Technical Sales Support Specialist for Olympus Industrial Microscopy, shares his expertise to offer manufacturers a solution. He says that “enhancing image contrast between these defects and the base material can considerably increase productivity and quality.”
To highlight defects in metal-based products, there are digital microscopes that offer a variety of illumination modes and user-friendly functions that can determine the most suitable illumination mode at the click of a button. “These illumination modes are complementary and can highlight different types of defects,” says Lucas.
In raw materials, defects can come from a mixture of different elements and phases. According to Lucas, the solution for the quality control of raw materials involves porosity measurement, phase analysis, and particle counting. He explains, “A porosity measurement can quantitatively assess the density of the raw material. A phase analysis can assess the volume fraction of different constituents in the raw material, and particle counting can assess the size and volume fraction of various precipitates,” all of which can be performed using digital microscopes.
Raw metallic samples often present two other inspection challenges: shiny surfaces, which can cause considerable glare, and very rough surfaces. As Lucas points out, “This glare reduces image contrast, making the microscopic examination of these samples difficult.” In the case of rough surfaces, Lucas says, “the limited depth of field of objective lenses makes their examination difficult as only small sections of the sample in the field of view would be in focus.”
Some digital microscopes, such as Olympus’ DSX1000 digital microscope with MIX illumination and high dynamic range, can significantly reduce glare, enabling manufacturers to highlight impurities. They also can quickly acquire 3D images of rough surfaces, so the entire field of view appears in focus.
When manufacturers work with recycled metals, the culprit impeding their inspection can be cleanliness. “The presence of nonmetallic inclusions in steel affects its formability, machinability, mechanical performance, and corrosion resistance,” says Lucas. Technologies like metallurgical microscopes and software aid in qualitative assessments of cleanliness. “For instance, Olympus offers a line of metallurgical microscopes and objectives with a high numerical aperture to find and examine nonmetallic inclusions at high resolution. There is also OLYMPUS Stream™ image analysis software that can accurately classify and measure the size of nonmetallic inclusions according to industry and international standards, such as ASTM E45.”
The rise of additive manufacturing poses its own challenges when working with metal-based materials. “The concern is the roughness of the as-built surface, as a rougher surface may result in the premature failure of the component,” says Lucas.
Laser scanning confocal microscopes, such as the Olympus LEXT™ OLS5000, can acquire 3D images with a height resolution of 6 nanometers to measure surface roughness. Dedicated objective lenses with a high numerical aperture can ensure accurate height measurements across the entire field of view.
For those interested in implementing a metal-based manufacturing operation, Lucas offers this advice, “Systems are becoming more complex with multiple moving components. Components are becoming smaller and smaller, and higher performance is expected from them. Consequently, tolerances on component dimensions are much tighter. Customers demand dimensional accuracy, so manufacturers must have reliable measuring tools to control their processes.”
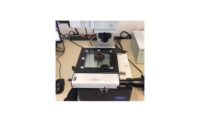
To ensure reliability, Olympus offers calibration of the microscopes mentioned in this article, as well as the STM7 measuring microscope with NIST-traceable calibration standards and guarantees the accuracy and repeatability of their measurements when the calibration is performed by an Olympus technician.
Looking for a reprint of this article?
From high-res PDFs to custom plaques, order your copy today!


