Measurement
It is Never Too Late to Teach an Old Custom Gage New Tricks
There are myriad ways to breathe new life into existing gages without the need to invest in new gaging.

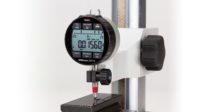
Image Source: Mahr
Custom gages have been in use since the first mass produced parts came out of the industrial revolution. This is because standard off-the-shelf gages may not always be the best choice for a given measurement for several reasons: they do not ensure the proper location for the check; there may be a need to make multiple checks to improve productivity; a design is needed to help eliminate operator influence; or even a complete automated gaging station is designed for lights out operation. Whatever the gaging requirement, custom gaging has been used to increase productivity at the point of manufacture for decades.
Something that has always been striking to me about custom gage design is that what is new is what is old. When it comes to custom gage design, the basic principles of metrology are the basis for a successful gage. Not much has changed in the decades since the successful “classic” standard bench ID/OD gages, snap or even air gages were introduced.
These gage designs are following the laws of physics and metrology. A good custom gage design employs features such as mass for stability, rigidity for repeatability, part staging to eliminate operator influence and consideration for specific part characteristics that need to be measured. These gage design features have been employed, and many of the custom gages that have been used at the point of manufacture are still good and continue to inspect parts day in and day out.
But what is changing is the hunger for gaging data and information. Digitization has changed our world and modern technology continues to shape the manufacturing industry. The vision of Industry 4.0 illustrates that production systems and machines are required to communicate and adapt continuously based on the information being gathered. That means production gaging must be able to communicate by sharing information and in response, provide the user with information about the process.
All types of gaging—hand tools, portable surface systems, and complex metrology systems—went digital long ago. Many of today’s digital tools can perform complex measuring tasks and share data much faster than just a decade ago. This goes along with the custom gages that have been in place for years. Because of their good gage design, they meet the tough gaging requirements for shop floor use; however, many of them do not speak the language of Industry 4.0 in terms of being able to communicate and share information to meet new demands.
Today, there are myriad ways to breathe new life into existing gages without the need to invest in new gaging. Users are familiar with the gages they have. They may be under quality control cycles, are easy to use, provide good results, and have proven themselves over time.
The proliferation of personal computers and the fact that almost everyone is comfortable using them has made the PC available in nearly every manufacturing, assembly, and quality area. PCs are rarely necessities for standard dimensional measurements, although practically any application can be enhanced using PC-based gaging software. The use of “gaging computers” when combined with a proven custom gaging solution offers greater potential benefits and the barriers to entry are lower than ever.
Gaging computer systems are now handling many individual gaging points by integrating different gage interface types into one base computer. Instead of having a number of standalone air gages and LVDT style bench amplifiers, the gaging computer has the interfaces available to configure all these input types. This is where less becomes more for the gaging process. The computer provides the visual indication for the operator to look at, and the individual displays to watch the changing tolerance colors and the data being acquired. And because the gaging computer can be networked to communicate with other systems, data and measurement results flow seamlessly within the modern factory. The gaging computer has become the display, data collection device, results classifier, and overall guide to the measuring process while information is being shared transparently in the background.
Automating the gaging process is another benefit for both the operator and process engineer. For complex measuring functions—for example, measuring 20 features on an engine block after an intricate machining operation—the gaging computer will provide a “guided sequence” that leads the operator through the gaging routine. The routine can instruct the operator on what gage to use, where to place it, as well as provide an indication of the results and steps to take if the results are not as expected. All the time, in the background, the results of the measurements are being stored for continuous review and analysis of the process anywhere in the world.

Standard Modules (left), PC Based Gaging (center), More results and data to use (right) Image Source: Mahr (Click on the image to enlarge.)
A Case In Point – Teaching Existing Gaging A New Language
A large manufacturer has a target to reach Industry 4.0 because there is a need for more part data for numerous reasons, including to document quality, control the process, and predict and prevent problems. There are dozens of gaging stations with users inspecting parts on standard or custom gage fixtures. Each station may have a series of gages, air or mechanical, and often with different display systems of various vintages by distinct manufacturers. The custom gages are producing the same good reliable measurements as they have for years.
However, each station is an island operating on its own with, at best, rudimentary one-way data collection (if any at all). Simultaneously, at most workstations in today’s manufacturing environments there is an operator using a networked PC to track the process part movement between operations, log in at the start of the shift or check emails throughout the day.
This is the place where new life can be added to existing custom gage solutions!
The first step is to keep the proven gage but update the old electronics or air/electric bench amplifiers to new, small interface modules compatible with a USB interface to a PC. These modules are flexible in configuration and available for many types of transducer/sensor signals. There are also modules that allow for input/output signals to control semi-automatic or fully automated gage operation.
A software solution is used on the workstation’s PC to connect all the gaging probes/inputs to create a virtual replacement for the now obsolete standalone bench amplifier. The gaging software allows for all basic gaging operations that one would have seen on the amplifier, such as displaying the measured value, part classification, actual part size readout, dynamic capabilities and more.
In addition to the standalone features of a bench amplifier, the gaging software can provide more signal sharing capabilities including complex formulas using the input signals, making measurements in a guided sequence format and visually classifying the total part results for proper handling of the part.
Additionally, because it is software running on a PC, the results provide more features including the ability to create, store, and reuse part measuring routines; save and transfer data either locally on the PC or in a file anywhere the PC is networked; simulate simple PLC commands with control of measurement functions through I/O commands; and more.
PC-based gaging software has also become more powerful over the decades, enabling easier interfaces for setup and use and customized result displays, in virtually any gaging requirement. The software makes it possible to set up complex gaging routines in a matter of minutes, and it becomes economical to teach an existing custom gage to speak the language of productivity and networking.
As with most things in life though, one generic gaging software package may not be able to fulfill every customer need. It becomes straightforward to update the custom gage but there may be legacy data collection software in use that requires a special dialect of data transfer. Or the customer may have special requirements for obtaining data from non-gaging instruments. There may even be requirements for unique ways of creating and loading programs or documentation features.
This is where the customization of software enhances custom gaging. As noted, standard gages may not be able to perform the functions required for the application, so a custom gage is needed. The same is true with gaging software. Ninety percent or more of gaging software routines will meet customer needs but customization is sometimes required for total acceptance and integration into a specific environment. This can be accomplished with gaging software that allows users to write their own custom programming routines to format and place the data where it is needed.

Standard off the shelf gaging programs fill most applications. But should customized fields or operations be required, it's relatively easy to customize applications to legacy needs. Image Source: Mahr (Click on the image to enlarge.)
Getting The Right Data
In the modern data collection environment, just getting the measured value from the gage isn’t enough. Oftentimes, additional information needs to be collected and the system must make it easy to do this. Information such as the serial number or production date code from the part, identifier of the machine used to complete the last operation, operator name, etc. are all required to ensure the user knows which data sets a measurement belongs to. This information can be collected as simply as offering the operator the chance to input it at the computer while making the measurement, or as sophisticated as scanning data matrix codes on the parts, bar codes on documentation traveling with the parts, or the ID badge of the operator.
Furthermore, information documenting the unique identifier of the measurement device must be collected. This is required for traceability and documentation that the gage used was in calibration at the time, or in the future if something damages that gage, the parts that were measured with it can be determined as well as the potential risk to the quality of the data.
Finally, this data must be provided to the “brains” of the operation in a way that makes it useable. In simpler systems, this might involve simply making sure the format is right for SPC, but in true Industry 4.0 systems, the data associated with the measurement typically needs to go to a central repository such as an SQL or Access database or directly to an ERP system. Modern gaging software systems allow the programming and configuration of this to ensure the data gets to the right place, in the right format needed to drive business decisions, and is complete to allow maximum effectiveness in its use.

Powerful but easy to use gaging software provides an economical way to update older and obsolete dedicated gaging stations. Image Source: Mahr (Click on the image to enlarge.)
Conclusion
Custom gage solutions have been and will continue to be employed in the manufacturing environment. The custom gages that have been in place and successful for years may not need to be replaced but rather have new life breathed into them. Utilizing today’s modular gaging systems with PC-based gaging software is a very economical way to replace and update dedicated gaging stations that are obsolete and expensive.
The ability to have easily customizable gaging software that works within existing processes can make this task simpler. Gaging software does not have to be created specifically for existing applications. Using standard gaging software tools while having the ability to add simple user-generated custom routines can provide the same reliable measurements while speaking an organization’s Industry 4.0 language.
Looking for a reprint of this article?
From high-res PDFs to custom plaques, order your copy today!


