For those of us in the manufacturing world, measurements on products and processes are all important to ensure the products will meet customer requirements, perform correctly, safely, and for a reasonable lifespan. We place our faith in the measurements to accept or reject product—or to adjust the manufacturing process. But are the measurements correct—and how would we know?
When the pandemic hit, manufacturers were already behind in terms of embracing new forms of learning. Training people, recruiting new people, troubleshooting problems in training and education is a must for manufacturers and now is the time to do it.
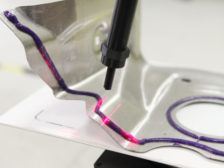
Manufacturing industries have been striving for years for a robust quality control solution which can reliably sort out bad parts of the dispensing process without causing much production downtime. What the industry craves is a robust 3D solution that provides a 360° view of the bead regardless of the dispensing direction.
Over the past 50 years, computer programming languages have made several significant advancements all focused on making a computer easier to use in a more human-readable format. If you wanted to learn programming in the early days you would have had to learn Assembly Language, a set of binary machine operation codes that instructed the microprocessor how to perform each step.
In my last column I listed some basic equipment requirements for the calibration of thread plug gages so I thought it would be helpful to give mating gages the same treatment.
Digitalization has changed our world as the internet and modern technology continue to shape the manufacturing industry. For example, the vision of Industry 4.0 shows that production systems and machines are required to be flexible and adapt with continuously changing manufactured products. That means production will be more individualized, flexible, and faster.
The role of metrology is shifting. This is especially true in modern industrial settings and for increasingly exacting applications. Once perceived as a necessary evil residing in the quality control department validating the integrity of finished parts and components, today metrology is viewed more as an enabling technology that truly adds value.
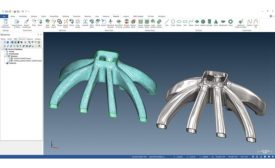
Before we can talk about reverse engineering as an application, it is important to understand how and why it has emerged as a critical metrology tool for manufacturers, and how it fits in the rapidly evolving digital workflow. Just a few years ago, the term ‘reverse engineering’ was associated more with industrial espionage, stealing designs, or product features from competitors. What has changed?
Even in a normal year, achieving high levels of quality is no small feat; it's a daily challenge that requires buy-in from everyone. This year, as COVID-19 wreaked havoc on supply chains, worker safety and consumer demand, maintaining high levels of quality became a nearly superhuman feat.