In-Process Gaging: Past, Present, and Future
In the near future, most operations will be measured in-process and compensated automatically.

Laser scan micrometer measuring diameter immediately after finish grind operation.
Manufacturers typically use two different techniques to assess part conformance and process control: either in-process gaging or final inspection. In-process gaging is measuring the part while it is still in the process of being manufactured and using that data to, sometimes, adjust the process, other times for part conformance. Final inspection, on the other hand, requires measuring a finished part after all of the manufacturing processes have been completed. The part is taken to an inspection station, or quality control lab, and measured on a variety of equipment, from calipers to coordinate measuring machines. The accuracy, repeatability and speed of inspection has improved over the years, but final inspection still has a few drawbacks.
One problem with only measuring finished parts is that the determination of conformance of the parts between the machine and the lab is unknown. Some manufacturers continue to add cost to the parts not knowing if the already performed operations were within specification. Others have the machine operators measure the parts within the overall process to ensure that they are in conformance before adding additional manufacturing cost, however, this data is rarely collected, or analyzed.
Multiple machining operations further compound the problem. If a defect is produced in the first operation, it can cause more problems down the line. It is wasteful to add machining cost to parts that are already scrap. It’s best to remove the defective part from the process before any more manufacturing cost is invested.
Gaging, final inspection, process control and statistical process control has been evolving. New techniques are being developed and utilized to gain benefits such as decreased time, overhead and overall cost. The way things have been done in the past have been improved upon and will continue to evolve and further improve. Below are ways that have been and are still being used, improved ways being used now, and an outlook of how they may evolve in the future.

Operator measuring pistons for outside diameter using a snap gage.
The Past
With manual machine tools, machining repeatability was directly determined by the skills of the machinist. The more experience, skill, patience and sometimes luck the operator had related to the consistency of the parts produced. Most machinists would inspect the parts multiple times as they were being processed. “Cut, measure, adjust, repeat” was the method.
With the introduction of more repeatable machining methods such as CNC machine tools, the skill of the operator no longer influences the part quality as much. Engineers or machinists would set up the machine, run a few pieces to make sure the parts were in tolerance or within a control limit, and release the process to an operator. The operator would load the rough parts and unload the finished parts.
However, many other variables such as casting variation, tool wear, and ambient temperature changes, just to name a few, still existed. Operators would check parts on some frequency, usually determined by process capability, to ensure the parts were in conformance. This manual in-process gaging would determine the adjustment, or offsets, that needed to be made to ensure the quality of the part.
Manual In-Line Gaging and Compensation Example
Jeremy P Banks: “One of my first jobs was making caliper pistons. The outside diameter of the piston was machined by a thirty year old centerless grinder. Blanks were fed into the grinder after a lathe operation. Dingy forged pistons went in one end and shiny ground pistons came out the other. My job was to check every fifth piston for diameter using a snap gage as I loaded them onto racks.
When the diameter reached the upper end of the tolerance, I would press the ‘comp’ button on the grinder. Inside the grinder, the grinding wheel would move forward to compensate for wear. This would usually result in a reduction in diameter of five microns. Simple enough.

Robot loading finished parts onto in-line coordinate measuring machine.
But not everyone used the ‘comp’ button the same. Some operators would try to keep the diameter near nominal, and press the ‘comp’ button frequently. Others would run the diameter on the low side in case they were too busy to check every fifth part. Others would let the diameter climb to almost oversized and then hit the button repeatedly until the diameter was almost undersized.
Part conformance to the tolerance was the only concern. Process capability and part consistency was someone else’s job.”
In those cases, the operator would make the decision when, and by how much, to adjust the process. But different operators can greatly influence the adjustments and thereby the capability of the process. This inconsistency can affect other machining operations or cause assembly concerns.
The Present
Modern in-process gaging not only uses more sophisticated measurement equipment, it also reduces operator influence by using software to control the adjustment frequency and amount. Modern, inline metrology equipment has features and functions to facilitate this.
Laser scan micrometers with part detection and automatic run execution can detect and measure the part and then send the data directly to a PLC. The PLC (or other device) monitors the measured diameter and makes adjustment when a limit is reached. (The limit having been set by an engineer and derived from statistical process control methods.)
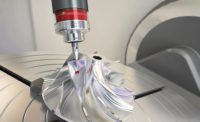
Machining centers with in-machining probing can measure a part while still fixtured in the machining center. The data can be used to check the part for conformance and remove additional material if needed.
Of course, in-process inspection with hand tools such as calipers and micrometers is still very common. Modern gages can send this measurement data directly to the PLC or to compensation software through cables or wireless technology.
For a modern implementation of in-process gaging, the following components are required: First, a machine tool with PLC control that allows offsets to be made (or equivalent). Second, a gage or piece of metrology equipment that has the required accuracy and repeatability for the tolerance. The gage must also have the ability to output the measured results. Third, a software that can import the measured data, determine when an adjustment is needed and send the offset to back to the PLC.
Automation – Part loading/unloading, compensation and SPC collection example
Mike Kessler: “In this application parts are made on multiple machine tools. After completion on the operation, a robot removes the finished part from the machine and places it on an in-line coordinate measuring machine outfitted with a contact probe. The CMM measures features like internal and external diameters, a step height and concentricity of an inner diameter to a datum. The data is then saved for importation with a statistical process control (SPC) software application and auto compensation application.
On a separate computer the data is collected and imported with an auto compensation application. The application computes a five-part moving average on some of the measured features. If the moving average surpasses a set allowance an offset is automatically calculated and a tooling offset is automatically sent to the machine to ‘auto compensate’ the machine.
Separately from the auto compensation an SPC application automatically imports the data, saves it for long-term use and calculates the statistics on the process. This helps the customer ensure their Cpk and Ppk requirements are being met.”
Some applications can be all in one, such as a machine tool with in machine probing. Other applications will need components from several suppliers and may require a contractor to put it all together. Whichever route taken, thorough testing and trials should be done to ensure the new process produces a consistent, conforming part.
The Future
As with any technology, the cost of the components will drop, and the implementation will become simpler. This will enable greater use of in-process gaging across all industries, not just high volume applications.
But, the real future of in-process gaging is tied to the adoption of intelligent manufacturing technology. Using the Industrial Internet of Things, process information will be collected from almost every operation. Uptime, feed rate, spindle RPM and every other piece of information collected will be uploaded to a central location through XML based data strings. A virtual factory would be modeled after this data to represent the actual process.
Software using artificial intelligence will monitor this virtual factory and test various adjustment methods to determine the best corrections. These corrections will be pushed back down to the machine tools automatically. The results will be collected and compared back to the virtual models. Unexpected results will be analyzed and new data applied to the virtual model.
Eventually, a robust virtual model will exist so that adjustments can be made quickly and accurately to complex, multi-operation processes. Less defects will be produced along with faster changeover and reduced scrap and rework.
Many pieces of this system are already gaining traction in the industry. More and more machine tools are supplying process data to intranets and monitoring software are displaying and improving machine uptime and usage. Metrology equipment and software are being adapted to work with this same infrastructure so that data can be collected quickly and easily. Technical colleges are teaching our future machinists and engineers about this technology and the potential gains to be had.
Advancements in practical AI application are announced every day. Very soon commercial products will be on the market that can allow manufacturers to reap the benefits of the data that is being collected. Through big data sharing, every company can benefit from the trials and struggles of others so that an entire industry can advance together with their competitors instead of struggling against each other. This will result in lower costs for the consumers and higher profitability for the manufacturers.
In the near future, most operations will be measured in-process and compensated automatically. We are at a very exciting time in manufacturing. This next revolution in industrial technology has already begun. In-process gaging is integral to this next step—the goal of intelligent manufacturing. Q
Looking for a reprint of this article?
From high-res PDFs to custom plaques, order your copy today!


